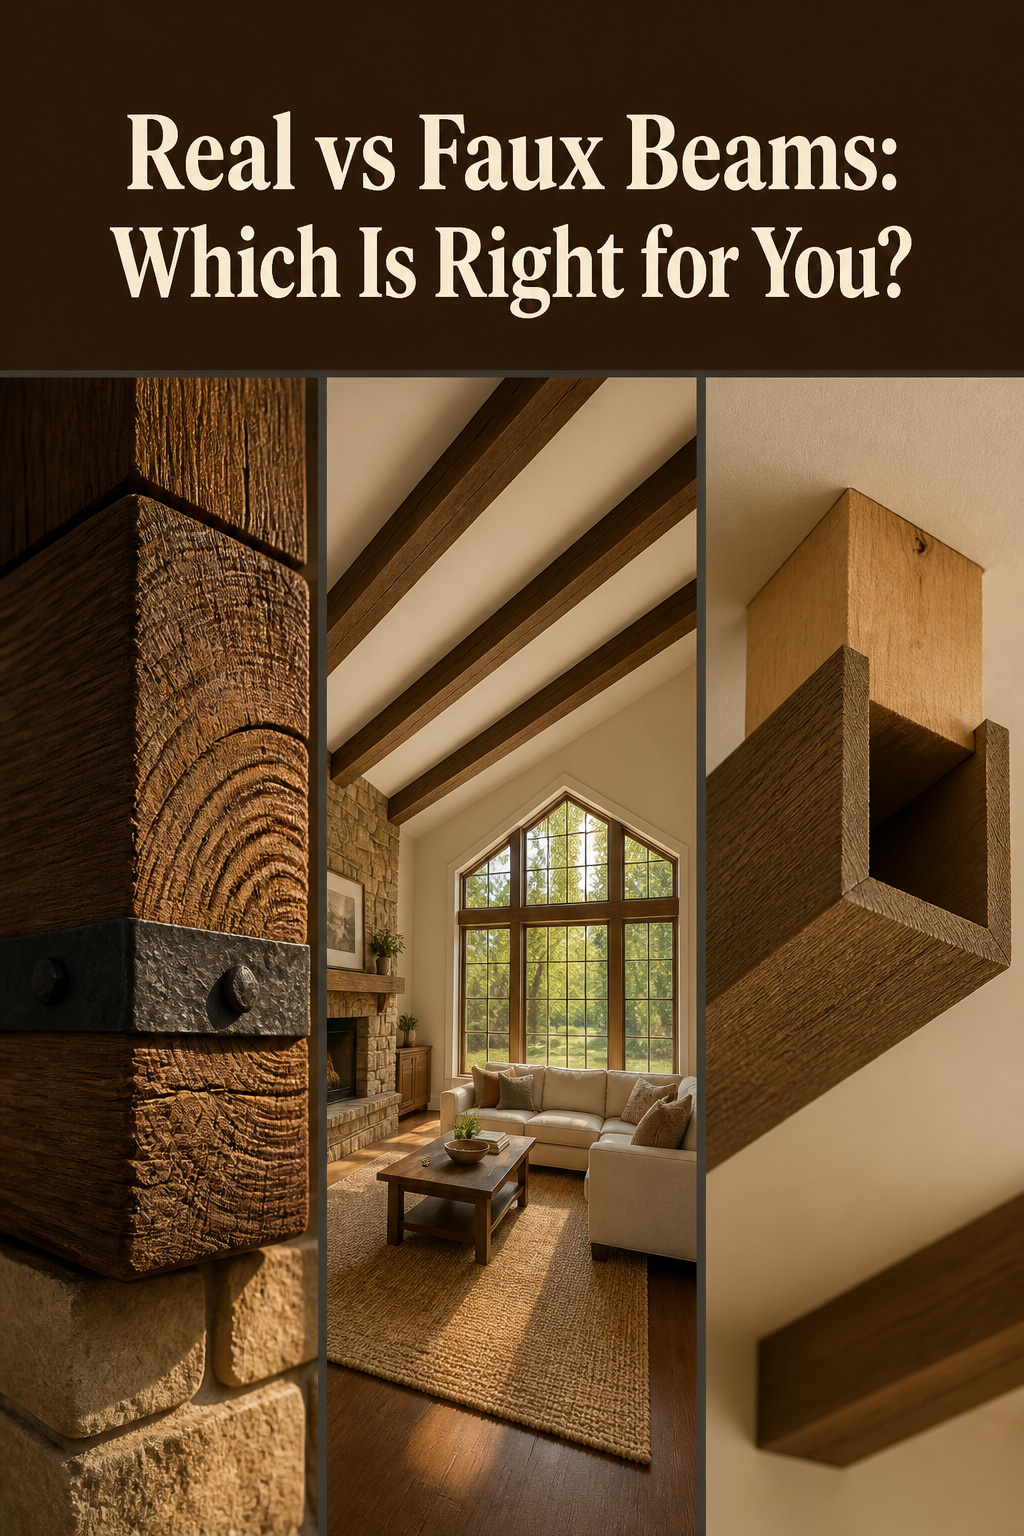
A beam crossing a ceiling is one of the oldest honest gestures in building. The hammerbeam roofs of English great halls put their structure on display rather than hiding it, and when the Arts and Crafts builders reached for exposed timber in their bungalows, they were reclaiming that same idea — that the way a roof holds itself up is worth looking at. That lineage is exactly why exposed beam ceiling ideas still land in a modern vaulted living room: the eye reads timber overhead as structure doing its job, even when the beam is decorative. Get the species, the size, and the mounting right, and a flat sweep of plaster becomes a room with bones.
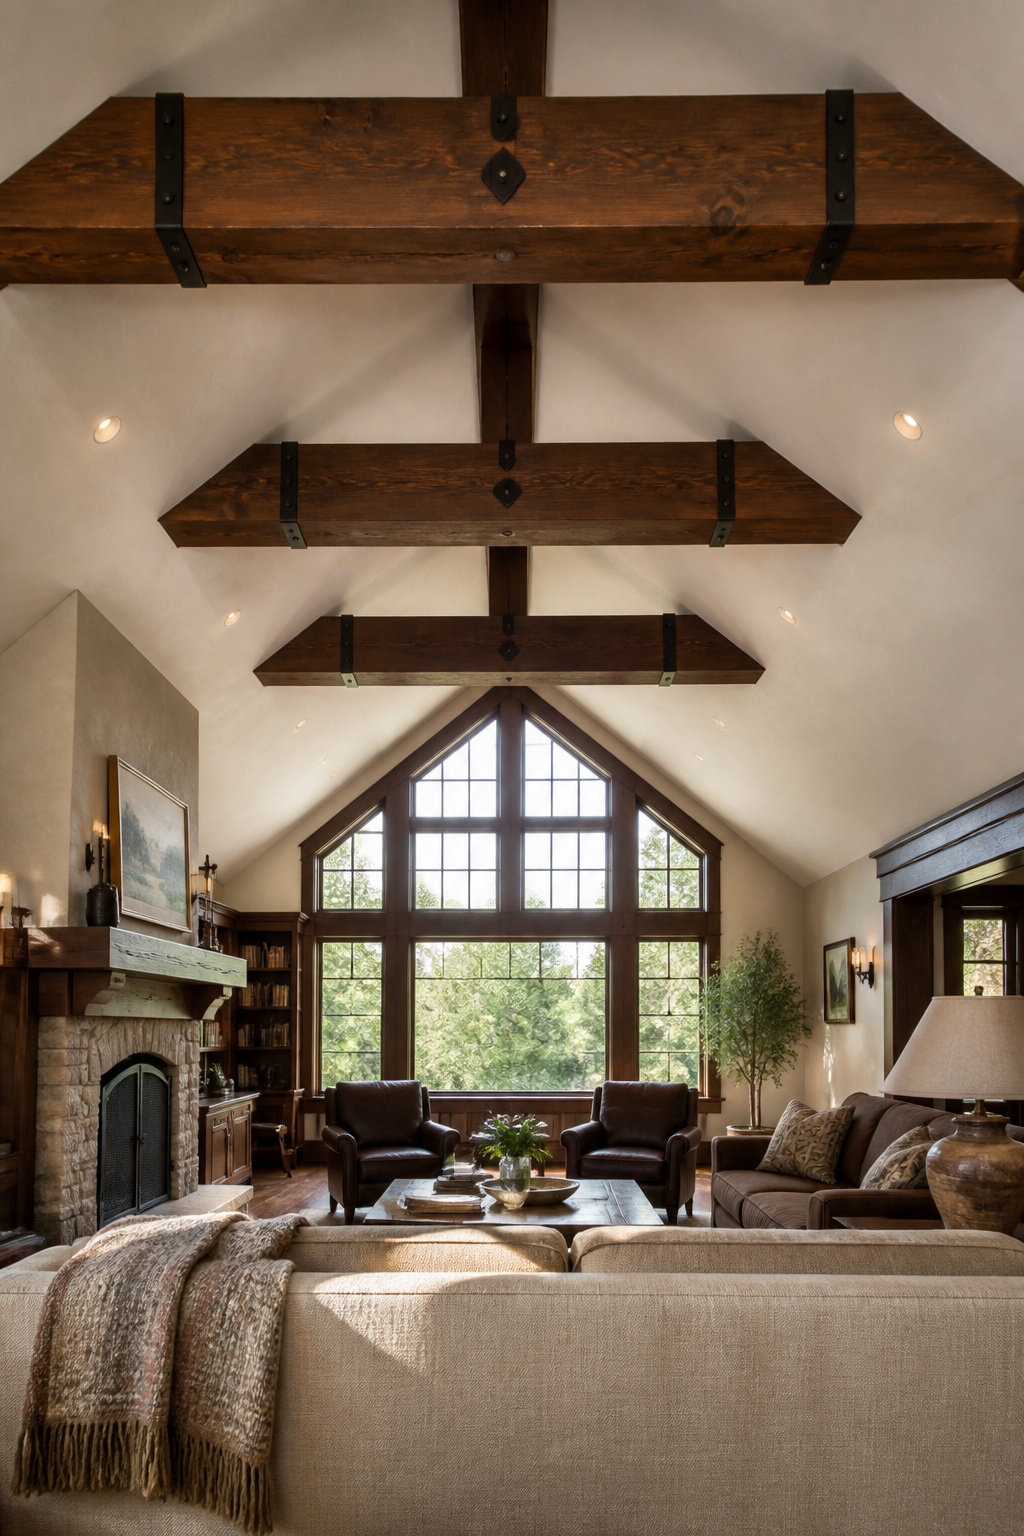
TL;DR
- Real timber beams (Douglas fir, oak, pine) weigh 10–40 lbs per linear foot and need fastening into framing; faux polyurethane runs 1–3 lbs and a confident DIYer can mount it with a stud finder and drill.
- For a vaulted room, beam depth in inches should roughly match the ceiling peak height in feet — a 12-foot peak wants a 10–12 inch deep beam — and depth should always exceed width so it reads as structure, not trim.
- Faux beams convince at 10 feet of clearance and above, hide wiring in the hollow channel, and remove cleanly later; real timber wins on close-up grain and the ability to re-stain.
What Exposed Beams Actually Do to a Vaulted Ceiling
Before choosing a material, it helps to know what the beam is for. A vaulted ceiling gives you volume, but unbroken volume has nowhere for the eye to rest — it pulls the gaze straight up to the peak and leaves the middle of the room feeling empty. A beam solves two problems at once.
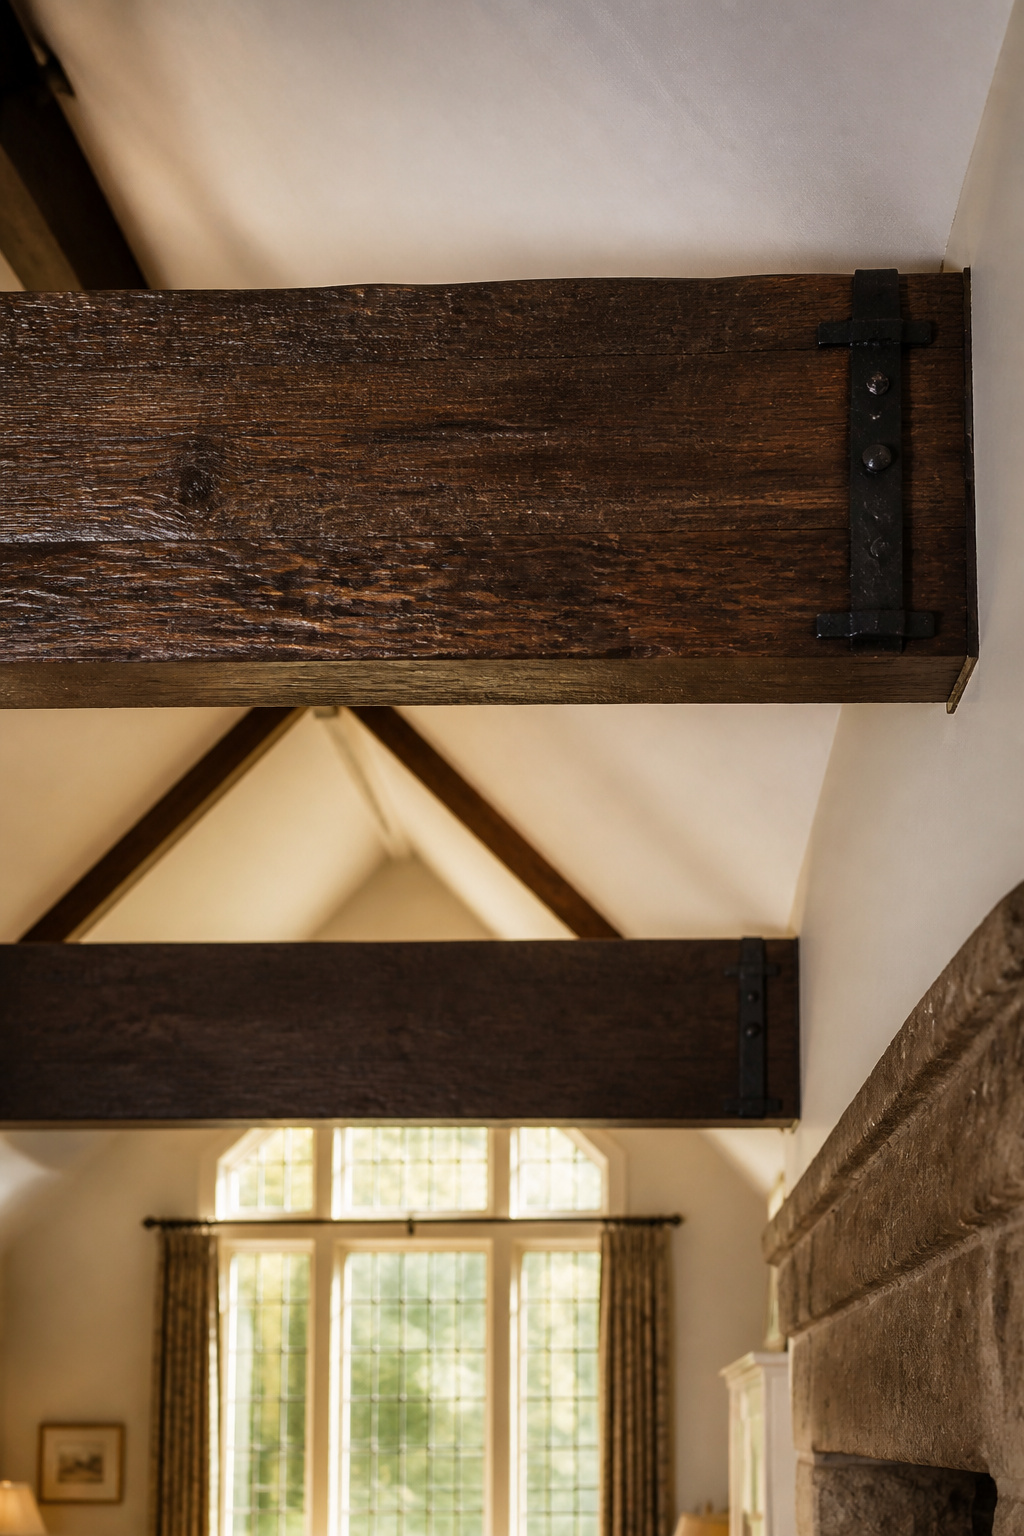
Breaking up height: how horizontal beams lower perceived scale
Run beams perpendicular to the ridge and they divide the ceiling into distinct bays. Those horizontal lines give the eye reference points and pull the gaze across the room rather than up into the apex — the same trick a wainscot rail plays on a tall wall. Dark-stained beams do this most firmly, sitting as visual weight at ceiling height and drawing attention into the middle zone instead of past it. Spacing matters here: a vault rewards wider gaps, roughly 5 to 8 feet on centre, where the 3 to 4 feet that suits a flat ceiling would feel crowded under all that height.
Warmth as a material property: why timber reads differently from paint
You cannot paint your way to what timber does. Wood grain — the tight rings of old-growth Douglas fir or the broader swirl of pine — carries a biological texture that plaster and drywall simply lack, and at ceiling height that texture softens both the acoustics and the visual hardness of a large room. The warmth is partly literal, since wood holds heat where metal sheds it, and partly chromatic: the amber-to-brown range reads as inhabited rather than institutional. As the team at ASI Architectural put it, beams cultivate warmth by giving a vaulted ceiling visual weight and grain that paint alone never delivers.
The historical precedents — and why they still work
Exposed beams began as necessity. Medieval halls, castles, and churches needed timber to span a roof, and the hammerbeam was structural mastery shown off rather than concealed. By the Renaissance, wealthier patrons moved to coffered and painted ceilings, so beams settled into vernacular and rural building — which is why they still read as honest and handcrafted rather than formal. The Arts and Crafts movement later chose them deliberately, a rejection of Victorian excess in favour of visible joinery. That continuity, from old timber-framed halls through Craftsman bungalows to today’s farmhouse vocabulary, is the practical reason beams never look like a fad. For the wider picture of how beams sit alongside lighting, paint, and furniture, the complete vaulted ceiling living room guide maps the whole room.
Real Timber Beams: Species, Grade, and What to Expect
If you want the real thing, the decision starts with species and grade — and the grain you choose to live with is the part no finish can fake later.
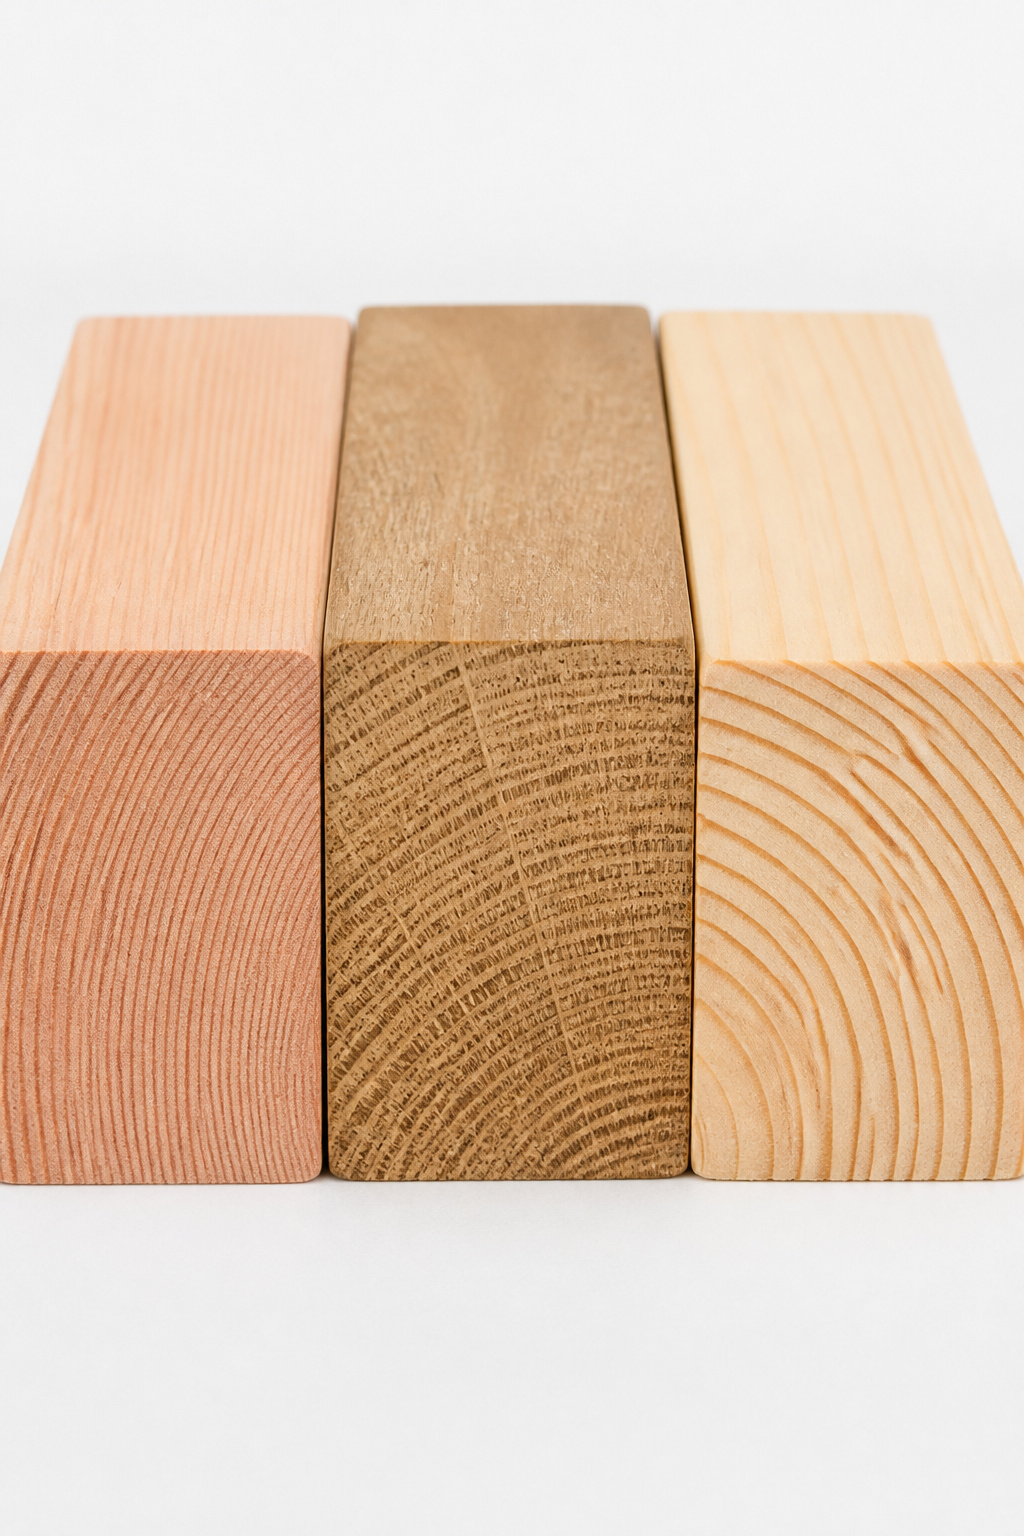
Douglas fir, oak, pine: grain and structure compared
Each species brings a different character to a ceiling. Douglas fir is the workhorse; white oak is the showpiece that moves more; pine is the budget option that demands care at the finishing stage.
| Species | Grain character | Structural note | Watch for |
|---|---|---|---|
| Douglas fir | Straight to slightly wavy, rosy tint, tight knots | Highest stiffness of N. American softwoods (855 MPa); deflects visibly before failing | Few drawbacks for ceiling use |
| White oak | Broad figure, pronounced ray fleck, hard | Stronger but more brittle; better for shorter decorative spans | Less stable in humidity, checks and moves at joints |
| Pine | Wide, open, pale rings | Weakest for spanning; not for long runs | Absorbs stain blotchily without pre-conditioning |
Douglas fir’s ductile failure — it sags before it gives — is the property engineers value most, because oak’s brittleness offers no such warning. If a beam is decorative rather than load-bearing, note that any species can be built as a hollow box: three boards mitred into a U-shape, using far less timber while presenting the same face.
Old-growth vs new-growth: why the grain matters beyond aesthetics
This is where I’ll commit to a position. Old-growth timber, grown slowly in forest competition, carries 20 or more rings per inch; fast-grown farm stock harvested in a decade or two may show only 3 to 5. That tight ring density isn’t sentiment — it means a higher proportion of dense late-wood, which gives old-growth its anti-rot, anti-warp, and anti-split behaviour. A reclaimed barn beam has already weathered decades of humidity cycling, so it arrives air-dried and stable and won’t cup or check in a heated living room the way green stock will. Per Jackson and Sands Engineering, those properties come from late-wood density and cannot be added back with any product after the fact.
Structural vs decorative: what an engineer needs to know
Be clear which you are buying. A structural beam transfers roof load into walls and foundation; on a vault without a proper ridge beam or collar ties, rafters can push the walls outward, and that failure shows first as hairline cracks at the wall-ceiling junction. Beams added purely for looks are decorative, and the beams themselves need no engineering review — but the fastening into existing framing must still be adequate. Even decorative solid wood is heavy: 10 to 40 lbs per linear foot, so a 12-foot Douglas fir 6×8 runs roughly 130 lbs. Confirm with a contractor that your framing can carry it before any timber is ordered.
Faux Polyurethane Beams: When the DIY Path Makes Sense
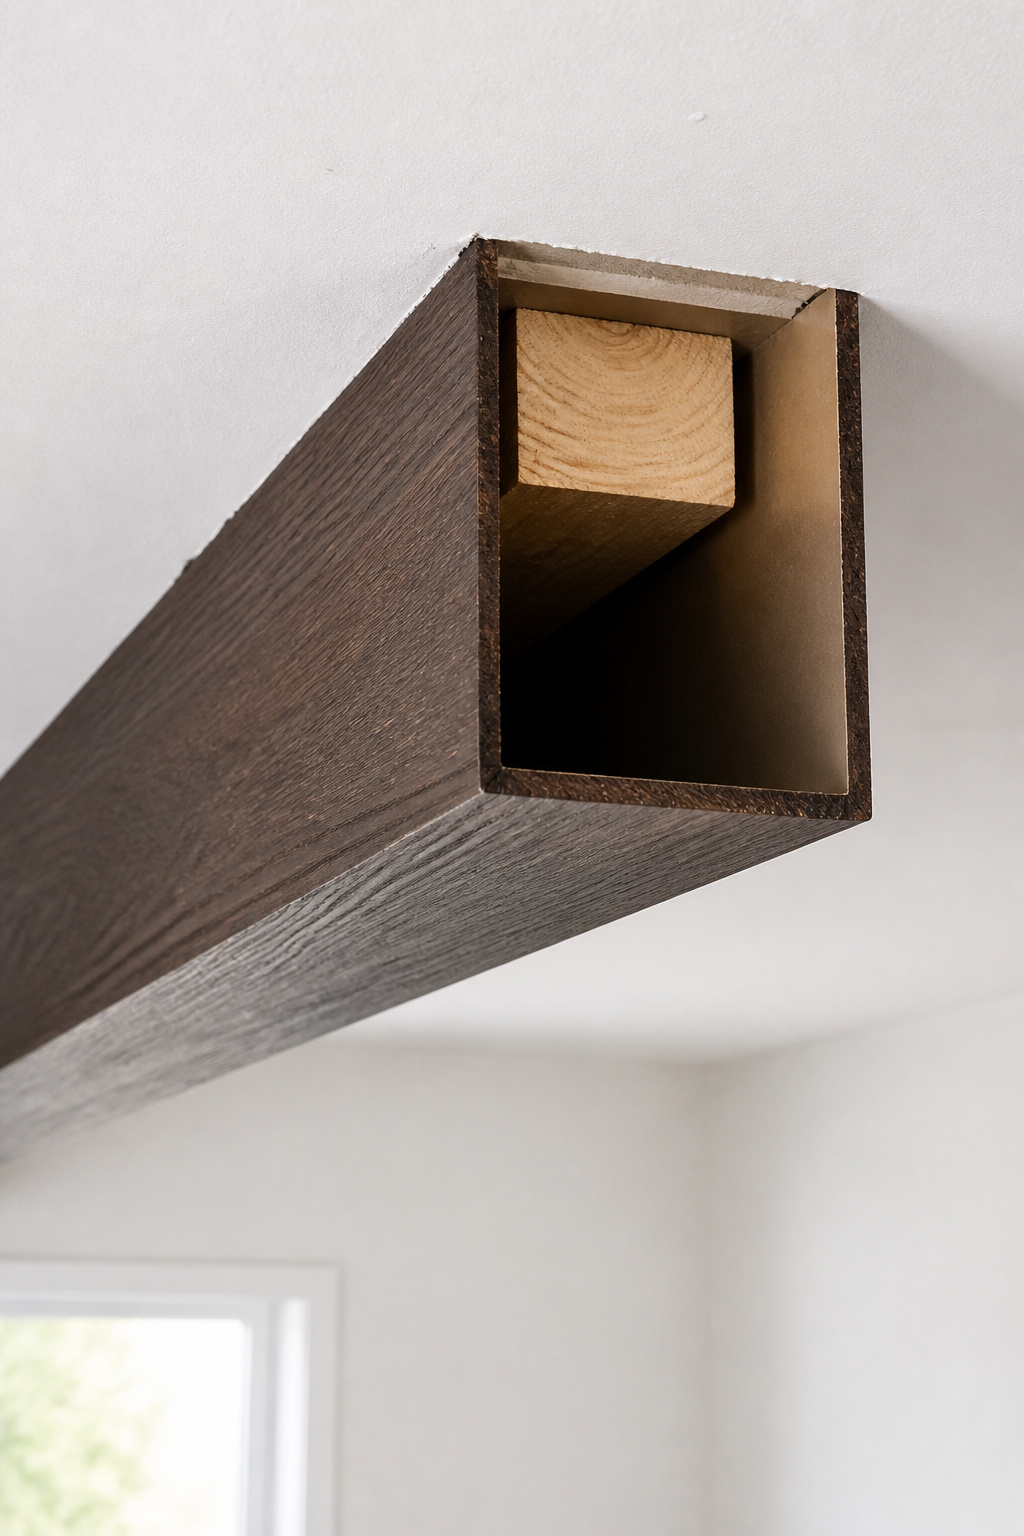
There is no shame in faux, and the reversibility argument is the honest one in its favour. Today’s high-density polyurethane beams are cast from moulds taken off real reclaimed timber, so they carry that original beam’s axe marks, knot holes, and raised grain.
What polyurethane beams are and how they convince
The casting technique is the same one used for architectural millwork reproduction, which is why the surface reads as genuine. The beams are three-sided — a U-profile that slides over a mounting block — and that hollow centre is useful: it routes electrical cable, speaker wire, or small ductwork out of sight. Because polyurethane doesn’t expand, contract, warp, or check as the seasons cycle, it suits a room with fluctuating heat — say, one with an open fire or a wall of south-facing glass — better than solid timber does.
Weight, installation, and the tools a DIYer needs
The weight difference is the headline. Faux runs 1 to 3 lbs per linear foot against 12 to 15 for solid oak, so a 20-foot beam comes in under 40 lbs and two people can lift it without scaffolding. The kit is ordinary: a stud finder, a drill, 2×6 blocking, construction adhesive, and finish screws — no specialist timber tools. Faux beams cut to length with a standard wood saw, mitre at the walls, and butt together for long runs, and a decorative iron strap laid over the joint hides the seam while adding period detail.
Where faux beams fall short
Honesty cuts both ways. Below about 10 feet of clearance, a faux beam’s hollow edges and uniform grain can read as artificial — the effect needs height and distance to work. The colour is fixed at manufacture, so you cannot strip and re-stain it the way you can timber; order physical samples, because a monitor will not show the true tone. Expect roughly 25 years before UV shift may call for repainting, and note that faux can be repainted but never re-stained to a different colour. On resale, beams add appeal, but a buyer who finds polyurethane where they expected timber may value the feature less — so transparency in a listing is the fair course.
Exposed Beam Ceiling Ideas: Sizing for a Vaulted Living Room
Sizing is where most projects go wrong, and almost always in the same direction — too small. A beam that looked enormous in the yard shrinks once it’s overhead.
The 8–12 inch rule and why oversized beams oppress low vaults
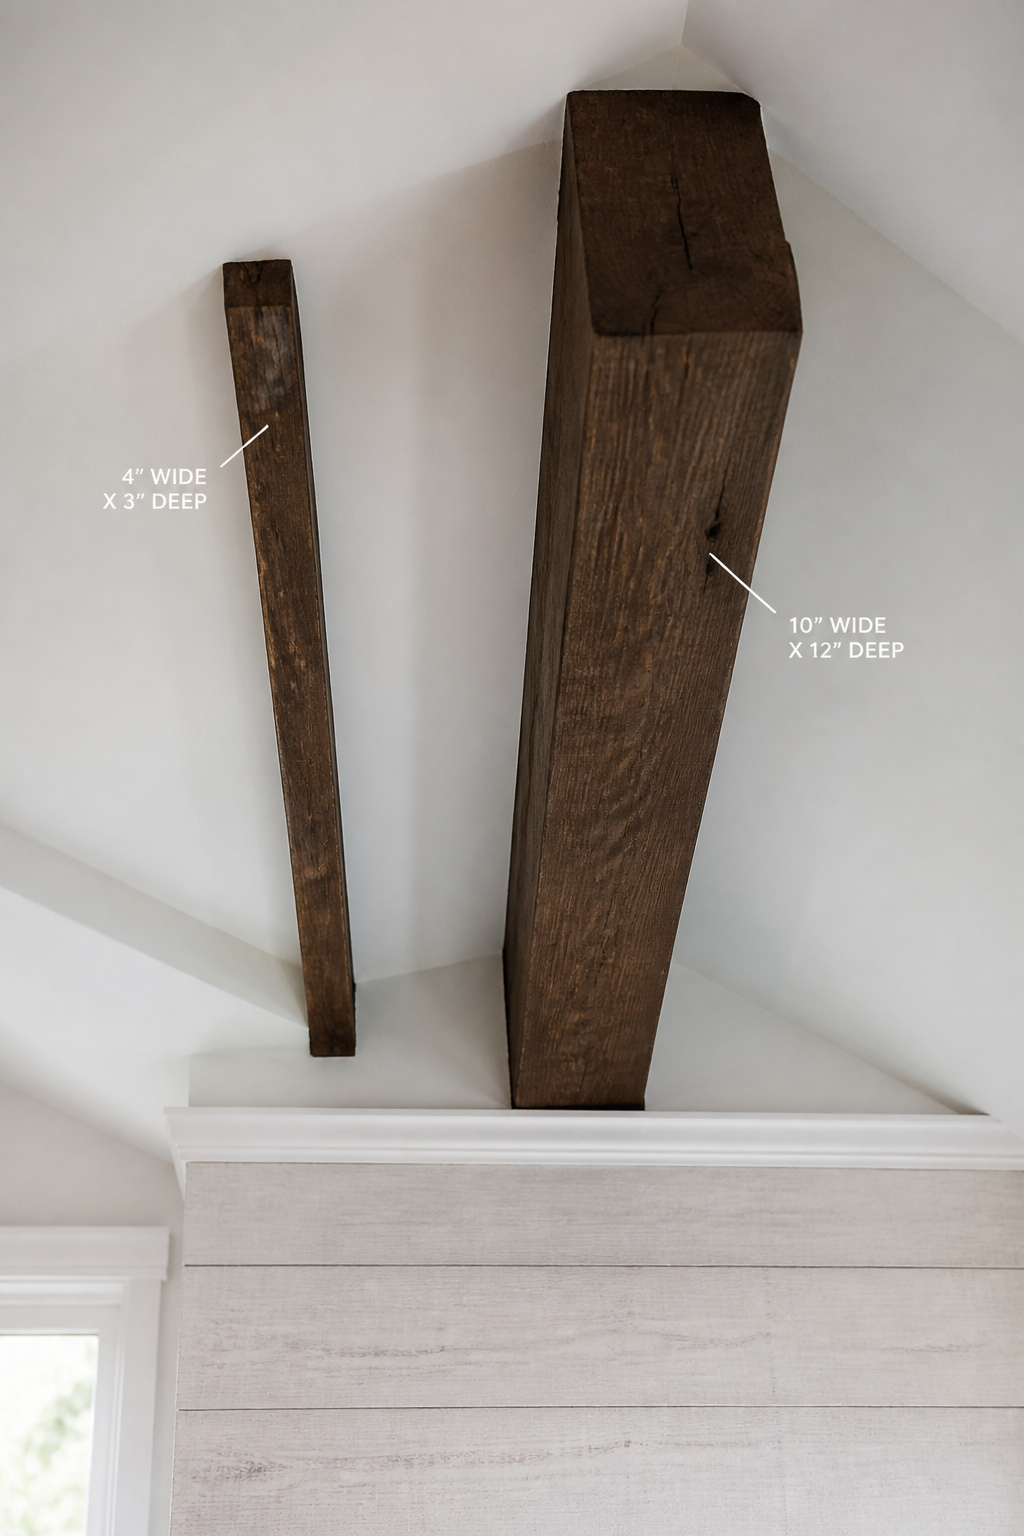
Medium beams of 8 to 12 inches wide suit most living rooms: wide enough to register at height, not so dominant they compress the room below. For a vault specifically, let the depth — the vertical dimension — track the peak. The chart below is the quick reference.
| Ceiling peak height | Recommended beam depth | Spacing (on centre) |
|---|---|---|
| Under 10 ft (low vault) | 8 in max | 3–4 ft |
| 12 ft | 10–12 in | 5–6 ft |
| 16 ft | 14–16 in | 5–8 ft |
On a low-clearance vault, treat the 8-inch end as the ceiling, not the floor — a deeper beam there compresses the space and undoes the vault’s whole advantage.
Spacing: how far apart beams should run
The common decorative spacing is 4 feet on centre for standard rooms, but a vault reads better at 5 to 8 feet, which keeps the ceiling a rhythmic accent rather than a grid. Match spacing to beam size: 3 to 4 feet for 6 to 8 inch beams, 4 to 6 feet for 10 to 12 inch beams. Even gaps — wall to first beam, between beams, last beam to wall — suit period and formal rooms; a slightly wider central bay reads more modern.
Depth-to-width proportion: the workshop habit
Here is the rule I check on every drawing: depth must exceed width, or the beam reads as a plank rather than a structural member. A beam 7 inches wide should be at least 8 inches deep. It matters most with faux, where some budget ranges invert the ratio and look wrong once up — verify the profile before ordering. And commit to a size that looks oversized on the floor, because ceiling height cuts apparent scale by 30 to 40 percent. As Barron Designs flatly notes, beams always look enormous in the yard and right in the room.
Finish, Tone, and Coordinating Beams With Paint and Walls
Finish is a decision you make against the room, not in isolation — and the sequence matters as much as the colour.
Dark-stained vs light-washed vs painted
Each tone does something different to perceived height. Dark beams against a cream ceiling create maximum contrast, making the horizontal line prominent and the room more formal. A light or whitewashed beam lowers that contrast and keeps a vault airy — the quieter, Nordic-leaning choice. Painting beams the same white as the ceiling gives visual quiet, reading the plane as textured rather than beamed, which works when the room’s other elements are already strong. Dark beams over dark walls can feel enveloping and intimate, but only with pale upholstery or a light rug below to keep the room from reading as a cave.
Straps, plates, and iron hardware
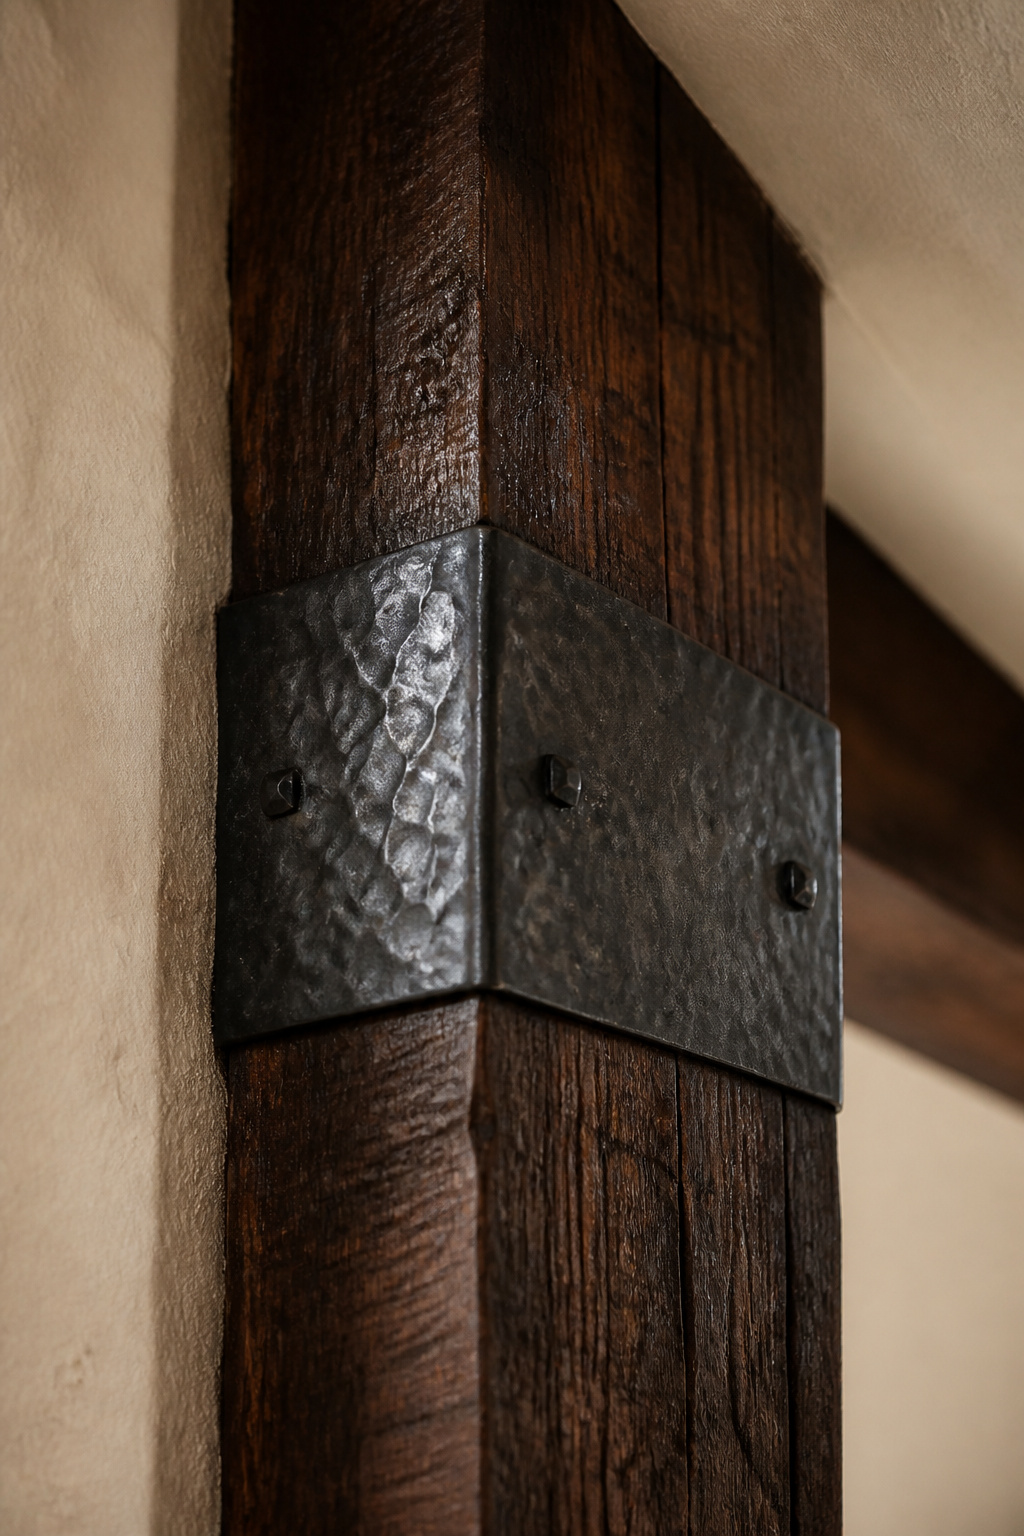
Hardware is what grades a beam project up from a woodworking one. Decorative iron straps are three-sided forms that wrap a beam at junctions and spans, echoing the forged straps that once held medieval and Craftsman joints — available in wrought iron, powder-coated steel, and flexible urethane. For faux beams, the urethane replicas are the practical pick: light, adhesive-fixed, and applied after the beam is up. They earn their place twice over, since a strap set over a butt joint turns the one seam that might give a faux beam away into a deliberate detail. Match the finish to the room’s other metals — door handles, fixture bodies, switch plates — so the hardware joins the conversation instead of breaking it.
Matching beam tone to wall and ceiling colour
The professional order is to fix the beam species and finish first, as the least flexible element, then choose paint to coordinate — not the reverse. On a vault, the beam-to-ceiling relationship matters more than beam-to-wall, because both sit in the same visual plane; a beam fighting the ceiling colour reads as a mistake rather than a choice. One observation from practice: warm-toned timber wants a warm white or cream overhead. Set amber Douglas fir against a cool, blue-leaning white and the contrast tends to throw the timber orange under lamplight, which is rarely what anyone intended. The same logic runs the other way too, which is why coordinating paint with wood tones is worth settling before you stain a single beam.
Installing Ceiling Beams: What Professionals Know That Most Guides Skip
The real and faux paths diverge most at installation — but they share one failure mode, and it’s the one DIY guides skip. Here is the sequence that avoids it.
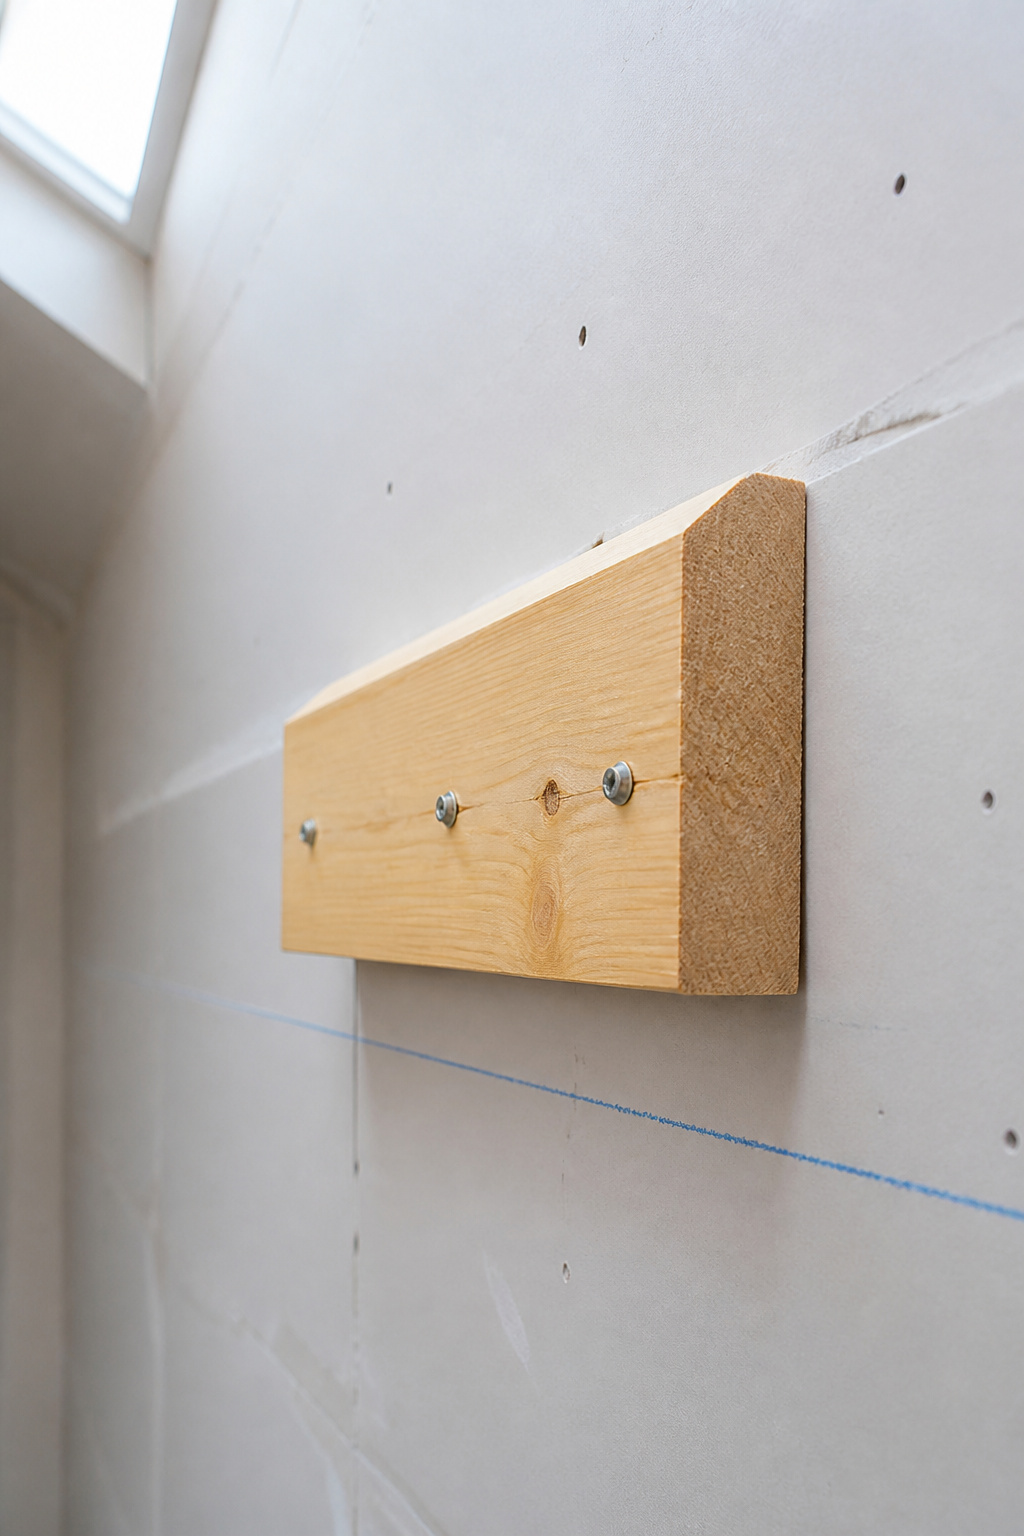
- Find the framing first. On a vault, rafters run with the slope, not across it, so scan along the slope direction with a stud finder in deep mode. Rafters sit 16 or 24 inches on centre; plan blocking to land on at least every other one for a 32-inch maximum interval, or screws will work loose over time.
- Chalk a centre line and measure out symmetrically. Vaulted rooms are rarely perfectly square, so measuring from one wall alone tends to give unequal bays. Mark beam positions out from the centre line in both directions.
- For real beams, set a bevelled ledger. Solid timber must fasten into rafters or blocking, never drywall alone — typically a 3/8-inch lag bolt into each rafter at 24-inch intervals, with a ledger strip carrying the weight between fasteners. Bevel the ledger’s top edge to the ceiling pitch so the beam sits flush; a square ledger on a slope leaves a gap at the top that no caulk hides.
- For faux beams, bevel the blocking. Fasten 2×6 blocks, at least 12 inches long, into rafters at 36-inch intervals with 3-inch screws, top edge bevelled to the pitch. Run a continuous bead of polyurethane construction adhesive on each block in addition to the screws — that’s what stops a faux beam rocking or creaking once it’s up.
- Cut the beam ends to the pitch, then dry-fit. This is the shared failure point. A square cut where the beam meets a sloping wall opens a crack that reads instantly as wrong; cut the ends to the ceiling angle and test the fit with the beam held in place before any final fastening.
Where a rafter doesn’t fall where you want a beam, blocking can be added between rafters — but that means opening the ceiling, a contractor’s job that can roughly double the install cost, so confirm beam positions against the framing before you finalise the layout.
So the verdict, plainly: choose real old-growth timber when the room is close enough to read grain and you want the option to re-stain down the years; choose faux when you want height, hidden wiring, a DIY weekend, and a clean removal later. Either way, let depth exceed width, let the beam look too big on the floor, and cut every end to the slope. A well-placed beam is also one of the surest ways of warming up a tall ceiling without touching the thermostat — the warmth is in the wood, and in getting these few things right.
FAQ
What size beams should I use for a vaulted living room ceiling?
For most vaulted living rooms, start with medium beams 8 to 12 inches wide. Match beam depth to the peak: a 12-foot peak suits a 10–12 inch deep beam, a 16-foot peak a 14–16 inch one. Keep depth greater than width, space beams 5 to 6 feet apart, and size up — height shrinks apparent scale by 30 to 40 percent.
Are faux wood ceiling beams worth it, or do they look cheap?
Quality polyurethane beams are cast from real reclaimed wood, capturing axe marks and grain, and at 10 feet or above they read as timber to most eyes. The tell is proportion, not material — an undersized beam gives itself away. They cannot be re-stained after manufacture, so order physical colour samples; monitor rendering is unreliable.
How do you attach ceiling beams to a vaulted or angled ceiling?
Locate rafters running along the slope, then fasten blocking (faux) or a ledger (real) into them, bevelling the top edge to the ceiling pitch so the beam sits flush. Faux U-channels slide over the blocks; real beams rest on the ledger with lag bolts. Crucially, cut beam ends to the pitch angle, not square, or a visible gap opens at the wall.