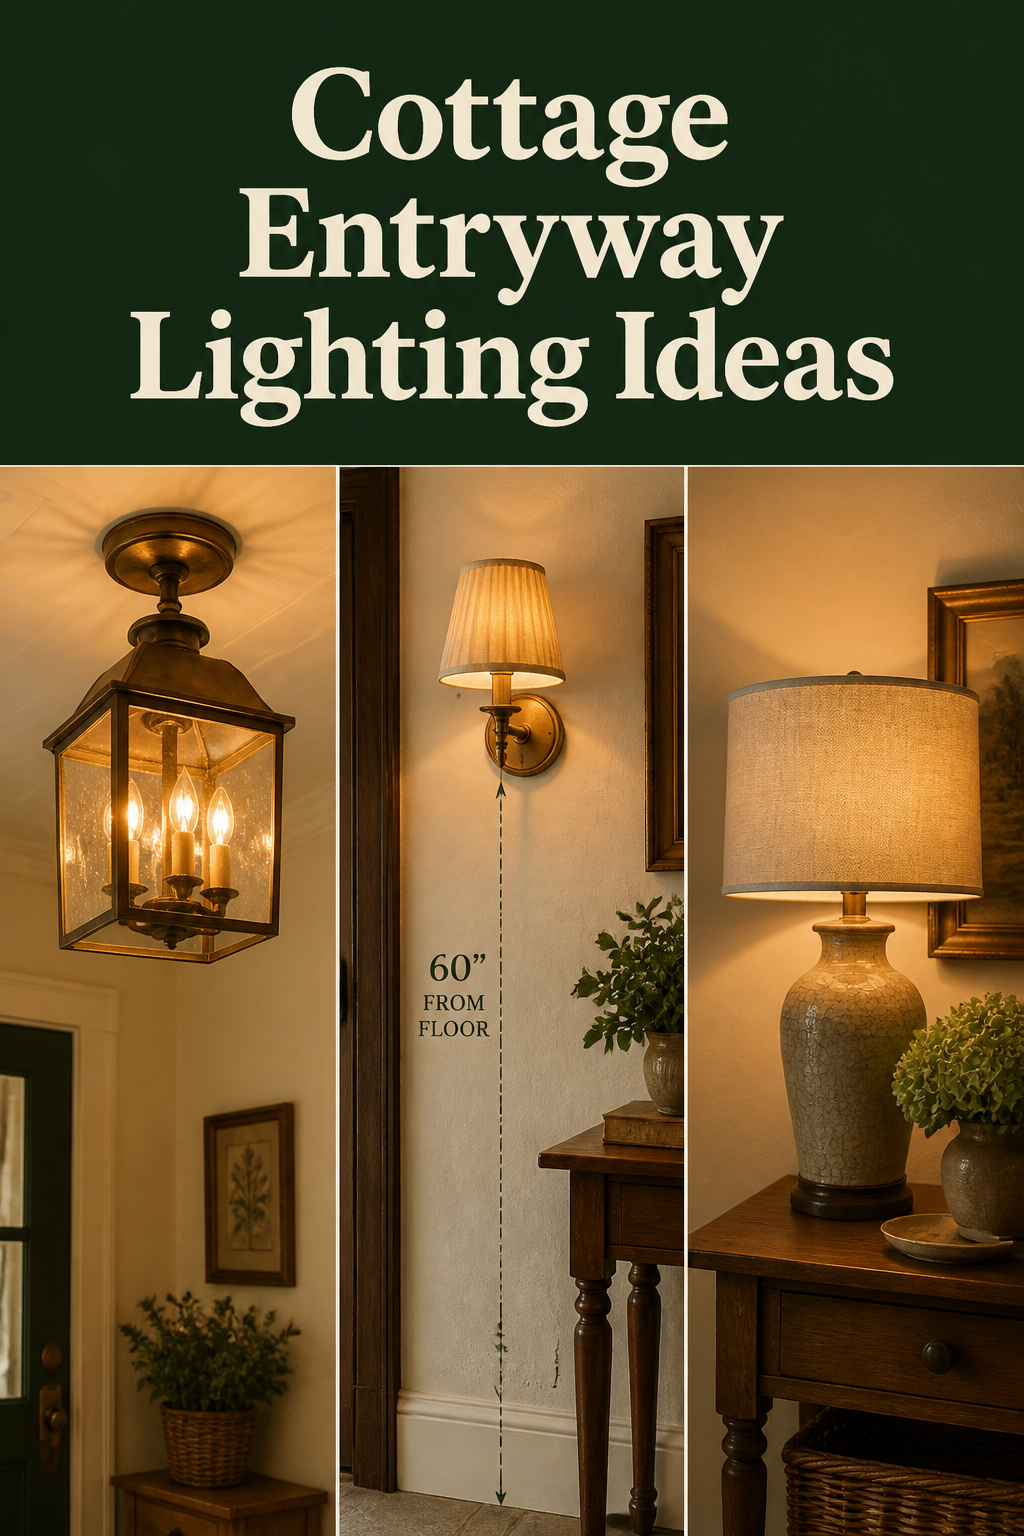
A threshold has to do two jobs in a single second: it has to receive you, and it has to reassure you that you are home. Most cottage entries fail at both for the same reason — one bright bulb in the ceiling rose, throwing flat white light straight down. It illuminates the space without welcoming anyone into it. The best cottage entryway lighting ideas start from that distinction, because the question an entry really asks is not “can I see?” but “does this feel like an arrival?” Get the second right and the first takes care of itself.
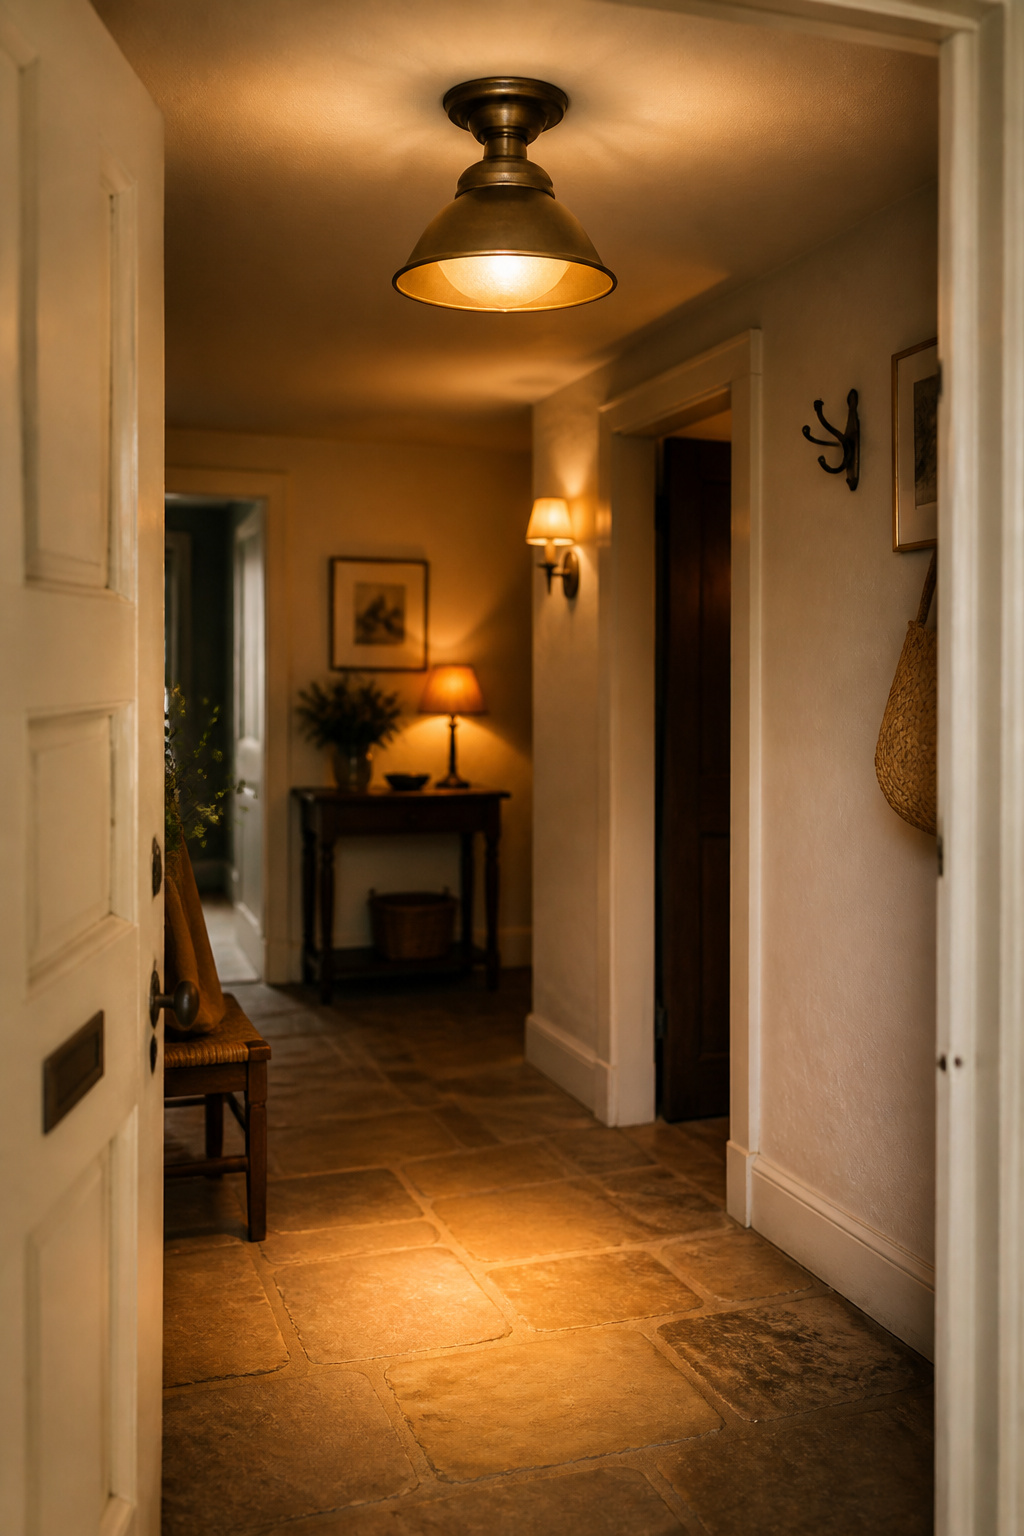
TL;DR
- Layer three sources at different heights — overhead semi-flush, wall sconce at 60 inches, and a console lamp at 24–32 inches — rather than relying on one ceiling fixture.
- Use 2700K warm-white dimmable LED bulbs throughout; anything above 3000K turns aged brass green and makes cream plaster look cold.
- On a standard 8-foot ceiling, keep the overhead fixture’s drop under 12 inches to hold 7 feet of clearance, and put each layer on its own switch.
The Principle That Changes Everything: Welcome Over Illumination
The single centre-ceiling fixture feels inadequate no matter what bulb you put in it, and the instinct is to blame the wattage. The real problem is older than electric light: a cottage entry was never meant to be evenly lit from above.
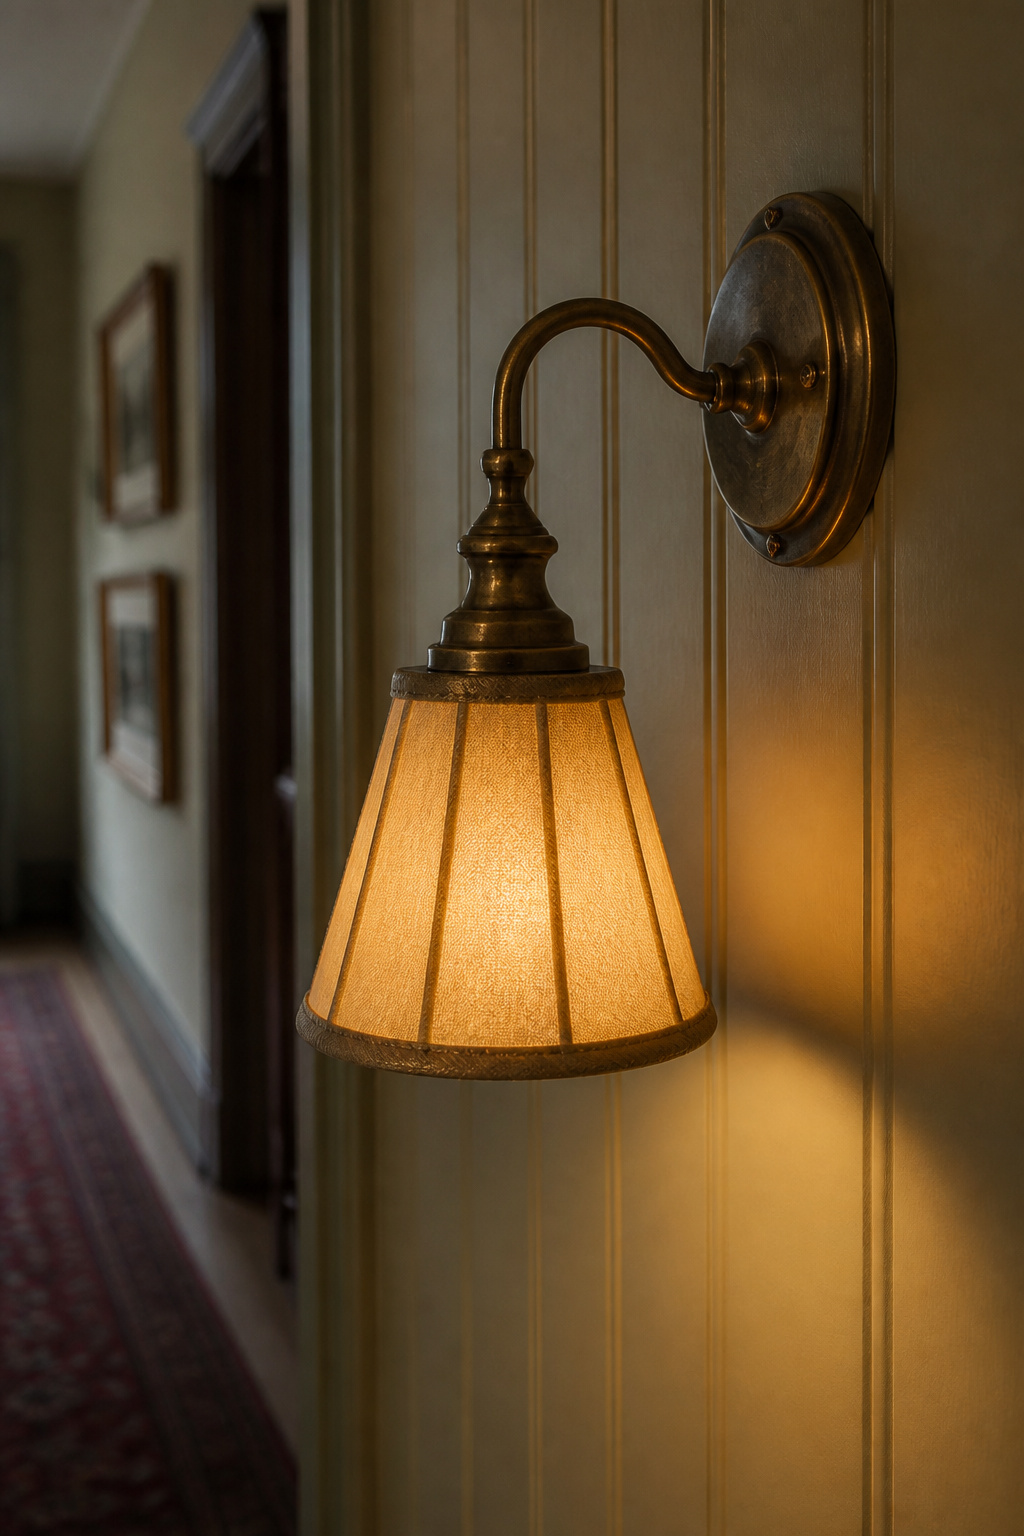
Why a cottage entry shouldn’t be evenly lit — the case for shadow and warmth
Even light flattens a room. One source directly overhead shadows the face and erases the depth that walls, joinery and a warm floor would otherwise carry. Layered light does the opposite, combining sources at different heights — overhead for ambient reach, wall level for intimacy, the console for a human-scale glow — so the eye reads depth instead of a flat wash. Warmth, not brightness, registers as welcome. Pair warm bulbs with a dimmer and the same entry shifts from bright-and-functional when guests arrive to soft-and-low in the evening, with no fixture change at all.
How Victorian and Edwardian entries actually handled the threshold light
Gas lighting entered Victorian homes from the 1860s, and in halls and on staircases it arrived as wall lights, not pendants — positioned, human-scale, never centred on the ceiling. Period accounts suggest hall gas fittings were commonly set around six feet from the floor, level with the people moving past them. The Edwardian era softened the metalwork and brought in smoked and coloured glass under the Arts and Crafts influence, but the logic held: light belonged at wall level or above a doorway. Wide-area electric ceiling light wasn’t a domestic fixture until after the First World War. The lonely overhead bulb is a twentieth-century convenience, not a cottage tradition — which is exactly why restoring the layers feels right.
The 2700K rule and what it means for every fixture decision that follows
Before any fixture, settle the colour temperature, because it governs everything after it. A 2700K warm-white LED gives a soft golden-amber glow with the yellow undertones of candlelight and old incandescent lamps — the spectrum most people read as “home.” Professionals specify 2700–3000K for any space with period fixtures and brass or bronze hardware. Go above 3000K and you grey out your own materials: aged brass turns faintly green, cream plaster goes cold, natural wood loses its warmth. So 2700K is not just a bulb choice; it commits you to a warm-toned finish family and rules out cool chrome. That warmth also changes how the walls read, which is why it pairs directly with your cottage entryway paint colors.
Overhead Fixtures for Low Cottage Ceilings: Scale, Form, and Period Finish
The overhead layer carries one constraint you cannot wish away: a cottage ceiling is usually eight feet or lower, so the fixture has to earn its place without stealing headroom.
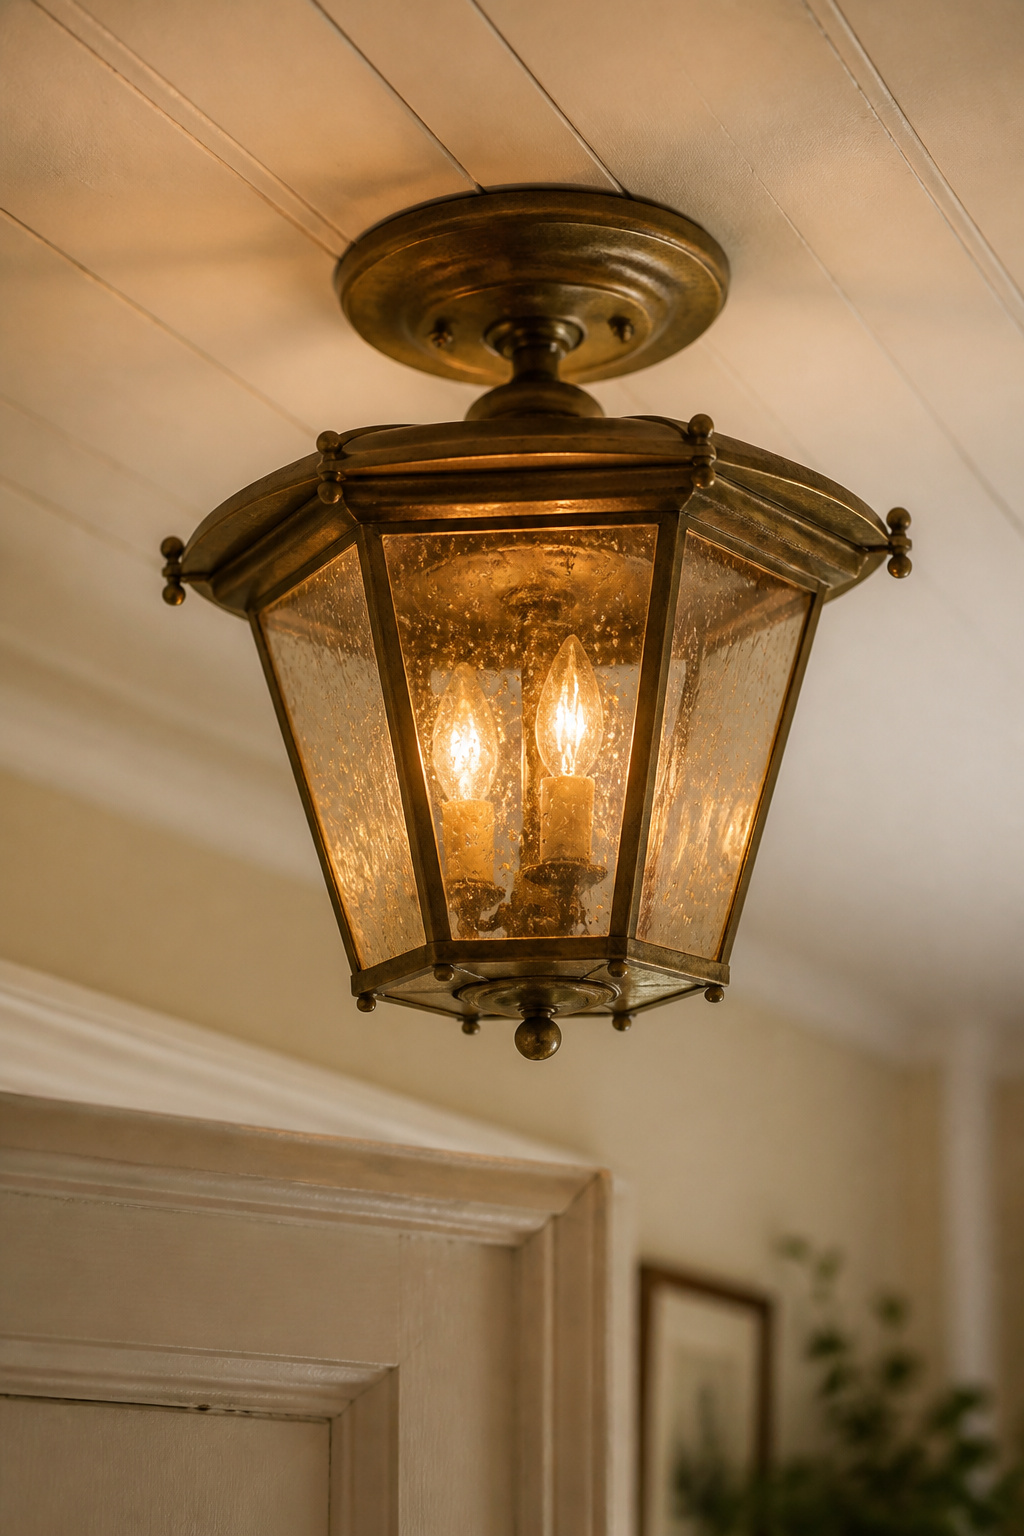
Semi-flush mounts — the safe choice, done well vs. done badly
A semi-flush mount drops 4–8 inches below the ceiling, giving visual presence without the hazard of a low pendant; both flush (0–2-inch drop) and semi-flush suit ceilings at eight feet or below. But “semi-flush” also describes the flat plastic dome or chrome globe that fulfils the wiring and gives the entry nothing. The period version uses a cage or lantern form, etched or seeded glass, and aged brass or bronze metalwork — and a darker finish reads larger than the same fixture in brushed nickel, presence a compact entry can afford.
Pendants and when a ceiling height (8 ft. minimum clearance) supports them
A walkthrough area needs seven feet of clearance from floor to the bottom of the fixture. On a 96-inch ceiling that leaves 12 inches for the whole fixture body — and a stricter 7-foot-6 guideline leaves only six. That math rules out most pendants and every chandelier on a standard cottage ceiling. The exception is an area no one walks directly beneath: over a console or in an alcove the fixture can drop to 6.5–7 feet, opening up a small lantern-form pendant with a body up to 18 inches.
Lantern forms, aged brass, and wrought iron: the finish families that suit cottage origins
Finish is what dates a fixture, for better or worse. The cottage hierarchy runs aged or antique brass first — warmest and most versatile against cream and sage walls — then antique bronze for darker beams, then wrought iron for the most rustic or Edwardian rooms. Chrome and nickel are anachronistic in anything built before the 1930s. The Arts and Crafts cottage pendant favoured handcrafted copper, mica or seeded glass and clean geometry over Victorian ornament. For scale, add the entry’s length and width in feet and read the total as inches: a 6×8-foot entry calls for a 14-inch fixture, a 5×7-foot entry a 12-inch one. Undersizing is the most common foyer mistake — the fixture ends up looking like a thimble on a barn.
| Ceiling height | Fixture type | Max drop / body | Typical diameter (5×7–6×8 ft entry) |
|---|---|---|---|
| 7.5–8 ft | Flush / semi-flush | Under 10–12 in | 12–14 in |
| 8 ft, over console only | Small lantern pendant | Up to 18 in body | 12–14 in |
| 9 ft+ | Pendant / small lantern chandelier | 7 ft clearance held | Add 2.5–3 in per extra foot |
Wall Sconces: The Layer That Does Most of the Work in a Narrow Entry
This is the layer almost every cottage entry is missing, and the one the Victorians would have started with. A sconce works at eye level, where the overhead never reaches, and in a narrow hall it does more for warmth than any ceiling fixture can.
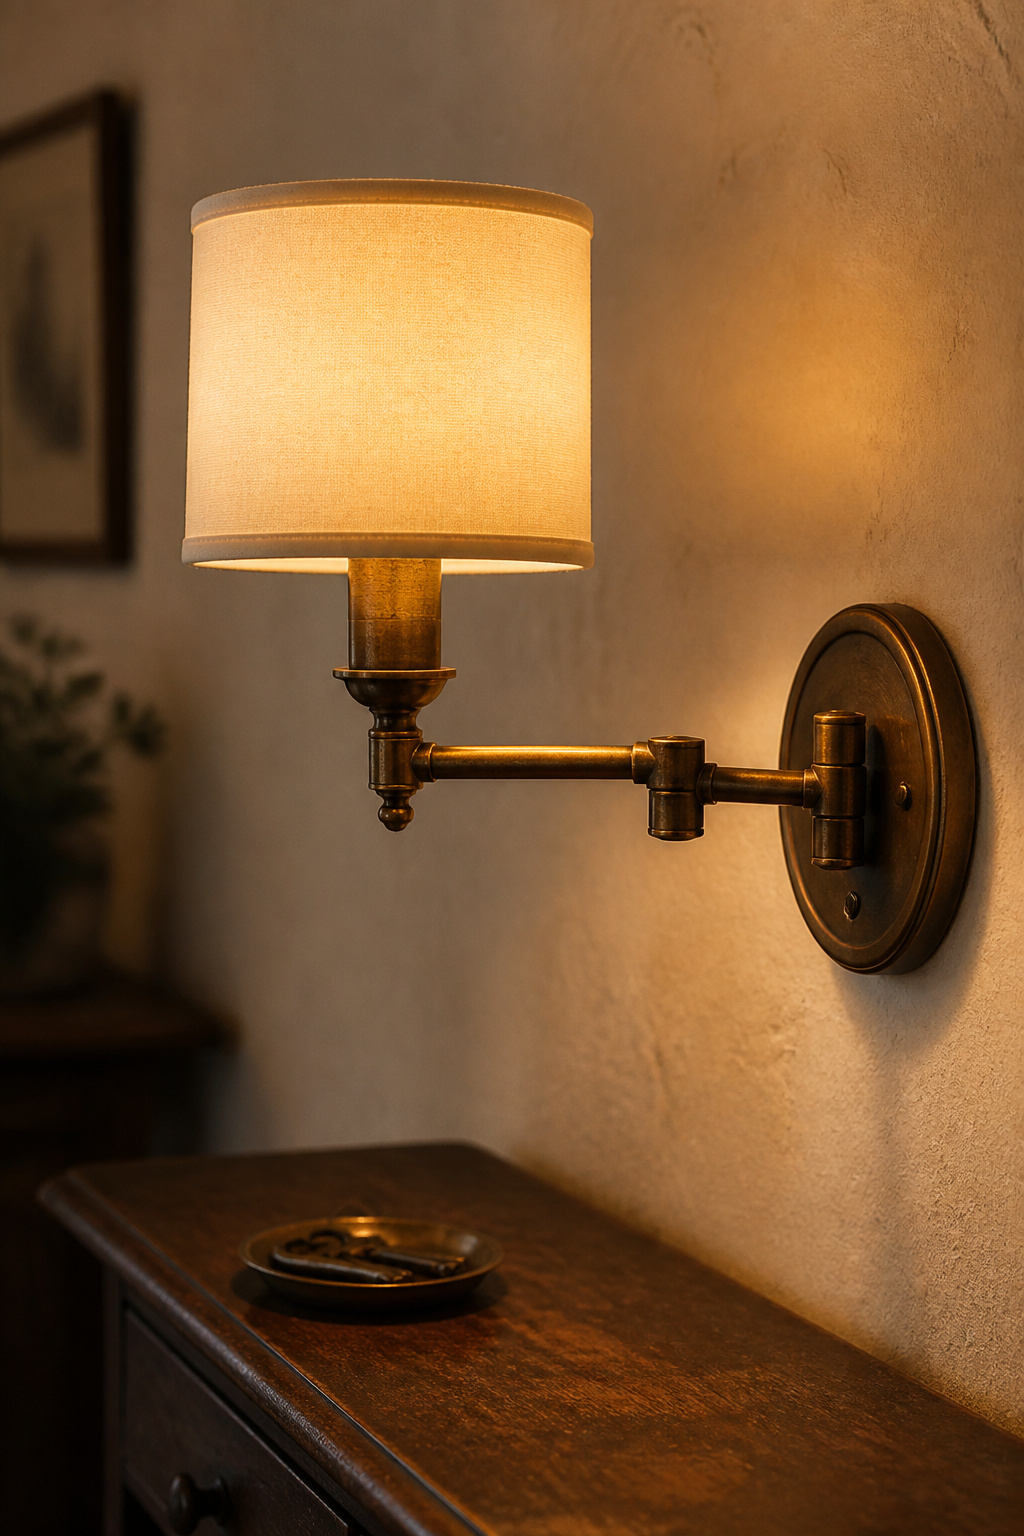
Placement height — the 60-inch standard and when to break it
Mount a hallway sconce with the centre of the fixture at 60 inches from the floor — lower than the 60–72-inch range used in living rooms. A hall is narrow and seen at close range while you walk, so the sconce needs to sit connected to the wall plane rather than stranded near the ceiling. Drift above 66 inches on a standard eight-foot ceiling and the lower wall looks bare while the light floats. Break the rule only when the ceiling rises with it — a 9–10-foot converted-farmhouse hall can carry the centre into the low 70s if the fixture has the body to justify it.
Swing-arm sconces and their dual role in a narrow hall
A swing-arm sconce is the quiet workhorse of a tight entry. It adds a layer without the weight of a pendant or the floor footprint of a lamp, and the arm earns its keep twice: extended over the console it becomes task light for the post or keys; retracted, it is ambient wall light again. Arm reach typically runs 12–24 inches, but under 36 inches of width a shorter 12–15-inch arm keeps it from becoming an obstacle. Where a new back-box would mean cutting into original plaster, a plug-in swing-arm needs nothing but a nearby socket.
Sconce finish pairing with overhead fixture — when to match and when to relate
Sconces and the overhead don’t have to match; they have to relate. Choose fixtures that share a design language — the same metal family, a similar silhouette, or a shared material like seeded glass. An aged-brass overhead with oil-rubbed-bronze sconces reads coherently because both are warm and patinated; the same overhead beside polished chrome reads as an accident. Keep a small entry to two finishes at most, and in a hall under 36 inches wide, choose a sconce that projects no more than four inches to keep the passable width intact.
The Console Lamp: Bringing Light Down to Human Scale
The third layer turns a lit entry into a warm one. It sits where people actually meet the room — keys on the tray, post on the surface, a glance in the mirror — at a height the ceiling fixture can never reach.
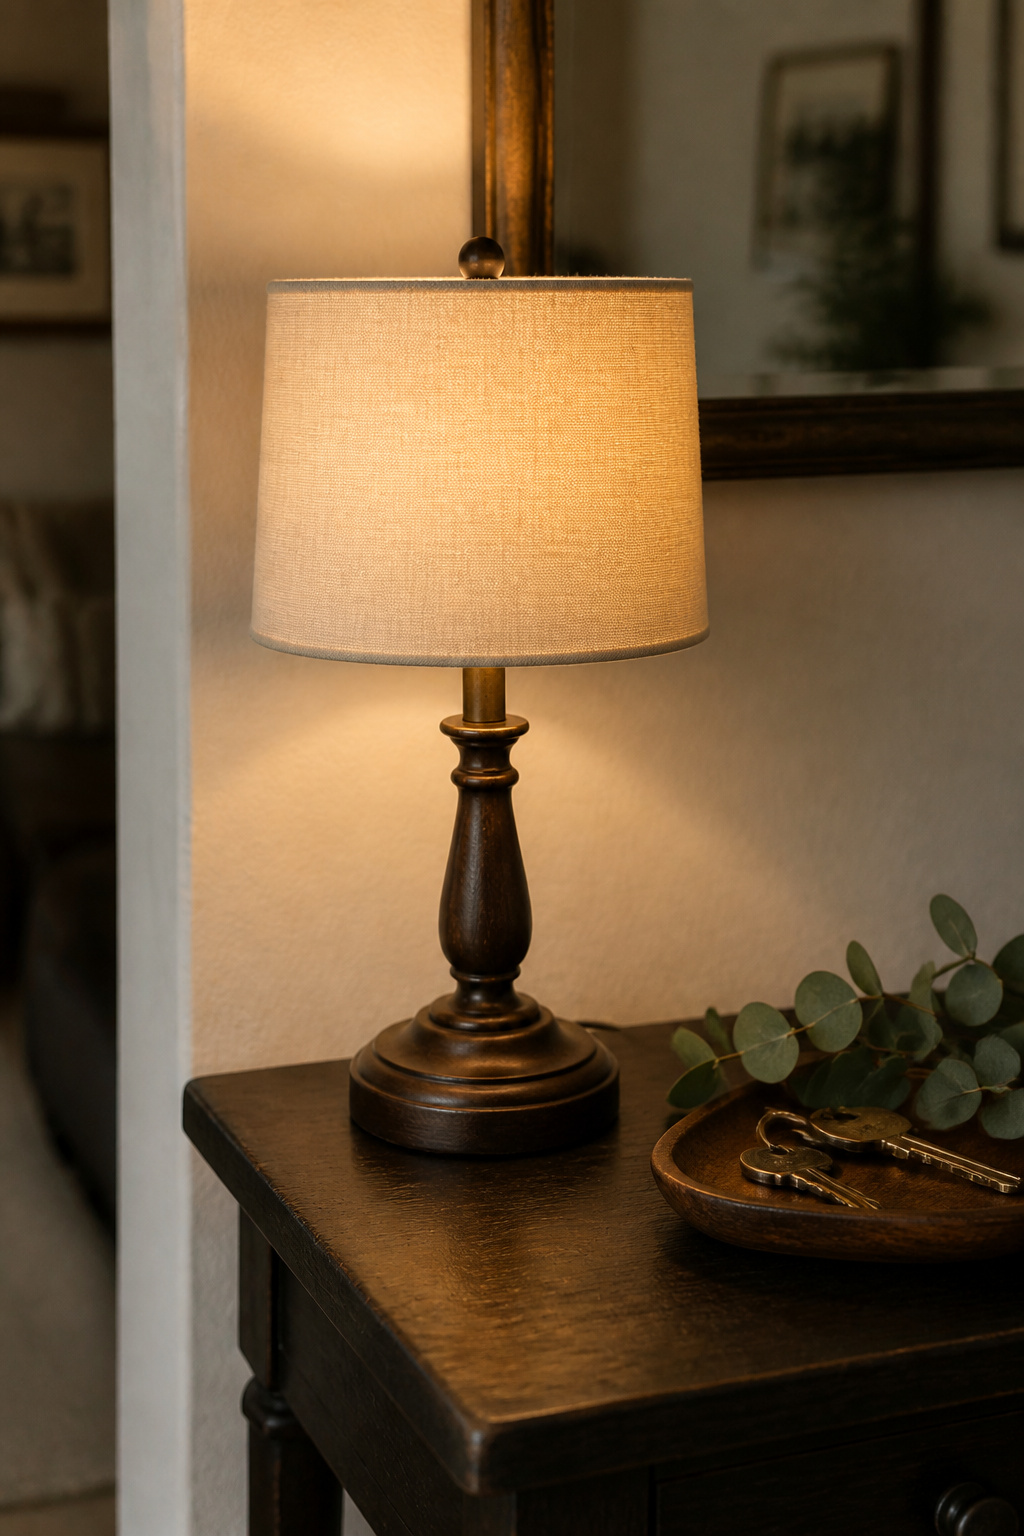
Lamp height and shade choice for an entry console
Aim for a total lamp height — base plus shade — of 24–32 inches, so the bottom of the shade lands near standing eye level and pools light rather than spraying it. A useful proportion is roughly 1.5 times the console height, so a standard 30-inch console pairs with a 24–28-inch lamp. Keep the shade no wider than the table surface; on a shallow 12–14-inch console, a slim drum or tapered bell shade stops it overhanging the edge. Warm linen drum shades or pleated and bell forms in cream or ecru sit far better than angular modern shades in grey or white.
Why a table lamp transforms the mood of an entry when an overhead cannot
The mood shift comes from height. An overhead originates at seven or eight feet; the console lamp brings the source down to 24–32 inches, where your eye naturally rests on entering. Target 400–1,000 lumens — enough to read by, not enough to overpower the warmth above. Set the lamp to one side rather than centred for more dynamic light, freeing the other half of the surface for a mirror or tray. Because the lamp is a styling element as much as a lighting layer, the console looks unfinished without it even when the overhead and sconce are lit. Styling that whole vignette around a lamp on the console table is its own craft, and that spoke owns it.
The outlet and extension reality — managing cords in a period property
Here is the workshop truth most lighting guides skip: a period cottage entry usually has one socket, often set near the door for a reading lamp that predates the console. Run the lamp from it on a braided-fabric cord rather than white plastic and the cord becomes a period-appropriate detail instead of an eyesore, clipped down the back leg to the skirting. Adding a socket behind the console runs roughly £67–£187 where wiring already exists, plus £75–£150 for a new circuit — the threshold for deciding whether to hardwire or live with the existing outlet.
Putting the Three Layers Together: A Cottage Entry Lighting Plan
Three good fixtures are not a lighting plan until they are wired to behave as one — and the difference between a layered scheme and a well-lit muddle is almost entirely in the switching.
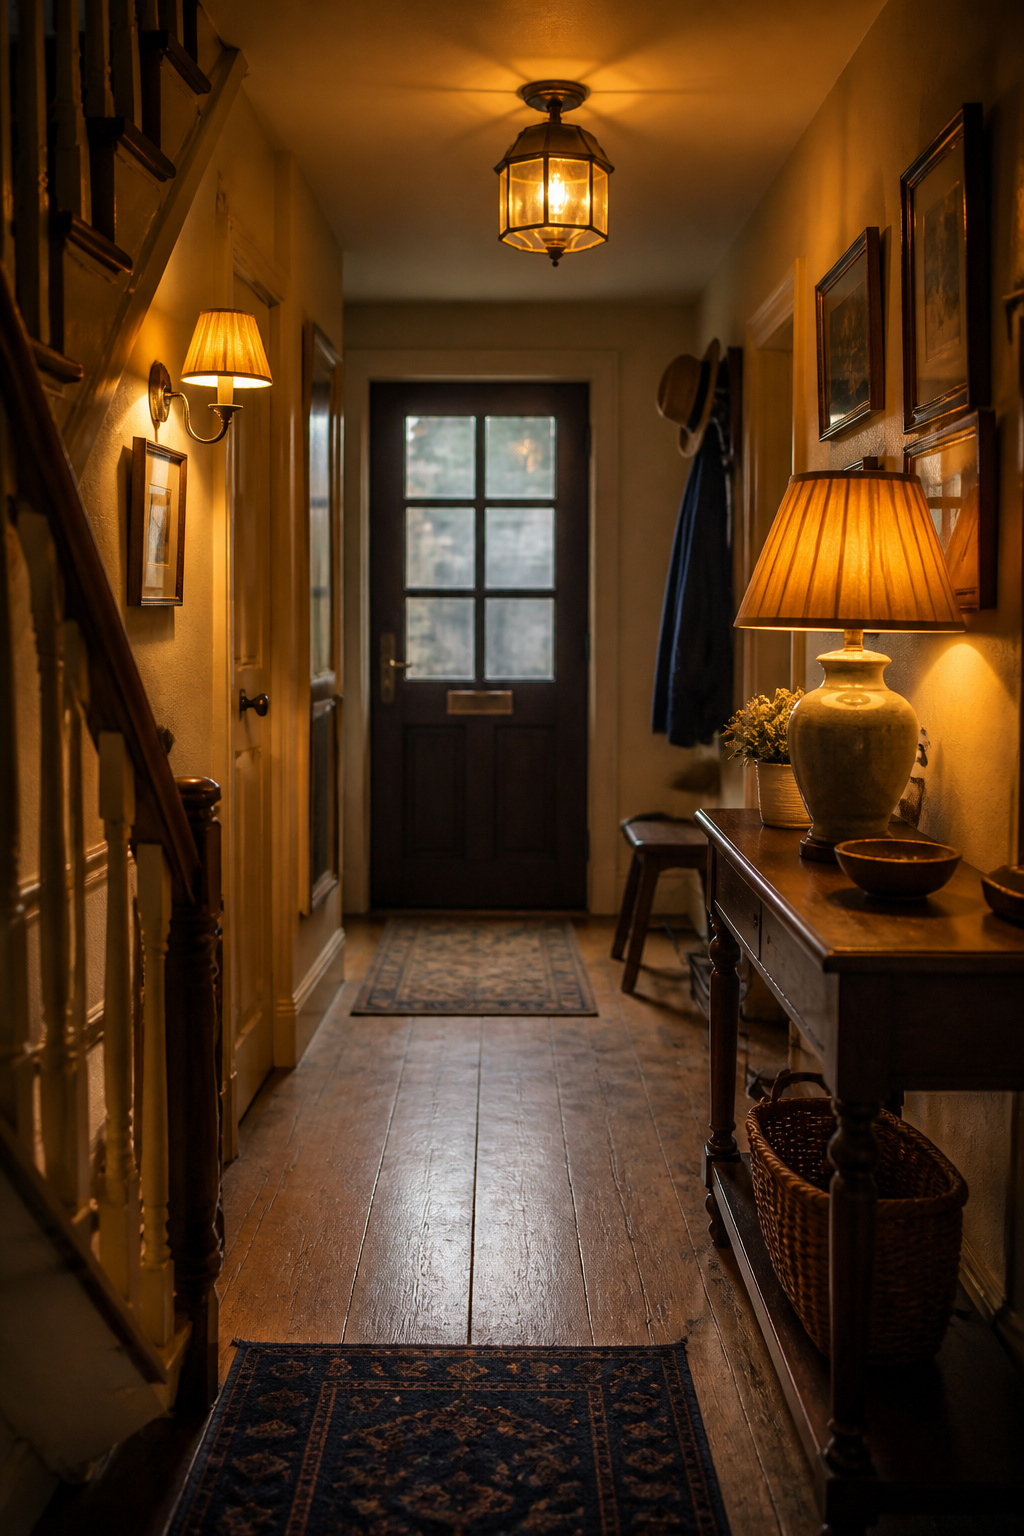
- Wire in sequence: overhead, then wall, then console. Run the ceiling circuit first while the void is open, chase the sconce back-box from that drop, and add the console socket last as a spur from the nearest one. Each step uses the access the last one opened — and back-boxes, three-way switching and dimmer zones all live in the plaster, so if the entry is being replastered, this is the window.
- Give each layer its own switch. Overhead on switch one, sconces on switch two, the console lamp on a switched socket. That single decision unlocks the three modes that make layering worth the trouble: all on for arrivals, sconce and lamp for the evening, sconce alone for an overnight glow.
- Check dimmer compatibility before you buy the bulbs. A standard leading-edge dimmer paired with LED bulbs flickers, buzzes and dims across a narrow range. LEDs need a trailing-edge (ELV) dimmer for smooth, silent control, and only bulbs marked dimmable should go on it. Trailing-edge dimmers now come in traditional toggle and rotary plates, so the switch can match the entry’s heritage without compromising the light.
A two-gang plate at the door (overhead and sconces) is the practical minimum; a three-gang adds the console lamp so you control all three at the door.
Small Entry, Low Ceiling: The Constraints That Make the Plan Better
The hardest entries — low ceiling, small footprint — tend to produce the most considered result, because they leave no room for a fixture that isn’t pulling its weight.
Fixtures under 10 inches drop that still have period character
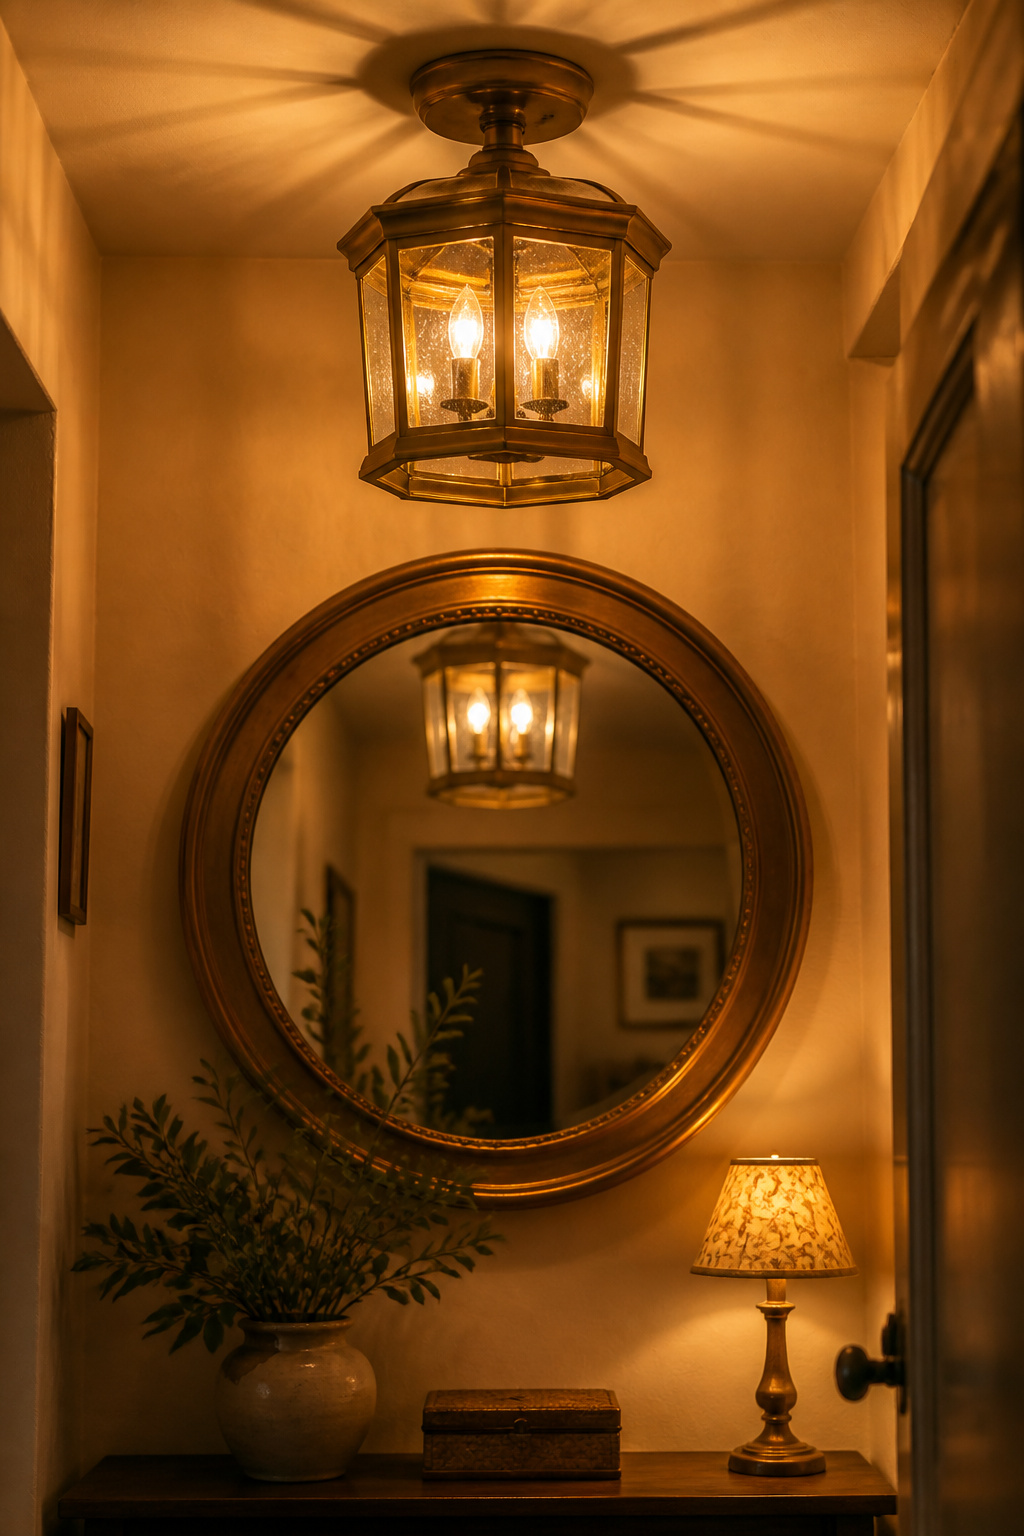
On a 7.5–8-foot ceiling, the overhead needs a total drop under 10 inches to hold seven feet of clearance — achievable in semi-flush lantern forms and short-drop cage pendants with etched, seeded or amber glass in aged-brass or wrought-iron frames, and several period-reproduction lines catalogue low-ceiling sizes specifically. Size it to the room even so: a low-drop fixture scaled by the room-dimension formula reads as intentional, while an undersized one reads as an afterthought. A dark finish helps it command the space without a physical drop.
Mirror placement to double the light you have without adding a circuit
A mirror is free lighting. Positioned to intercept a sconce or overhead at a slight angle — roughly 15–30 degrees rather than flat-on — it can double the perceived brightness without a single extra circuit. The common error is hanging it square to a bare overhead, which bounces hard light into the eyeline; a sideways shift or slight tilt resolves the glare into a warm wash. A tall rectangular mirror stretches apparent height in a narrow hall; a round or oval one softens hard right-angle architecture, and a flanking sconce draws the eye up to make a low entry feel taller.
When a single beautiful semi-flush and a console lamp is the complete answer
In the smallest entries — under five feet square — two layers are the whole plan. An overhead semi-flush and a console lamp deliver the essentials, ambient reach and human-scale glow; adding sconces in that footprint only clutters the wall. Size the single semi-flush right (12–14 inches for a 5×5 entry) in an aged-brass lantern form, pair it with a 24–28-inch lamp on the existing socket, and the scheme is both practical and historically sympathetic — hardwired overhead, plug-in lamp, exactly as a period entry would have grown.
The constraint, in the end, is the gift. A reader who started with one cold bulb and a corridor now has the three-layer plan, the fixtures sized and finished to the entry, and the 2700K warmth that makes all of it read as welcome — enough to brief an electrician, or to begin with a single good semi-flush and a lamp this weekend. For where the lit entry sits among everything else that gives a cottage its character, the cottage entryway ideas guide ties the whole space together.
FAQ
What kind of light fixture is best for a low-ceiling cottage entryway?
A semi-flush mount, dropping 4–8 inches below the ceiling, is the standard choice for ceilings of eight feet or lower — it gives presence while keeping seven feet of headroom. Pick an aged-brass or wrought-iron lantern form with seeded or etched glass, and size it by adding the entry’s length and width in feet for its diameter in inches.
What colour temperature bulb should I use in a cottage hallway?
Use 2700K warm-white LED, the professional standard for cottage and period hallways. It casts a soft golden-amber glow that matches candlelight and flatters brass, plaster and wood. Avoid anything above 3000K, which greys out warm materials and makes aged brass look green. For dimming, choose dimmable bulbs and a trailing-edge (ELV) dimmer.
Do I need an electrician to add a wall sconce in an entryway?
For a hardwired sconce, yes — installing the back-box and running cable is certified-electrician work under UK Part P rules, typically £67–£187 if wiring is nearby, plus £75–£150 for a new cable run. A plug-in sconce avoids it entirely: it uses a standard socket, and a braided-fabric cord in a matching colour keeps the cord nearly invisible against period joinery.