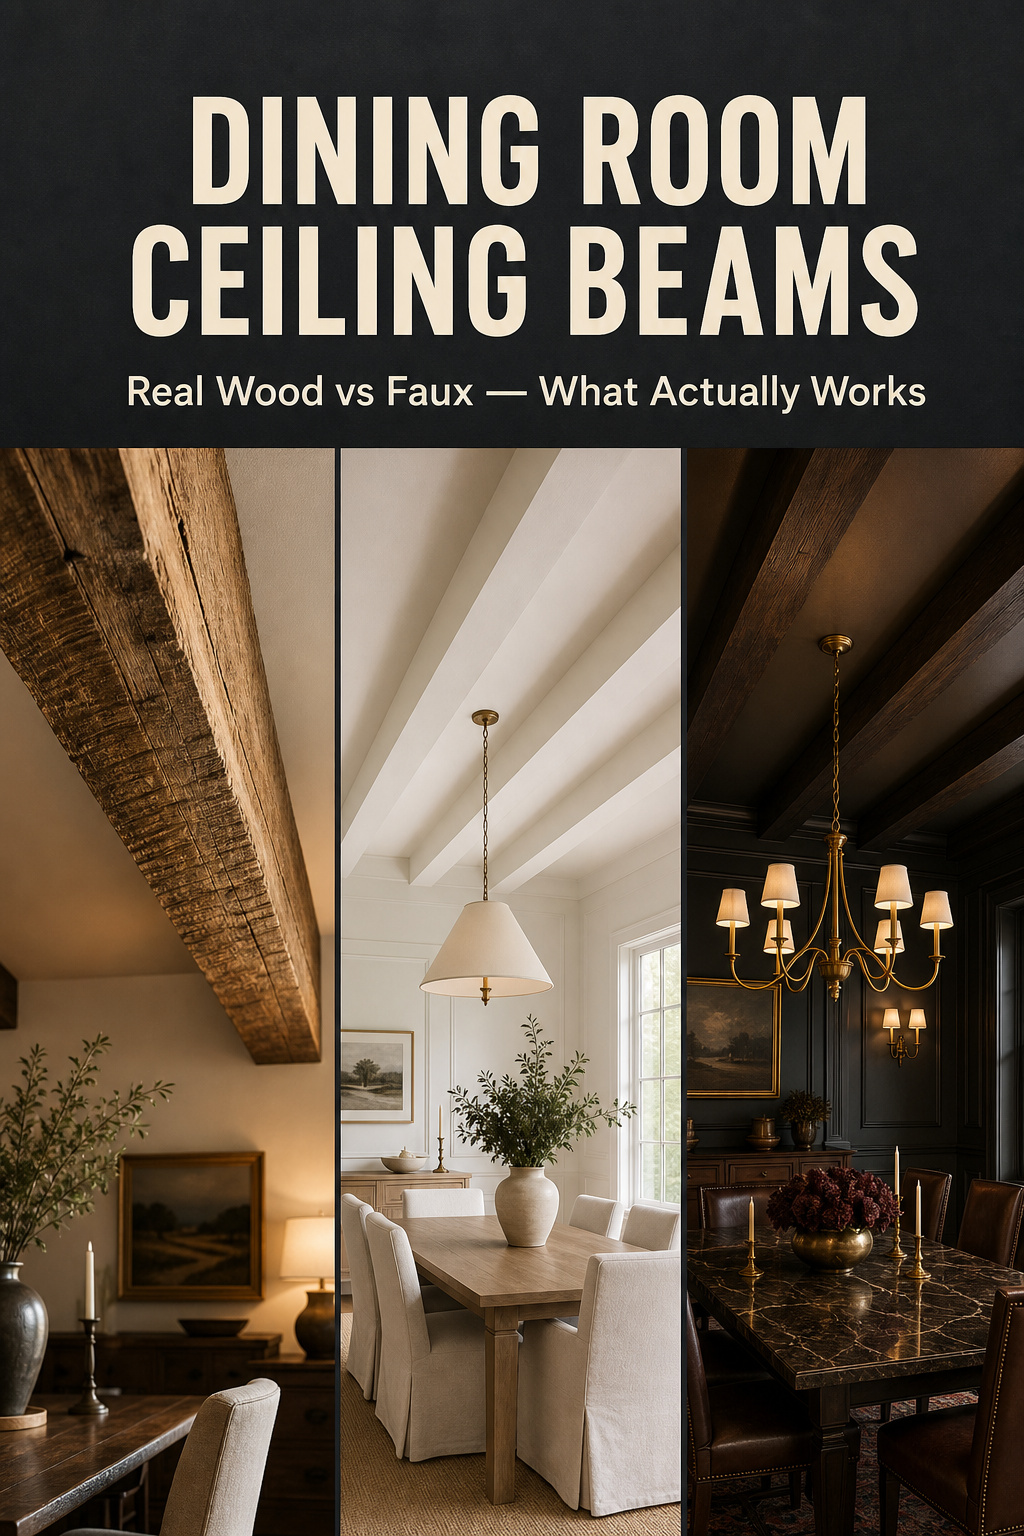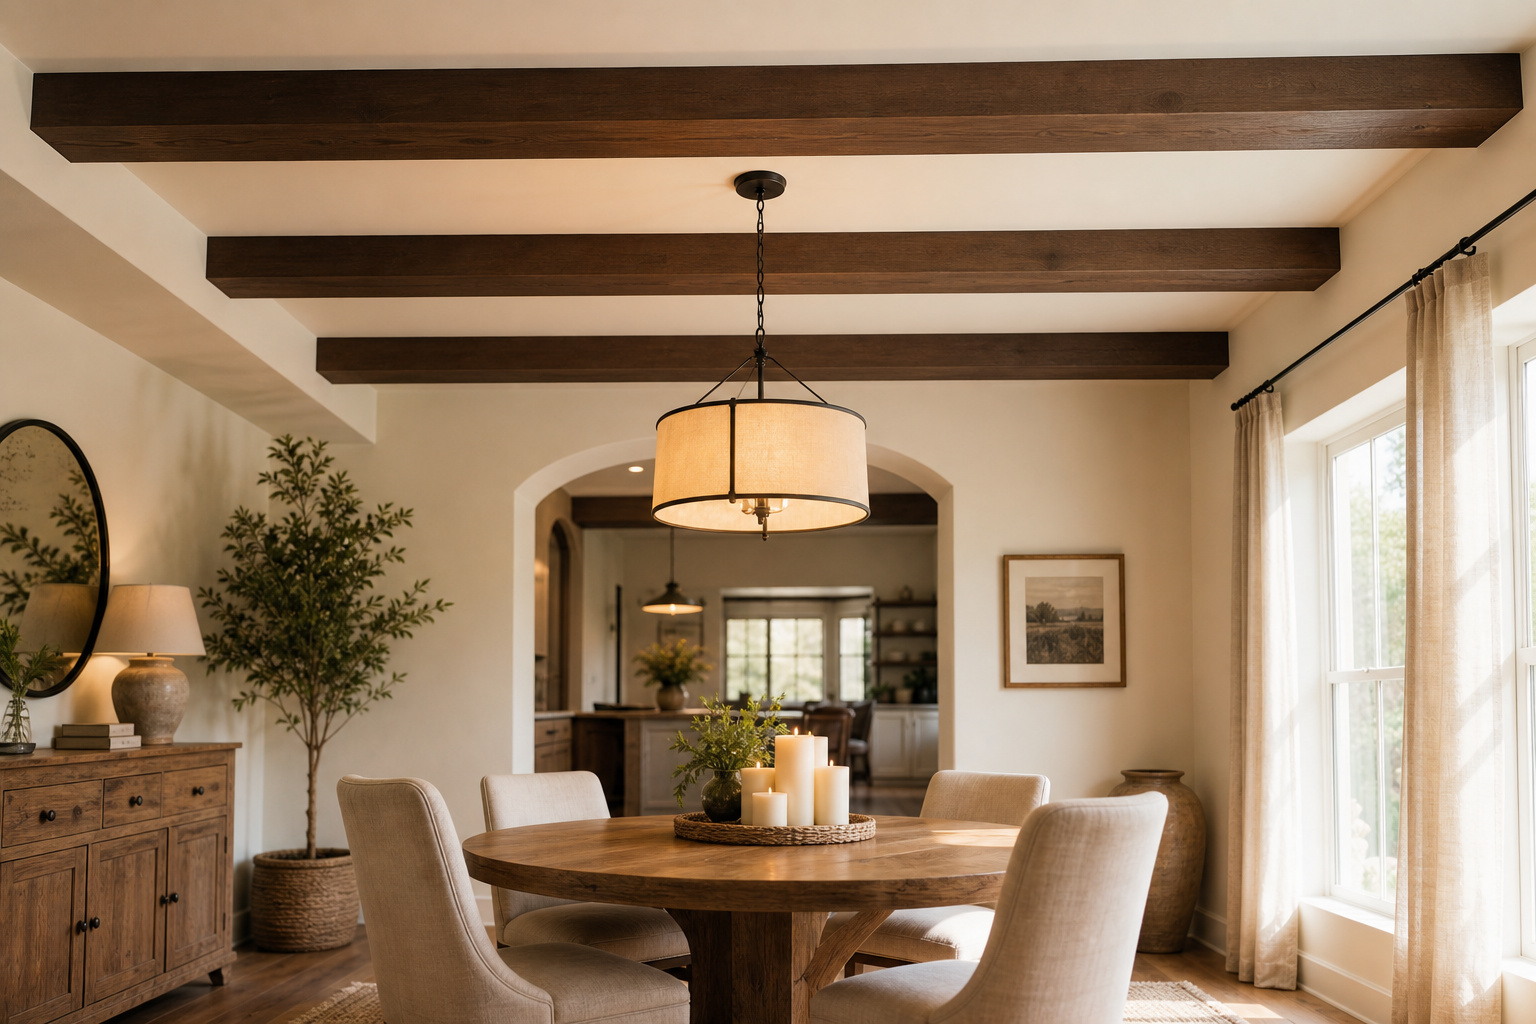

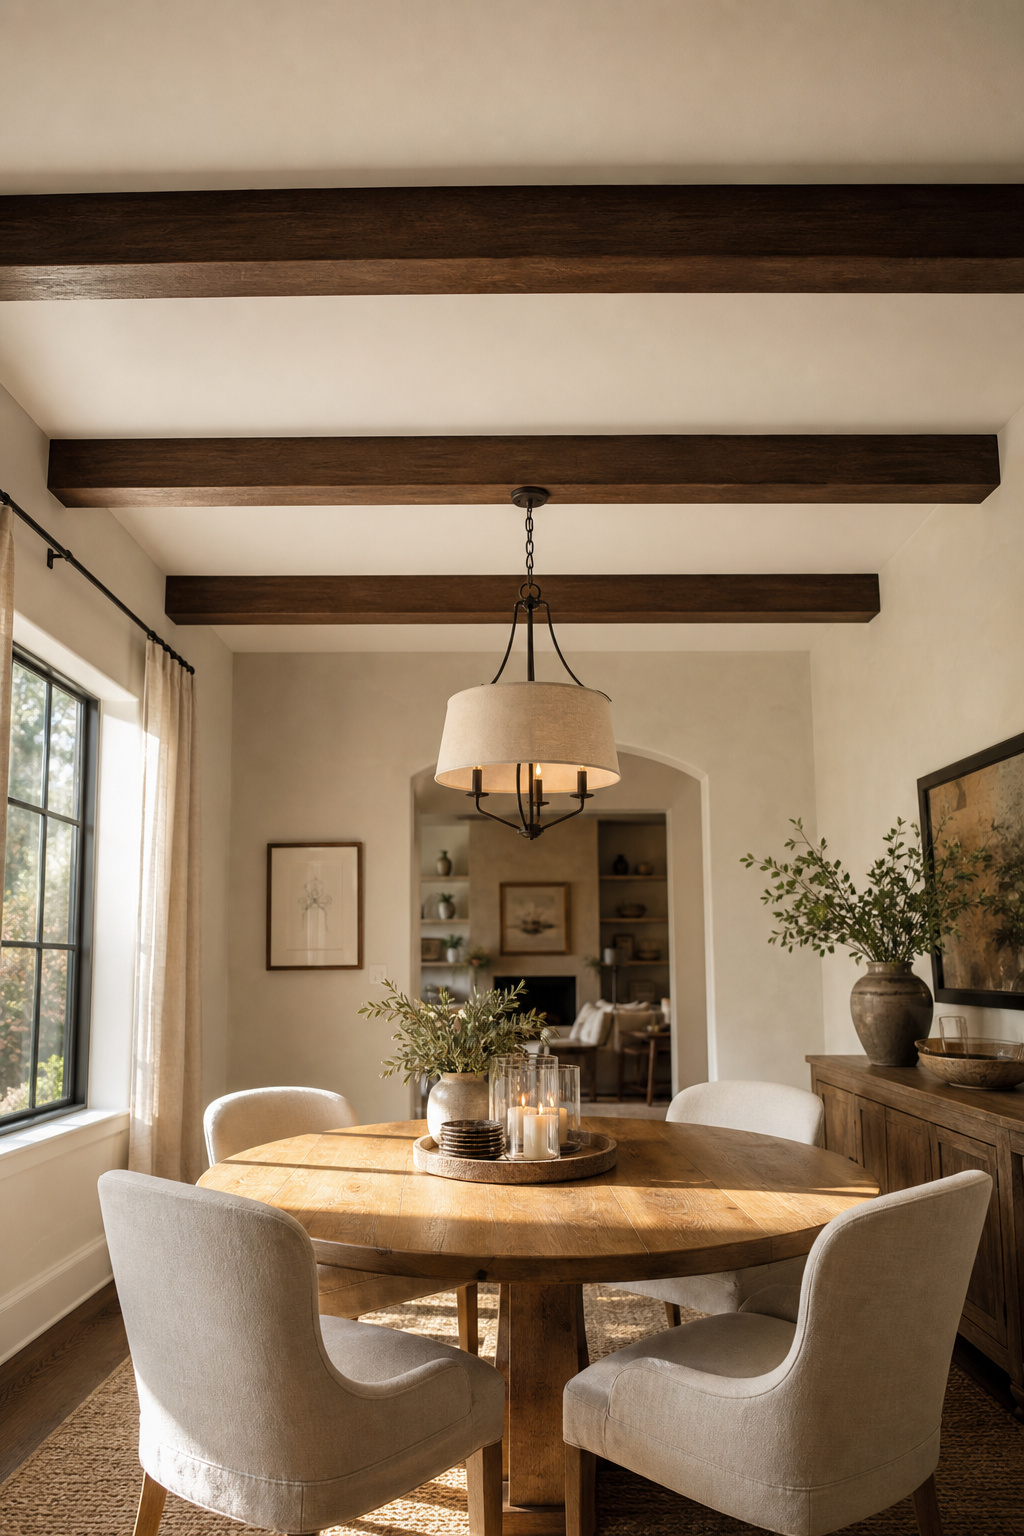
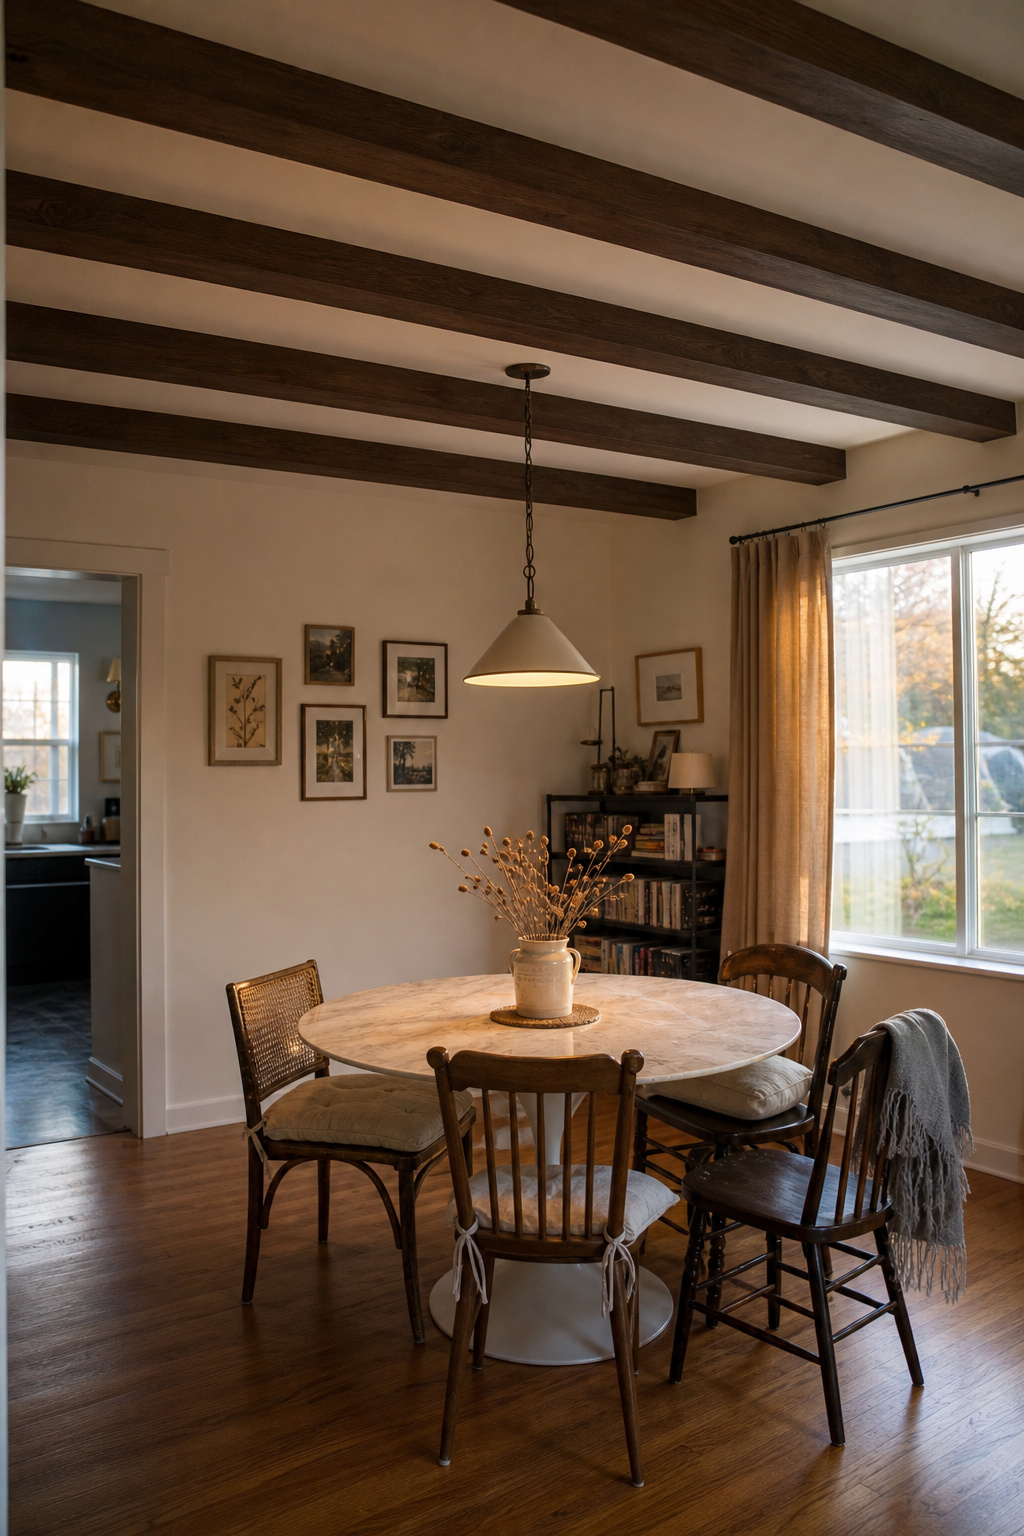
A confident DIYer can put three dining room ceiling beams across a standard room in a weekend for $350 to $900 — or pay a pro $1,500 to $2,500 for the same look. That gap is the whole reason this article exists. Beams read as expensive architecture, but the faux ones weigh almost nothing and go up with tools most people already own. The trick is deciding real versus faux before you buy anything, because that one choice sets your cost, your skill ceiling, and whether the ceiling needs reinforcing first.
TL;DR
- Polyurethane faux beams weigh a tiny fraction of solid timber, so a single person with a helper installs three across a 12-foot dining room — no structural work, $250 to $600 in materials.
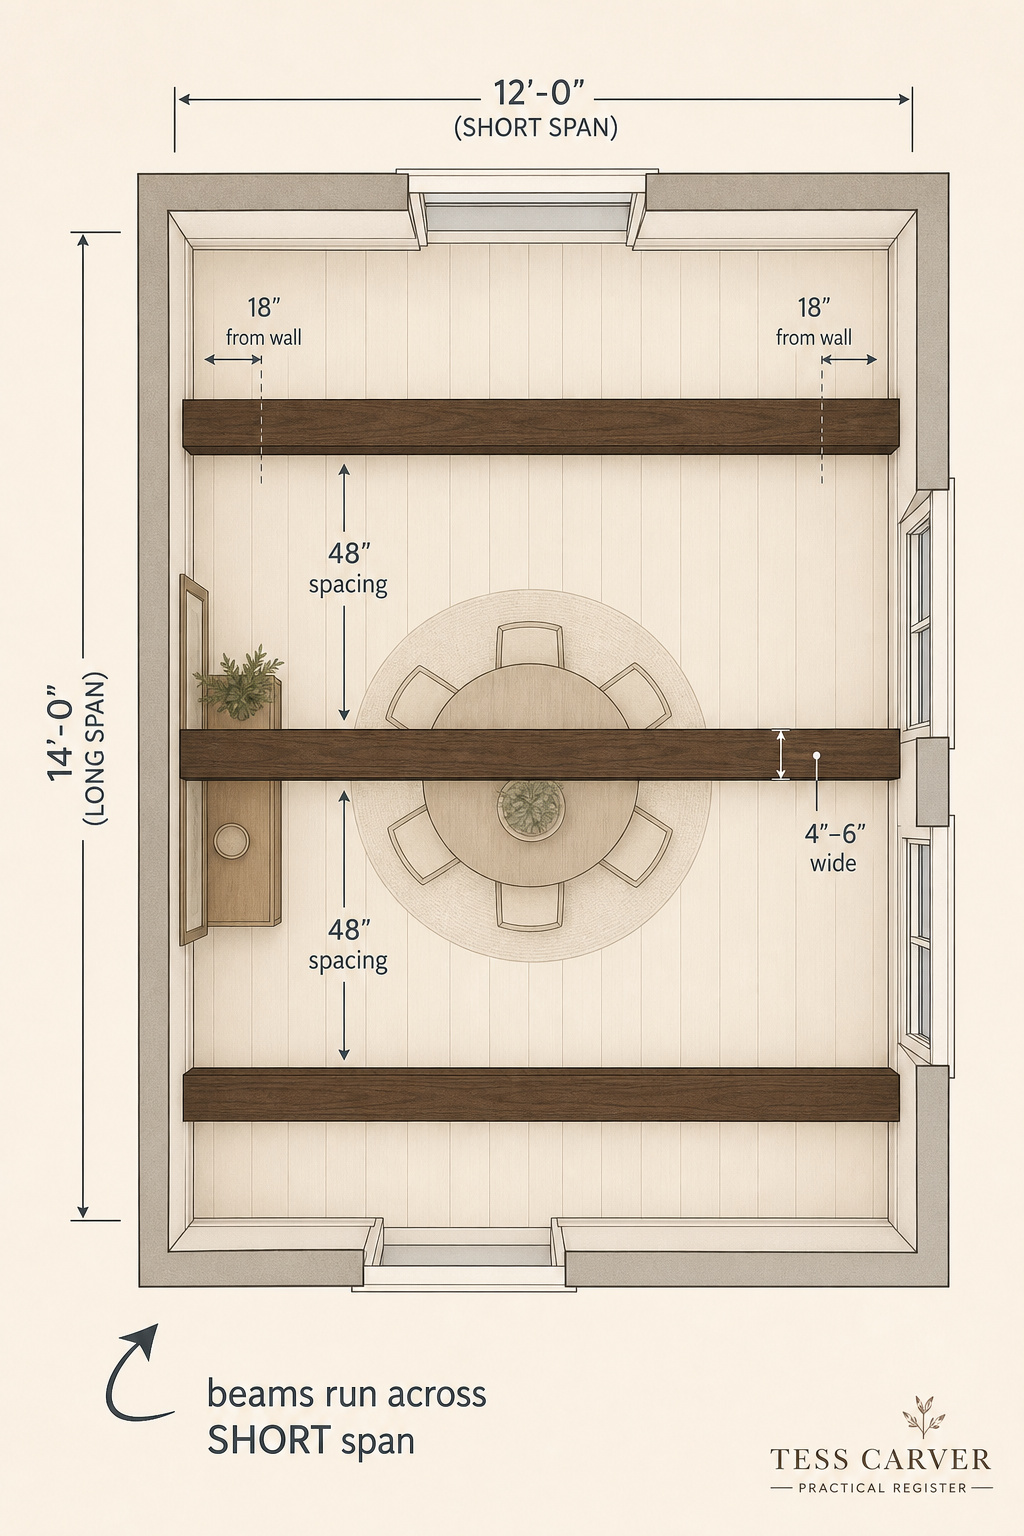
- Run beams across the room’s short span at roughly 4-foot centres, sized 4 to 6 inches wide on an 8 to 9-foot ceiling, with the middle beam aligned over the table.
- Faux beams are not load-bearing: a light fixture mounts to the ceiling joist behind the beam and feeds through a drilled hole — never hung off the beam itself.
Dining Room Ceiling Beams: Real vs Faux, Decide First
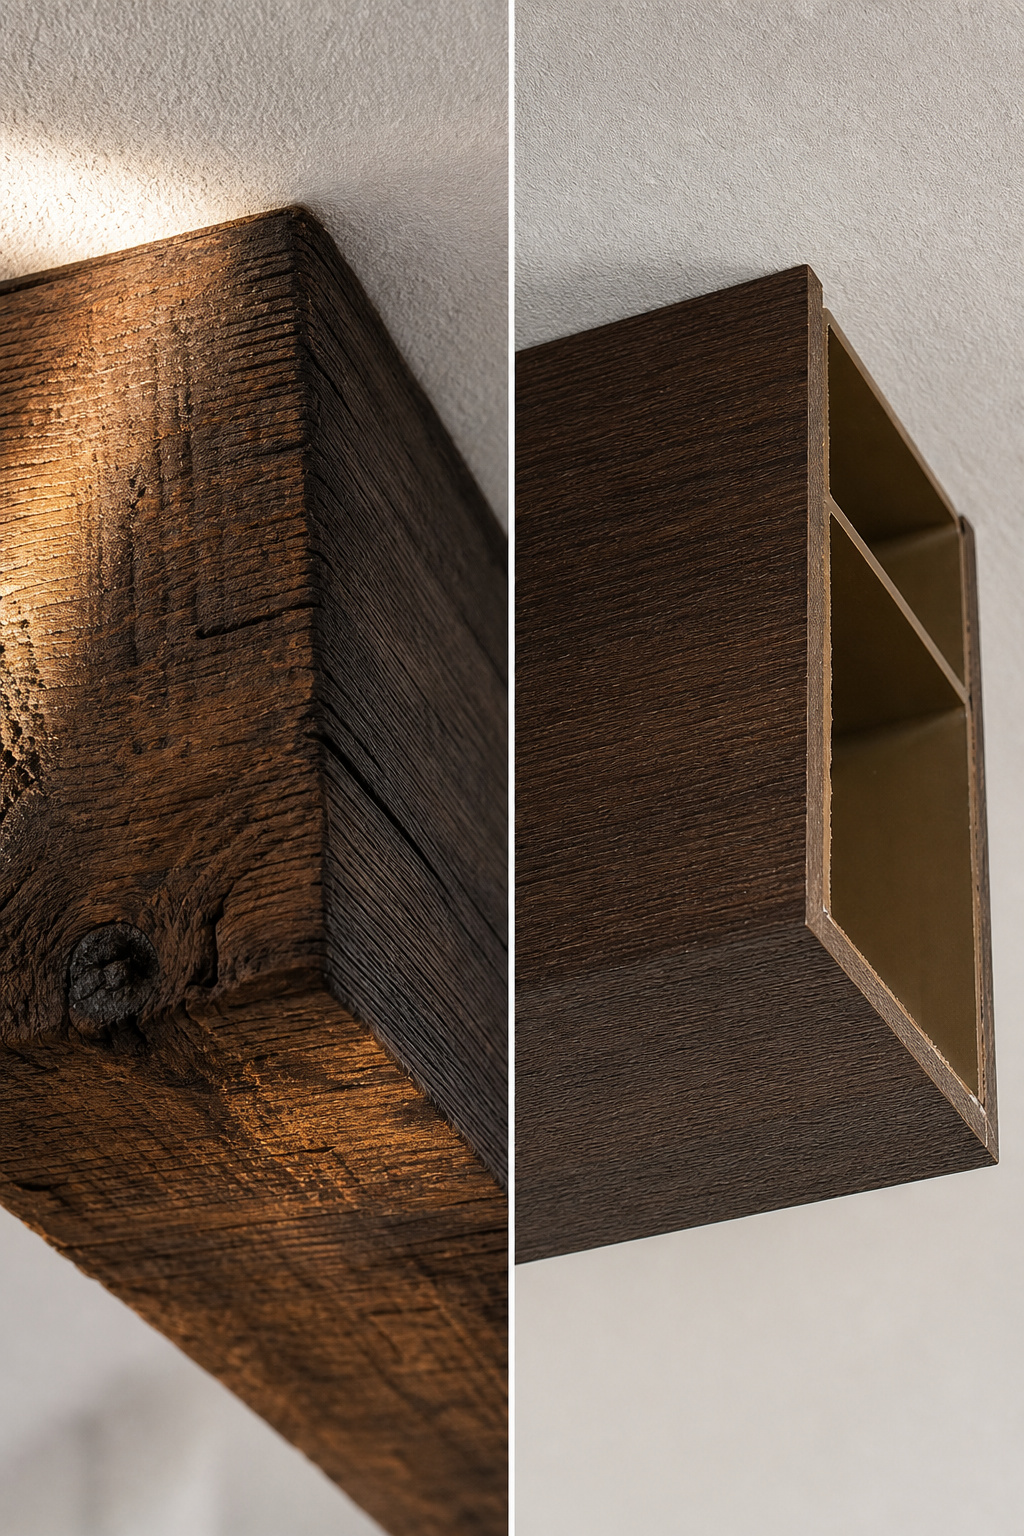
Before you fall for a Pinterest ceiling, settle the boring question: what are you putting up there, and can the ceiling take it? Solid timber and faux box beams look similar from the floor and behave nothing alike during the build.
What real timber ceiling beams actually involve
Solid decorative wood is heavy and unforgiving. A 12-foot oak beam at 4×6 inches lands around 100 to 150 lbs and needs two people plus a deadman prop to hold it while you fasten. Anything genuinely hefty wants blocking sistered between the joists, and the heaviest beams should get a structural engineer’s eyes first. That reinforcement runs $500 to $2,000 — an expense faux beams never trigger.
Faux box beams: the weight advantage, honestly stated
Polyurethane (HDU) box beams are the opposite problem. A beam spanning a 12-foot ceiling comes in under 25 lbs total — light enough that one person manages it with a helper steadying the far end. The honest limits: they are not load-bearing, they dent under a hard knock, and they take water-based finishes only. Oil-based stain will not cure on the foam and peels within months.
Which choice suits which budget and skill level
Here is the trade-off laid out the way I’d sketch it on the back of a receipt at the cut counter.
| Beam type | Material cost/LF | Relative weight | Skill level | Ceiling fix method |
|---|---|---|---|---|
| Solid timber (decorative) | $5–$30 | Heaviest — props + two installers | Confident builder + help | Blocking; engineer review if heavy |
| Site-built pine box | $3–$8 | Middle — manageable | Some builds (miter saw) | Nailer boards into joists |
| Polyurethane faux | $15–$25 | Lightest — self-aligning over nailers | First build | Nailer boards; toggles off-joist |
Three quick reads on that table:
- First build, basic tools: polyurethane faux, every time. No heavy lifting, no structural work.
- Confident with a miter saw: site-built pine boxes give you a real-wood surface that stains like timber, for less material money and more labour.
- Period farmhouse or barn, budget over $3,000: solid timber earns its place when material honesty is the brief.
If you want the beams to intersect into panels rather than run as simple parallels, that’s a different project — see taking beams to a full coffered grid. This article stays in the linear lane: beams that run one direction across the room.
Sizing and Spacing Beams in a Dining Room
Get this right with painter’s tape before you order anything. Proportion and spacing aren’t taste calls — they follow ceiling height and room width, and getting them wrong is how a room ends up feeling pressed-down or tunnel-like.
The proportion rule: width to ceiling height
Roughly an inch of beam width per foot of ceiling height. An 8 to 9-foot ceiling wants 4 to 6-inch beams, 3 to 4 inches deep. A 10-foot ceiling carries 6 to 8 inches wide and 4 to 6 deep. Go wider than that on a low ceiling and the room visually compresses.
How many beams, and which direction
The most-used spacing is 4 feet (48 inches) on centre; the dining-room sweet spot runs 3 to 5 feet. In a 12 to 14-foot-wide room, three beams at 40 to 48-inch centres is the well-tested formula. Run them across the shortest span — the structurally realistic direction, and it pulls the eye across the room’s width, the view everyone has while seated. Run them the long way down a narrow room and you get a tunnel.
Use this as your starting point, then mock it up in tape:
| Room width (ft) | Beam count | Beam width (in) | Spacing on centre (in) |
|---|---|---|---|
| 10–11 | 3 | 4–5 | 36–42 |
| 12–13 | 3 | 5–6 | 42–48 |
| 14–15 | 4 | 5–6 | 42–48 |
| 16+ | 4–5 | 6–8 | 48–54 |
Aligning the centre beam with the table
Position the middle beam over the centre of the dining table — that single alignment ties the ceiling to the furniture so the two read as one design instead of two unrelated things. Leaving 12 to 18 inches of clear ceiling at each side wall reads as deliberate rather than fitted-out. Tape it all up, sit down at the table, and look. It costs nothing and saves a trip back to the timber yard.
Installing Faux Box Beams: A Weekend Sequence
This is a genuine two-day job for one motivated person: Saturday for layout, joist-finding, and dry-fit; Sunday for adhesive, fastening, caulk, and touch-up. The sequence is forgiving — the one step that bites people is rushing the dry-fit, which I’ll flag where it happens.
The honest kit
Tools: stud finder, tape, chalk line or laser level, drill/driver, a miter or circular saw, ladder, caulk gun, safety glasses. Materials: faux beam blanks ordered 2 to 3 inches long for trimming, 2×4 nailer boards, polyurethane construction adhesive, finish screws (or a finish nailer for the lightest beams), colour-matched textured caulk, wood filler, water-based primer and paint or stain. Budget $100 to $300 for tools if you’re starting from nothing — the under-$30 stud finder alone saves an hour of knock-and-drill guessing.
Locating the nailers, then fitting the box
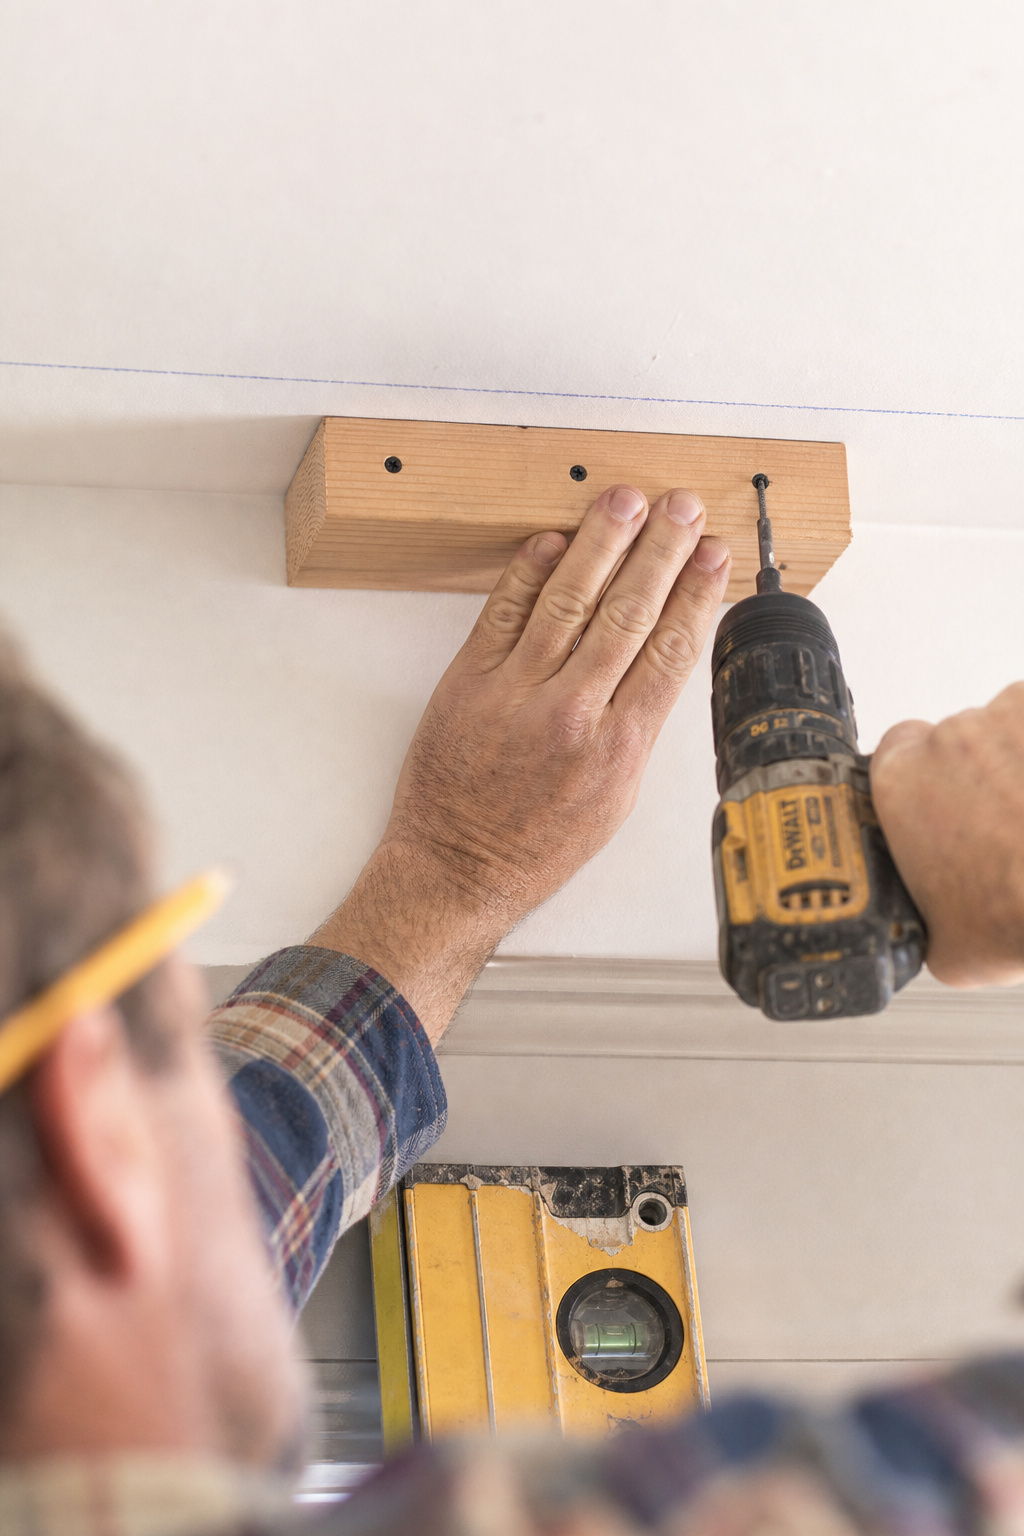
The beam is hollow and slides over a 2×4 nailer fixed to the ceiling. Get the nailers straight and everything downstream follows.
- Locate every ceiling joist along the run with a stud finder; mark each with a pencil tick on both sides of the beam line.
- Snap a chalk line down the centre of each beam run for a dead-straight reference.
- Cut nailer boards to the beam’s inside channel width minus 1/8 inch for clearance.
- Fix nailers to the ceiling at roughly 3-foot intervals with 3-inch screws into joists; use rated toggle bolts where a joist doesn’t land under the nailer.
- Dry-fit the beam over the nailers with no adhesive, check the length and the end gaps at both walls, and trim back in 1/16-inch increments until snug.
- Glue and fasten: run a 1/4-inch bead of adhesive along the nailer top edges, slide the beam home, drive finish screws through the sides into the nailers, countersink and fill the heads.
- Caulk where each beam face meets the ceiling and at the wall ends, smoothing with a damp finger.
- Prime and paint — though the smart move is finishing the beams on the ground first; more on that next section.
The mistake that shows up from the floor lives at step five. Skip the dry-fit, or cut a beam short and trust caulk to hide the gap, and you’ll regret it. A gap under 1/8 inch disappears into caulk and shadow; a gap over 1/4 inch reads as unfinished from a seated diner’s eye line, and there’s no fixing it short of pulling the beam — which, once glued, usually means destroying it. Cut long, dry-fit, shave in tiny increments. Ten extra minutes here is the cheapest insurance in the project.
Staining, Painting and Finishing the Beams
Finish decisions happen before install, not after — painting a beam overhead with a brush is slow, drippy work. The first call is paint-grade versus stain-grade.
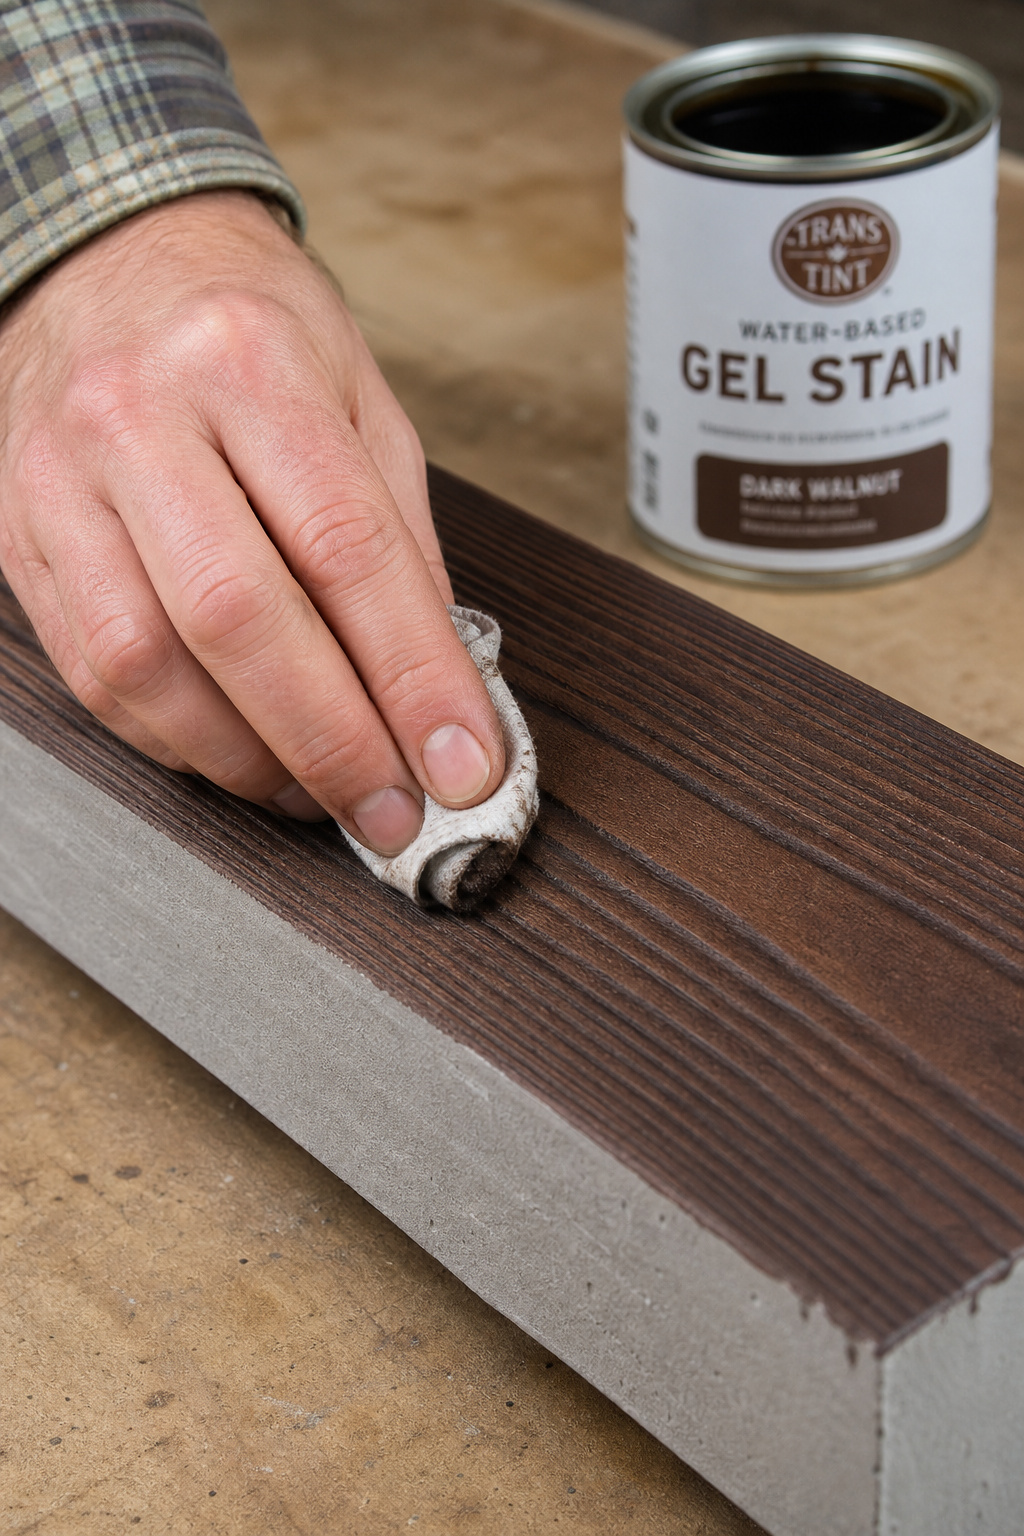
Paint-grade polyurethane is smooth, for white-on-white or ceiling-matched looks where the form is the point. Stain-grade has moulded grain that takes water-based gel stain and reads as genuine timber from the floor. For staining, prime in a wood tone, brush on the gel stain, then pull a rag across the grain — it settles into the moulded texture and the excess lifts off, giving instant depth. For painting, water-based latex only, in eggshell or satin; high-gloss reflects ceiling light and reads as plastic.
Matching the beam to the ceiling colour reads as refined architectural form. Dark stain on a white ceiling is the dramatic, farmhouse-leaning move, and off-white walls push back against that weight nicely. Either way, order one unfinished sample and finish it before committing to the full set — what looks right on the ground shifts under the dining room’s own light. After install, touch up the caulk and screw-fill with a small artist’s brush, and spec the colour-matched textured caulk — white caulk on a dark beam shows no matter how you paint it.
Hanging a Light Among the Beams
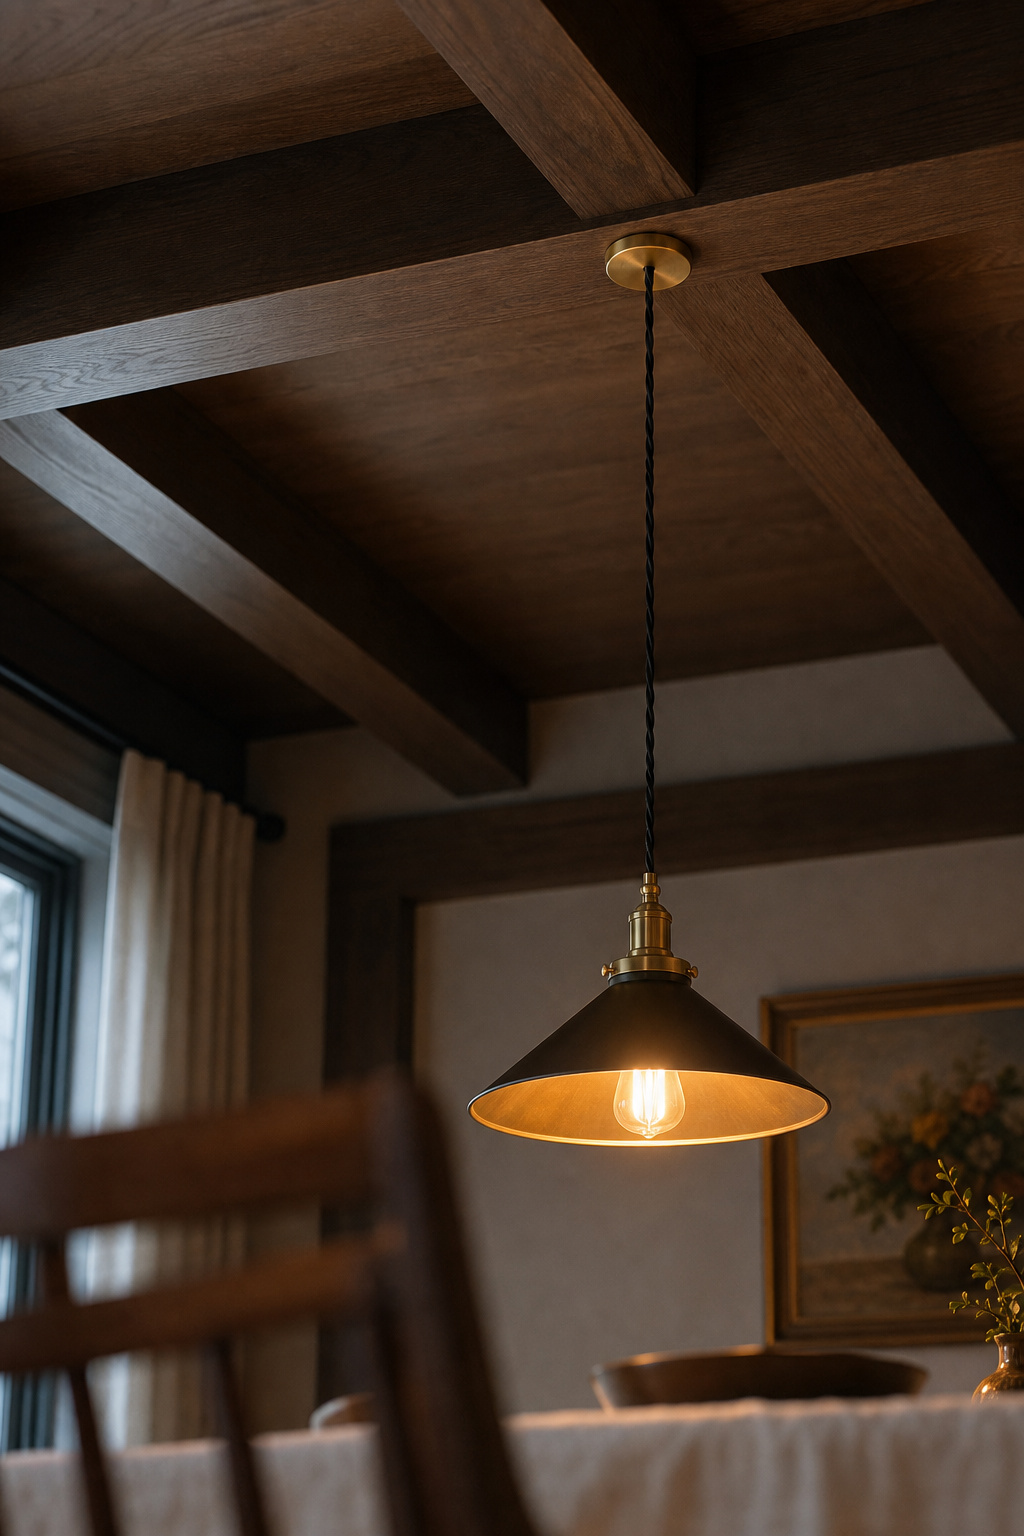
The question I field most about beamed ceilings has a hard safety-rule answer: never hang a fixture from a faux beam. It is not load-bearing, and the foam will not hold machine screws under a swinging load. The fixture mounts to the ceiling joist; the beam just hides the hole.
A pendant or chandelier works between beam runs when its canopy equals or exceeds the beam face width — a 4-inch canopy on a 5-inch beam creates an awkward gap around the mount. A linear bar pendant parallel to the beams echoes their geometry without competing. The method: mount the electrical box and hardware to the joist before the beam goes up, drill the beam with a hole saw (foam cuts in minutes), slide it over the nailers, and feed the cord through so the canopy seats flush. The shortcut that fails is screwing the canopy straight into the foam — it’ll pull free eventually.
If your ideal centre point lands under a beam, mount slightly off-centre between beams rather than redoing the layout — nudging spacing 2 to 3 inches at the tape stage is free, while relocating an electrical box runs $100 to $300. For the full picture on fixture size and hanging height, see hanging a fixture among beams.
Your First Saturday: Getting Started This Weekend
Here’s your concrete first move, and it takes twenty minutes with a tape measure. Two numbers do all the planning.
Measurement one: room width in the direction the beams will span — the short span. Measure at three points and use the longest; that’s your beam length plus 3 inches for trimming. Measurement two: ceiling height, which sets beam size (8 to 9 ft = 4 to 6 in wide; 9 to 10 ft = 5 to 6 in; 10 ft+ = 6 to 8 in). Drop both into a manufacturer’s online visualiser to lock spacing and count before you order — faux beams ship cut-to-order and are usually non-returnable once cut.
For sourcing, the specialist online suppliers carry the widest finish and size range and run sample programmes — order at least one sample, since the cost is typically credited against your order. For quick local pickup, big-box stores stock standard beams in 8 and 12-foot lengths, narrower in range but fine for a test run. Building pine box beams instead? 1×6 and 1×8 boards run $80 to $150 for a three-beam room, but you’ll want a track or table saw to keep them straight.
Real talk on cost and time: materials $250 to $600, tools $100 to $300 if you own nothing — so $350 to $900 all-in DIY against $1,500 to $2,500 for a pro. That labour saving buys the tools with change left over. Time is two full days plus a touch-up evening, and budget for the one extra hardware-store trip — after the dry-fit almost everyone wants one more box of caulk or longer screws. To see where beams sit among all the dining room ceiling options, the pillar guide lays out the full menu.
FAQ
How much do faux wood ceiling beams cost to install?
Professional installation runs $1,500 to $4,000 for a typical room of three to five beams, at $15 to $35 per linear foot for material and labour combined, averaging around $3,000. DIY drops that sharply: beam material runs $15 to $25 per linear foot, plus $100 to $300 for tools — landing a three-beam project at $350 to $900 total.
Can faux ceiling beams support a light fixture?
No — faux beams are not load-bearing and cannot hold a fixture. Mount the light to the ceiling joist above the beam using a proper electrical box, then feed the chain, rod, or cord through a hole cut in the beam with a hole saw. The canopy plate sits flush against the beam face, creating the illusion the fixture hangs from timber.
Which direction should ceiling beams run in a dining room?
Beams should run across the shortest span of the room. That’s structurally realistic, since a real beam spans the shorter distance, and it draws the eye across the room’s width to make a rectangular dining room feel wider. Running beams down the long axis elongates the space into a tunnel — particularly unpleasant from a seated diner’s eye line.