

A washer rough-in looks like a wall full of pipe you’re not allowed to question. Once you know four numbers and one hard rule, it becomes a checklist. The laundry room plumbing requirements behind a second-floor install follow the same physics as a basement install (water in, water out, exhaust out), but upstairs every one of those numbers matters more, because a mistake does not pool on a slab. It shows up as a water stain in the room below.
TL;DR
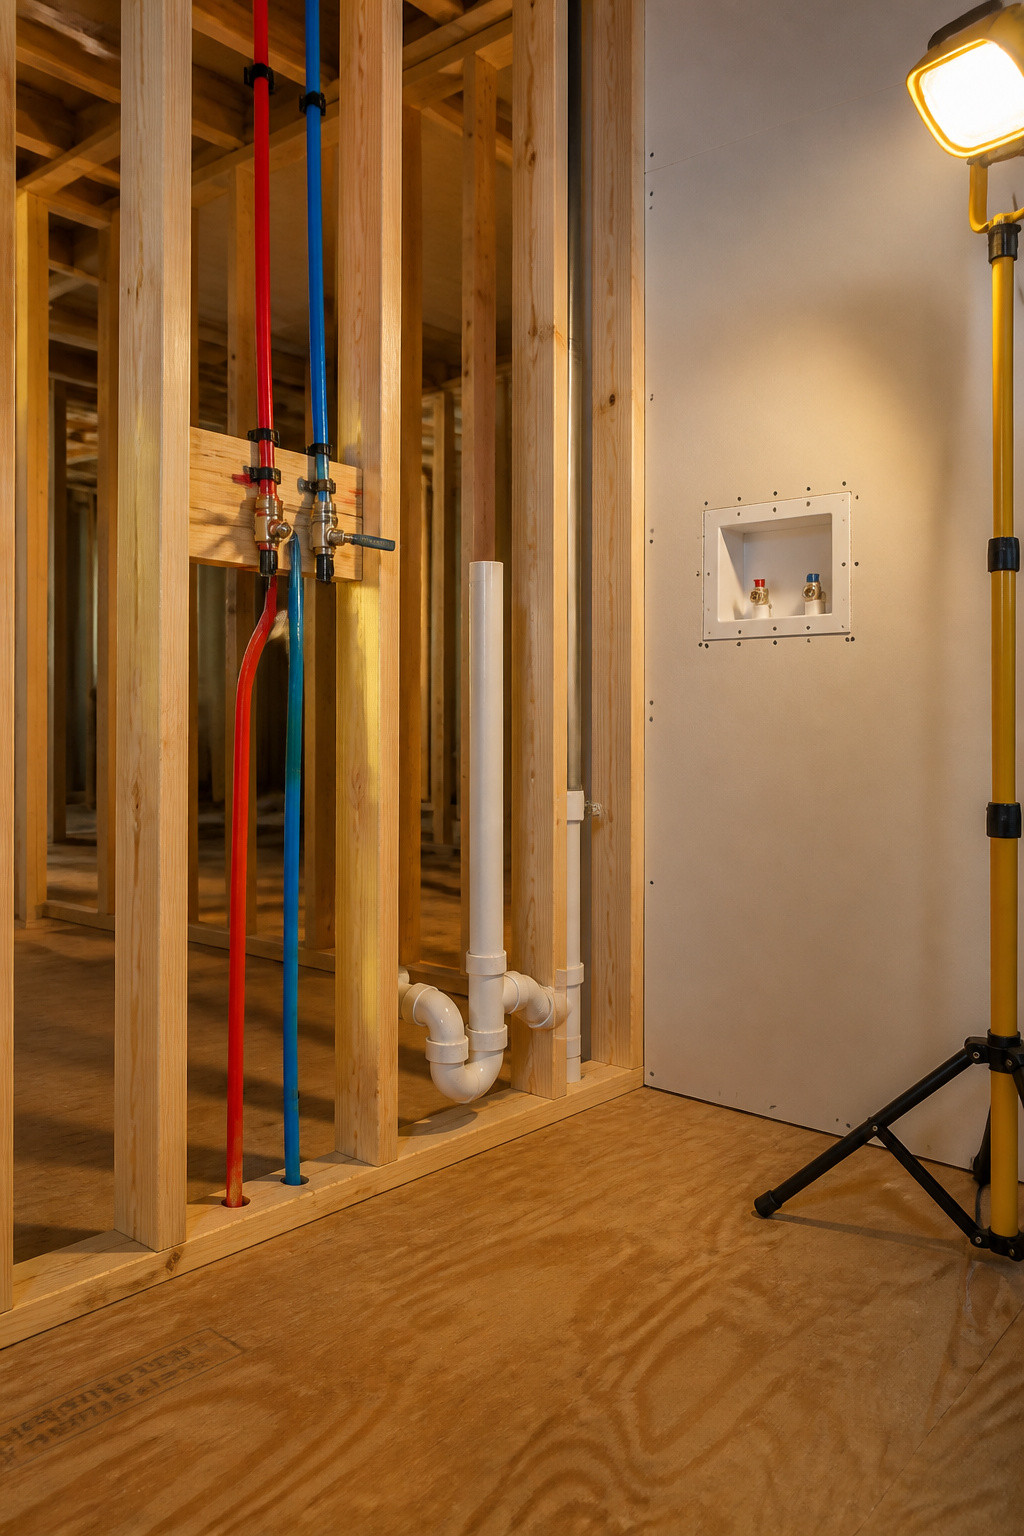
- Supply lines are 1/2-inch hot and cold, stubbed at about 48 inches with quarter-turn ball valves; PEX runs roughly one-third the material cost of copper at $0.50-$2.00 per foot versus $2-$8 for copper.
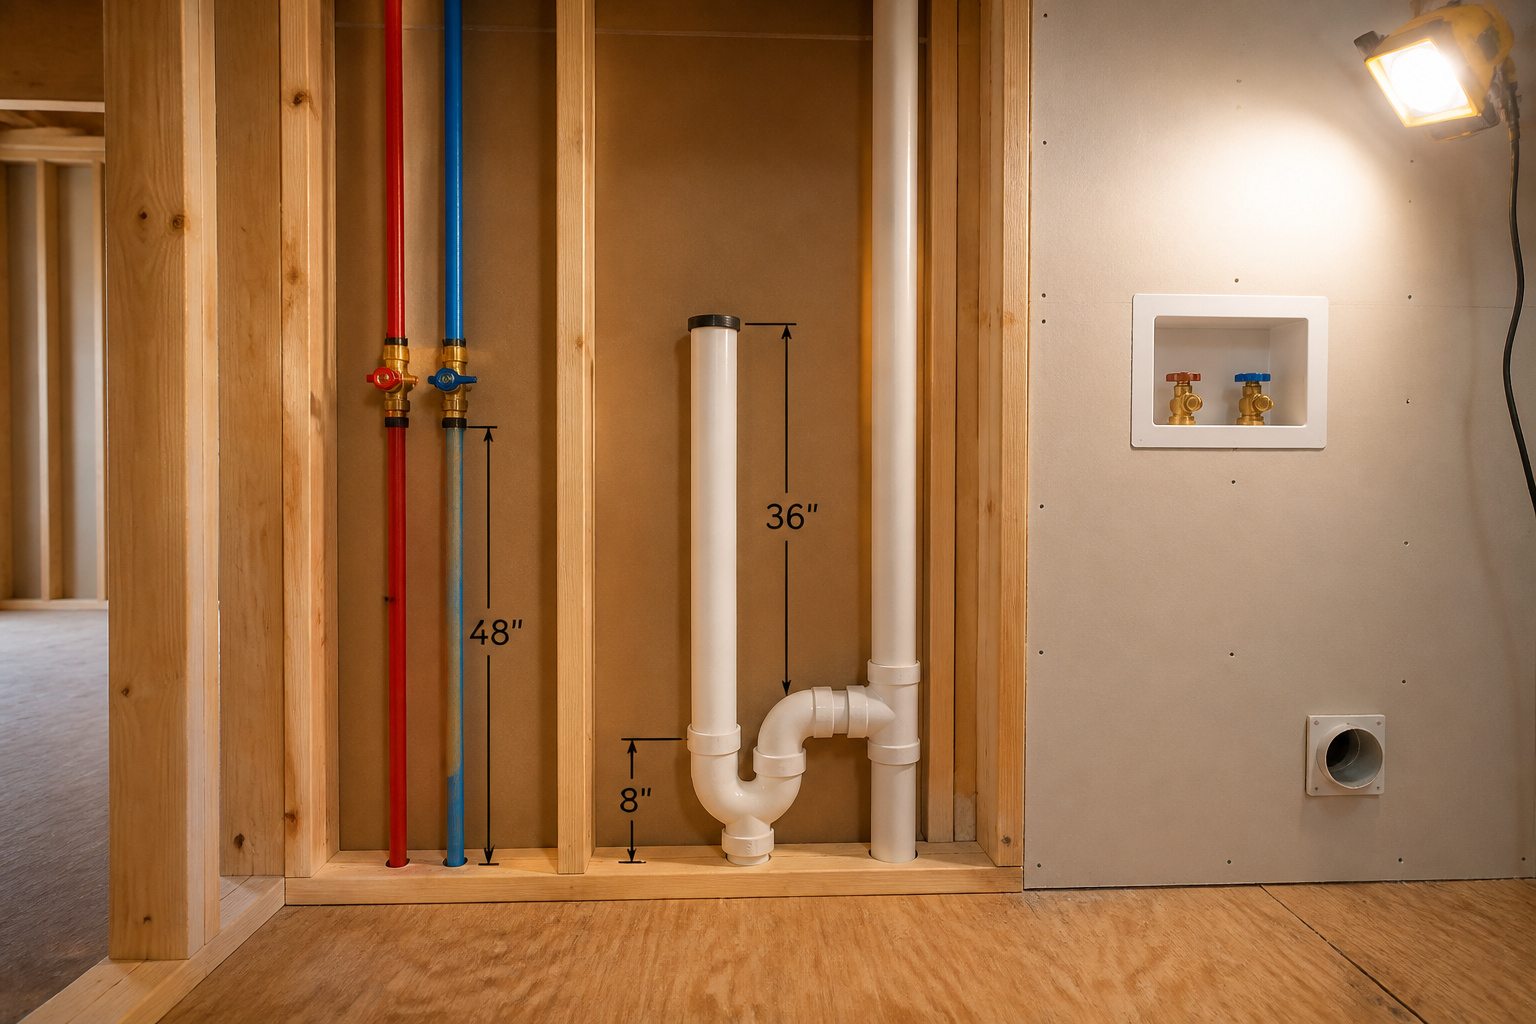
- The drain needs a 2-inch standpipe set 18-42 inches above the trap weir (aim for 36-42) on a vented P-trap. Set it too low and a spin-cycle discharge overflows the floor.
- Dryer exhaust must exit outdoors through rigid metal duct, never into an attic; new supply, drain, or vent work means a permit and, in most places, a licensed plumber.
Cutting into the drain stack or the vent network crosses into licensed-pro territory in nearly every jurisdiction, so I’ll be clear throughout about which line is yours and which is the plumber’s. This article covers the mechanicals: water, drain, vent, and circuits. For the project scope and budget around them, see converting a closet into a laundry room; for the broader picture, see our upstairs laundry room ideas and planning guide.
Hot and cold supply lines: the laundry room plumbing requirements that start the job
Supply is the easy half. Both lines are 1/2-inch hot and cold branches, and the only real decisions are where you tap them and what you run them in.
Tapping off an existing bathroom line vs running new supply from the main
The cheap route is to tie into an existing 3/4-inch branch near a hall bath or above the kitchen, then reduce to 1/2-inch at the stub-out. That keeps the new run to 5-15 feet instead of a full pull from the basement main. Patrick A. Finn, a Chicago-area design-build contractor, frames siting the same way: put the room near existing plumbing, because short runs mean less pipe that can fail. If no nearby branch has the pressure capacity, the code-correct fallback is new pipe from the main. Slower and pricier, but sometimes the only honest answer.
One placement rule that catches people: keep supply out of exterior walls. Code allows it only if the pipe is insulated or heat-traced against freezing, so an interior wall next to a bath stack is the better routing for two reasons at once.
Pipe diameter, material choice (copper vs PEX) and what each costs
PEX has taken over retrofit work because of its flexibility. You can snake it through finished framing with small access cuts instead of opening the whole wall the way copper’s straight runs and elbows demand. Cost spread below: these are 2025-2026 national averages, so treat them as ranges and get local quotes before you budget hard.
| Material | Cost per foot (materials) | DIY-able? | Lifespan |
|---|---|---|---|
| PEX | $0.50-$2.00 | Yes, with a crimp tool | 25-50 years |
| Copper | $2-$8 | Soldering skill needed | 50-70 years |
Both are code-accepted under the IRC and IPC, so this is a real choice, not a compromise. Copper lasts longer and PEX installs in roughly half the time. For an upstairs retrofit where you’re working around existing framing, PEX usually wins on cost and on how little wall you have to demolish.
Shut-off valves at the machine: code minimum and why you want more
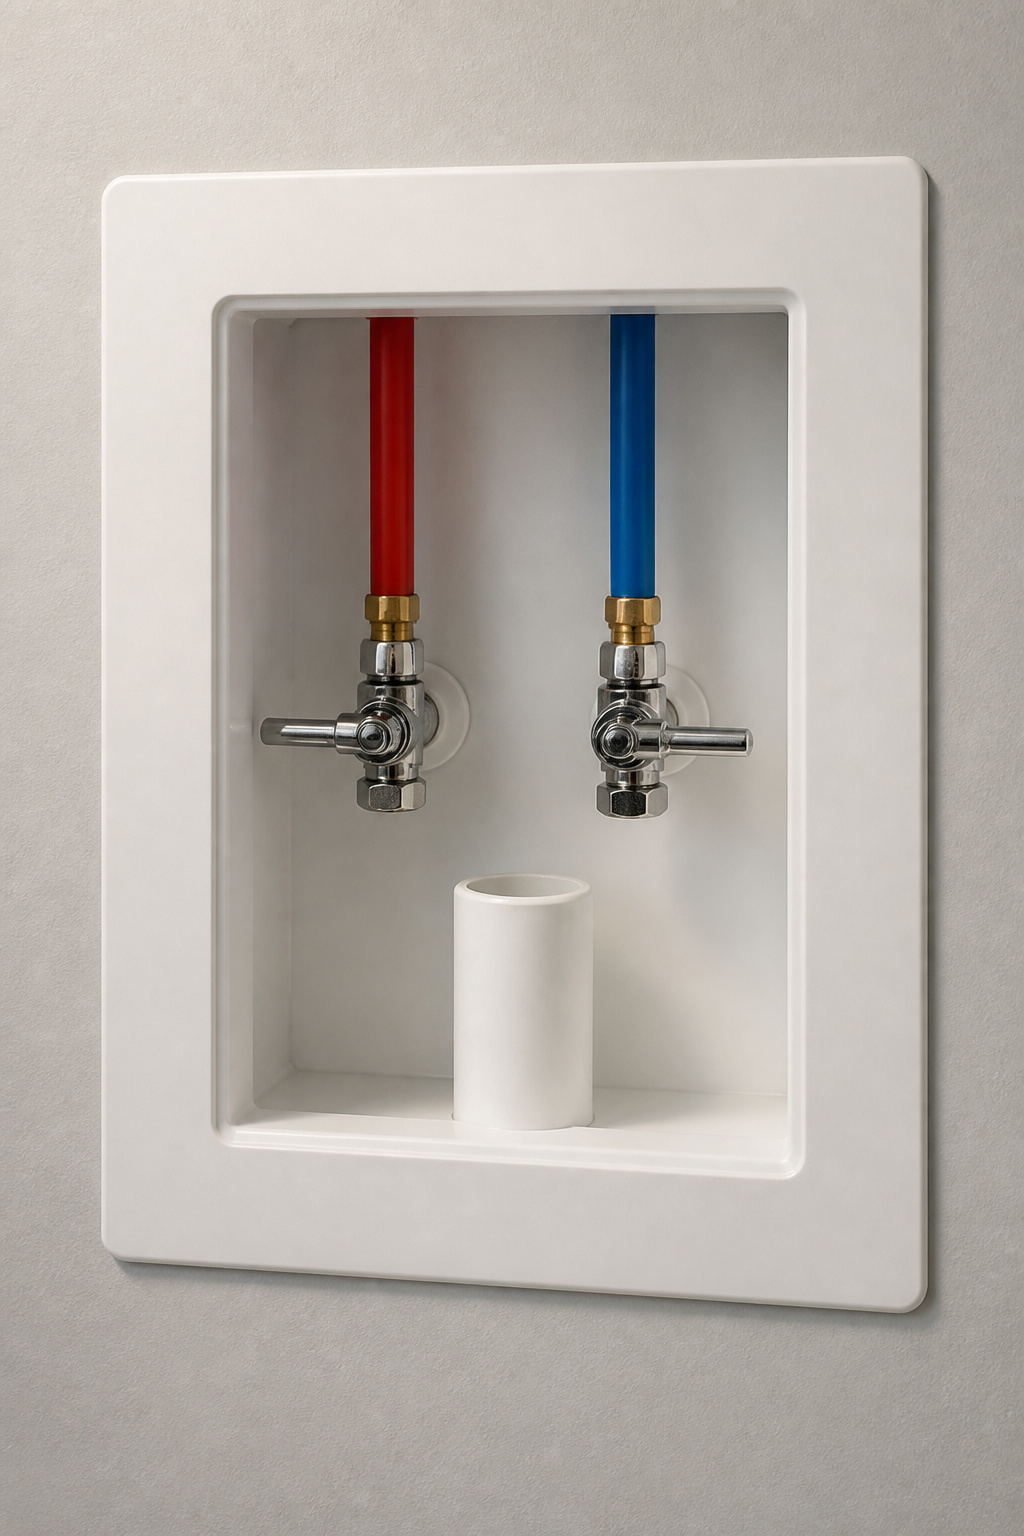
Code only requires a shutoff somewhere on each supply line. For an upstairs laundry, “somewhere” is not good enough. If a hose lets go at 2 a.m., you need a valve you can reach in seconds, not one buried down the hall. Install individual single-lever quarter-turn ball valves for hot and cold, in a recessed washer box behind the machine at about 48 inches up. Ball valves close in a quarter-turn; the older multi-turn angle valves seize after years of disuse and won’t shut when you finally need them. Fine Homebuilding calls the recessed washer box the cleanest solution here: supply, valves, and standpipe in one accessible spot the inspector can see and you can reach.
The standpipe and P-trap: drain basics that can’t be skipped
This is where DIY rough-ins go wrong, because the drain is not a hose pushed into a hole. It is an indirect-waste setup with two heights that both have to be right.
What a standpipe is and why the 2-inch minimum exists
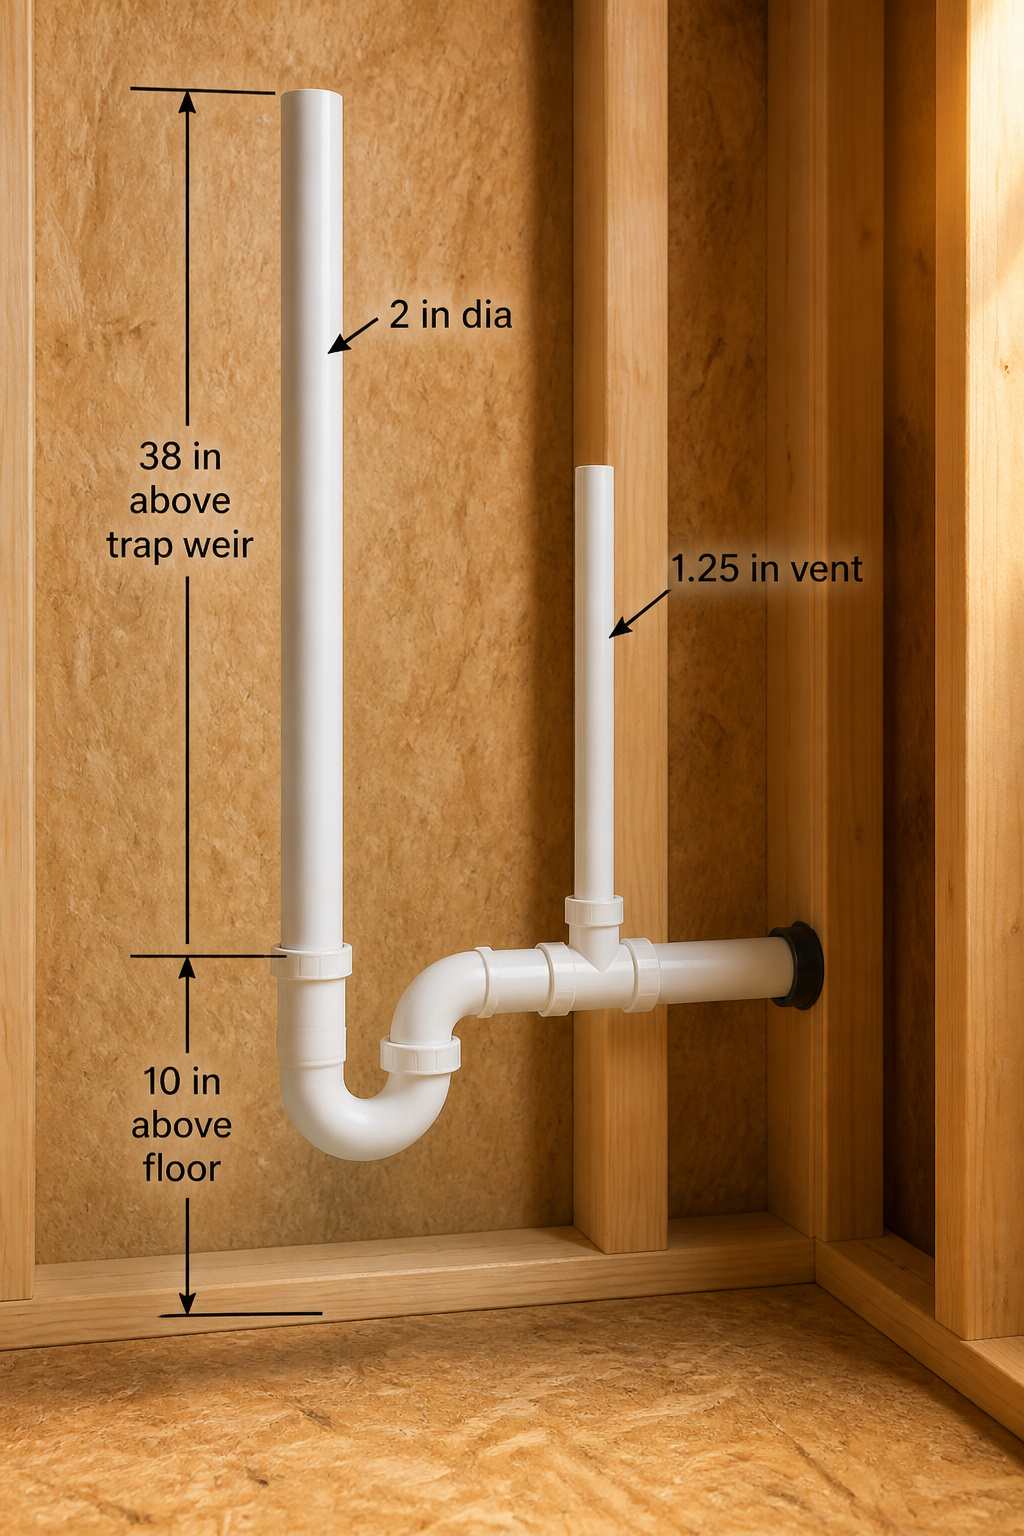
A standpipe is the vertical pipe the washer’s drain hose drops into. The hose is not sealed to it; that open drop is a required air gap, so dirty drain water can’t siphon back into the machine. The IPC (Section 406.1) and IRC (P2706.1.2) both set the minimum diameter at 2 inches, and the reason is flow: a modern washer pumps 15-25 gallons per minute on the spin cycle, and a 1.5-inch pipe can’t pass that without backing up. If your rough-in shows a 1.5-inch drain, it gets upsized before a machine connects to it.
There’s a framing catch worth knowing before you open a wall. A 2-inch drain has to run vertically in a 2×4 stud bay, because a 2×4 can only be notched to about 2-3/32 inches, which is barely enough. Fine Homebuilding flags this as the most overlooked structural issue in upstairs laundries: if the drain needs to run horizontally, you want a 2×6 wall.
Standpipe height: the code range and why too-low causes overflow
Two measurements, both from IPC 802.4.3:
| Element | Code requirement | Practical target |
|---|---|---|
| Standpipe height above trap weir | 18-42 inches | 36-42 inches |
| Trap weir above finished floor | 6-18 inches | Within code range (6-18 in) |
Aim high in the standpipe range. At 36-42 inches the opening sits above the drum’s flood rim on virtually every residential machine, so a high-volume discharge can’t back up and spill. Set the standpipe under 18 inches and you’ve built the single most common rough-in failure: the machine fills the pipe faster than it drains, water overflows the top, and on a second floor that water goes straight through the ceiling below. The trap weir matters too. Too low and the horizontal drain arm can’t hold its required 1/4-inch-per-foot slope to the stack.
The vented P-trap requirement and what happens without it
The P-trap holds a small water seal that blocks sewer gas. A washer’s high-flow discharge pulls negative pressure in the line, and without a vent that pressure siphons the seal dry, then sewer gas comes up through the drain. So the trap has to be vented. The standard fix is a 1-1/4-inch vent pipe rising vertically off the drain arm, connecting within 5 feet of the trap weir.
Where a conventional vent run is long or awkward, an air admittance valve (AAV) can sometimes substitute. It opens to admit air on negative pressure, then closes against gas. However, some jurisdictions ban AAVs outright, so verify with your local building department before you spec one. If you do use an AAV, it must stay accessible; one buried behind finished drywall can never be replaced when it fails.
Dryer venting upstairs: the one rule that overrides everything else
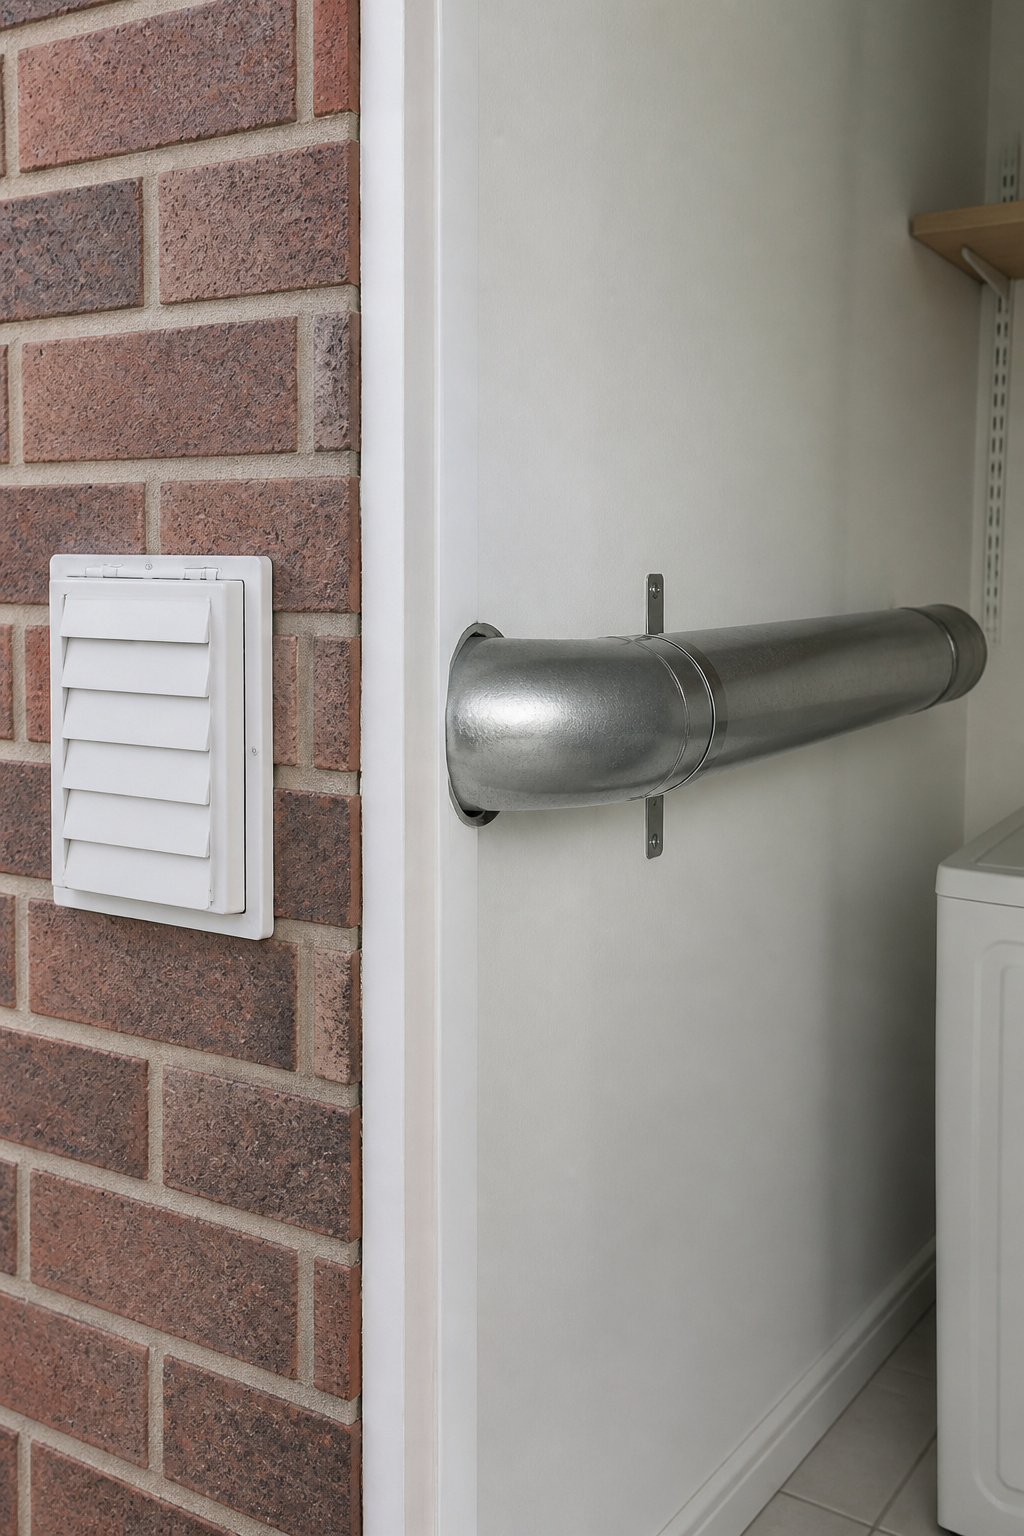
Everything in this section bends to a single rule: the exhaust goes outside. Not the attic, not a wall cavity, not the soffit. Outside.
Why dryer exhaust must exit outdoors, never into an attic or wall cavity
IRC M1502.3 requires the duct to terminate outdoors, full stop. Venting into an attic or wall cavity is explicitly prohibited, and the reason is fire and rot: dryer exhaust carries lint, which is highly flammable, plus humid air. Dump that into an enclosed space and the lint builds into a fire hazard while the moisture rots framing. For a second-floor laundry, the temptation is to run straight up and out the roof through the attic. Don’t. The exterior-wall exit is always the cleaner, inspectable route. Terminate it with a backdraft damper, and never a screen; screens catch lint and become the hazard.
Rigid metal vs flexible duct: code says rigid, and here’s why
IRC M1502.4 requires the main run to be rigid smooth-metal duct, minimum 4-inch diameter. Smooth interior walls are the point: ribbed metal and flexible vinyl trap lint in every ridge. InterNACHI, the home-inspector body, is blunt: “Flexible, ribbed vents should no longer be used and should be noted as a potential fire hazard.” Inspectors flag flex duct as a safety defect, not a style note. The one exception is the transition duct: the short flexible-metal (never vinyl) connection from the dryer to the wall box, capped at 8 feet and never concealed in the wall.
Maximum run length and how to calculate yours
The code ceiling is a 35-foot equivalent length for 4-inch rigid duct, but that’s equivalent length, not straight-line distance, so fittings count against it. The math:
- Start with 35 feet.
- Subtract 5 feet for every 90-degree elbow.
- Subtract 2.5 feet for every 45-degree elbow (or just 1.5 feet for a long-sweep elbow).
- The remainder is your maximum straight-pipe length.
So a run with two 90-degree elbows leaves you 25 feet of straight pipe (35 − 10). Then check the dryer’s own manual. Many manufacturers spec 25 feet, tighter than code, and you use whichever number is lower. The good news upstairs: a laundry near an exterior wall is often the easiest vent in the house, a clean 6-10-foot straight run, while a basement set has to travel up and across.
Where DIY ends and the licensed plumber begins
This part does not pin to a single rule, so I’ll give you the principle instead of a false promise. Most U.S. jurisdictions let a homeowner do plumbing on their own primary residence, but “allowed” and “advisable” aren’t the same standard, and the rules genuinely vary by state and town. The reliable line: if you’re adding something that wasn’t there (a new supply tap, a new drain opening into the stack, a new vent), it needs a permit and, in most places, a licensed plumber. Verify your specifics with the local building department before you start.
Tasks a skilled DIYer can usually do legally:
- Connect the washer to existing stub-outs: hooking supply hoses on and dropping the drain hose into an existing standpipe is an appliance hookup, not plumbing. No permit anywhere.
- Install a recessed washer box onto rough-in that’s already there.
- Run rigid metal dryer duct from an existing wall box to the exterior termination.
Where you need a licensed pro:
- Tapping a new supply branch into existing copper or PEX.
- Opening the drain-waste-vent stack to add a sanitary tee for the standpipe. Get this wrong and the whole house gets slow drains, gurgling, and sewer gas.
- Adding or altering vent pipe that ties into the main stack.
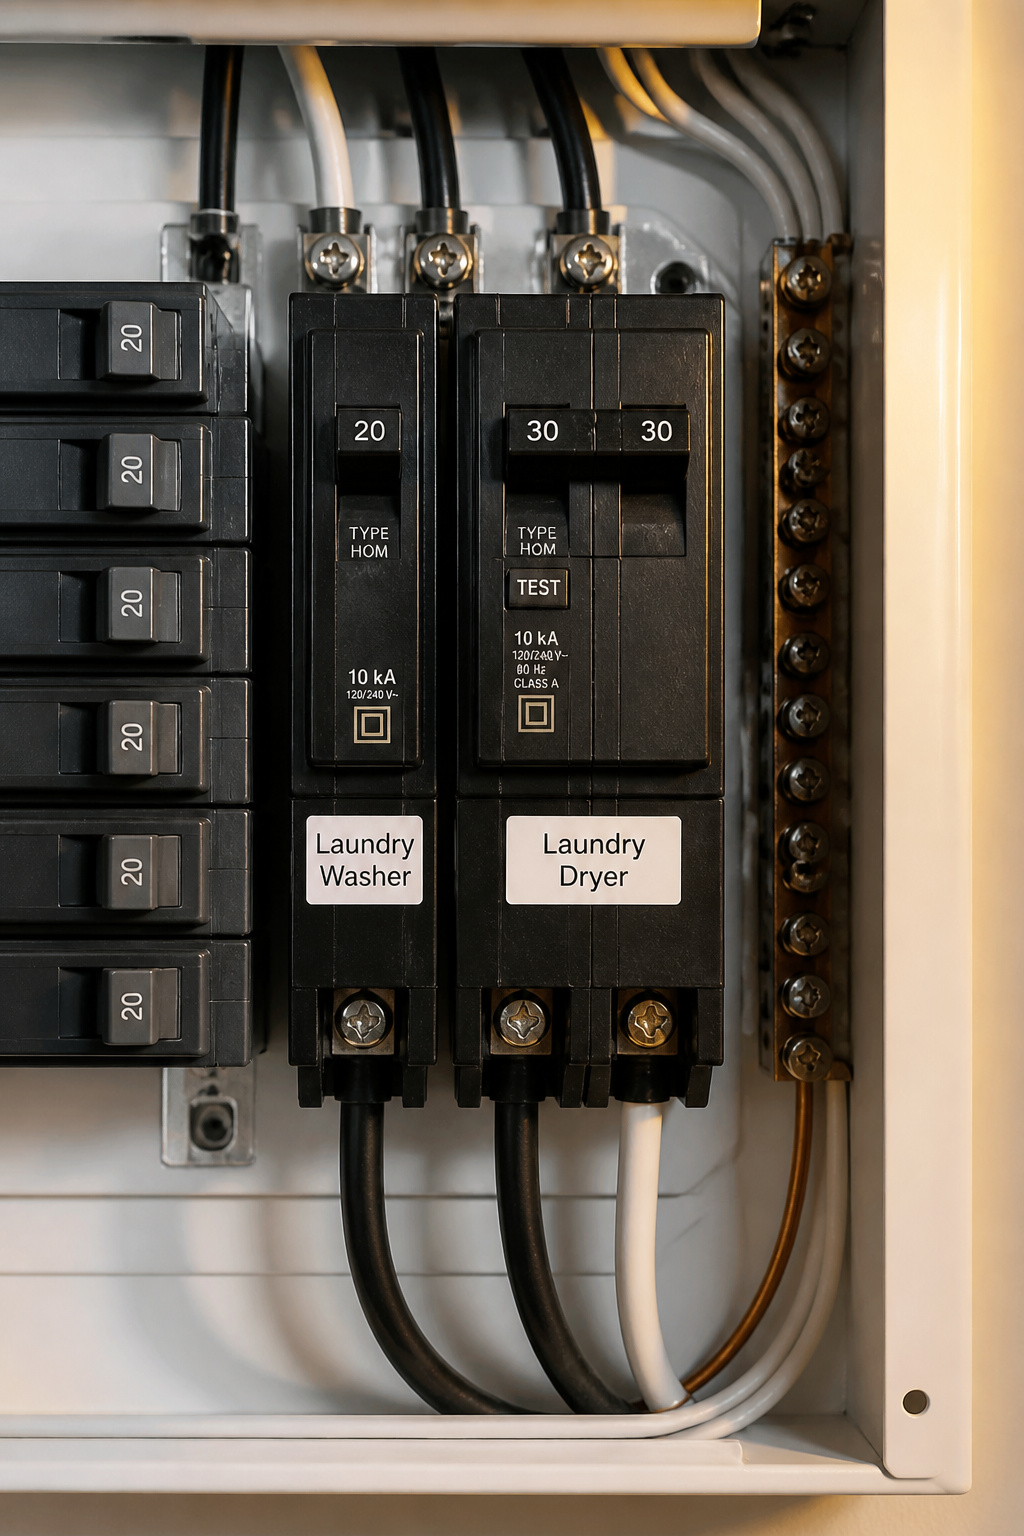
- New 120V washer and 240V dryer circuits: an electrician’s job, and the 240V dryer circuit has needed GFCI protection since NEC 2020 (a 2-pole 30A GFCI breaker). Family Handyman notes this recent change catches a lot of people off guard; an inspector will check for it.
When you hire, three questions sort the good plumbers from the rest. Ask who pulls the permit and schedules the rough-in inspection. A reputable plumber pulls their own; passing that to you is a flag. Ask whether your existing stack (usually 3 inches) can take the new washer tee or needs upsizing. And ask about the AAV option if your vent run is long. If they dismiss it without checking local code, get a second opinion. Because flood protection gets designed into this same rough-in, plan to build in flood prevention while the wall is still open.
Permits and inspections: the step most DIYers skip
I treat the permit as non-negotiable, and the math is the reason: it always costs less than the skip.
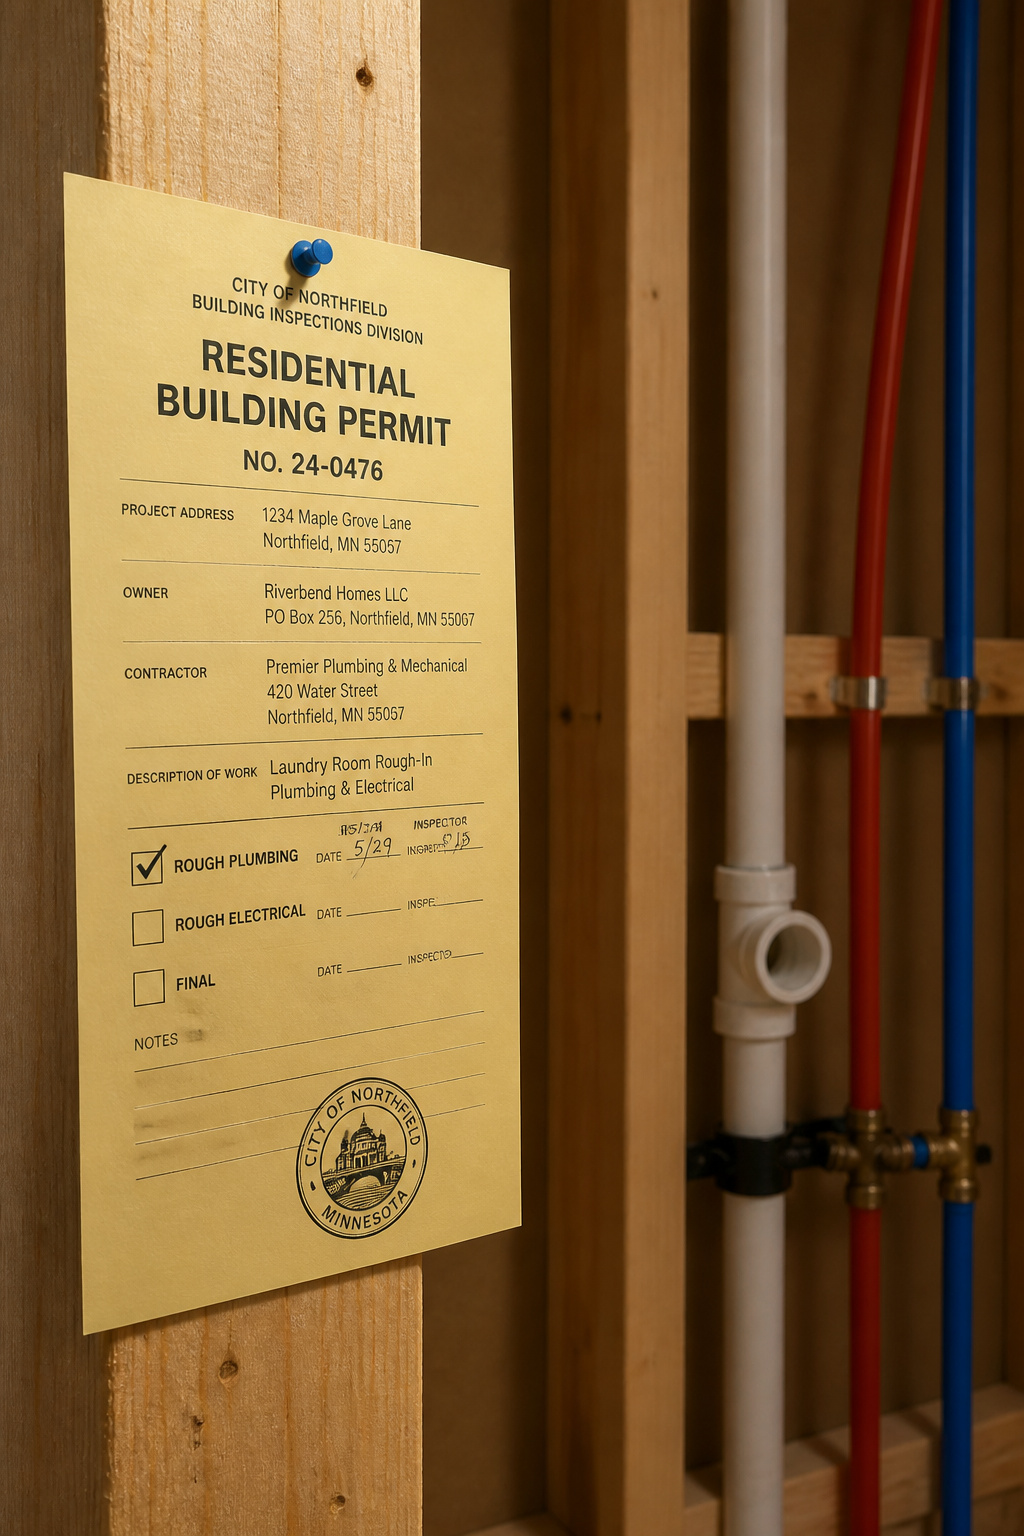
New laundry plumbing almost always triggers a permit, because it bundles new drain connections, new supply branches, and new circuits, and moving or extending any of those requires one in virtually every U.S. jurisdiction. The two electrical circuits usually need their own permit, though most municipalities issue plumbing and electrical together. The whole thing typically runs $50-$300, with most laundry jobs in the lower half of that range.
What you’re actually buying is the rough-in inspection: the one independent check, done before the walls close, that the numbers are right. The inspector verifies the standpipe diameter and height, the trap weir height, the vent connection, the supply shutoffs, and the dryer duct material and termination. Pressure-test the supply lines before that visit. Get it signed off and the walls can close with confidence.
Skip it and the cost doesn’t disappear; it moves to resale. A buyer’s inspector flags unpermitted plumbing, and buyers use that to cut their offer, demand corrections, or walk. A retroactive permit usually means opening finished walls to expose the work, which on an upstairs laundry can run past $2,000 in labor alone. Worse, an insurer can deny a water-damage claim if the install wasn’t code-compliant, which is the wrong outcome for a room sitting over your living space. Family Handyman puts the stakes plainly: improve your home without permits and “your insurance company may not help you with the liability.” On a second floor, that’s a compounded risk on the one failure most likely to do real damage. Pull the permit. It’s the cheapest line on the whole job.
FAQ
What size drain pipe does a washing machine need upstairs?
The IPC (Section 406.1) and IRC (P2706.1.2) both require a minimum 2-inch drain and standpipe, upstairs or down. Modern washers discharge 15-25 gallons per minute, which a 1.5-inch pipe can’t handle without backing up. The standpipe should rise 18-42 inches above the trap weir. Target 36-42 inches upstairs to keep an overflow off the floor below.
How far can a dryer vent run on the second floor?
IRC M1502.4 allows a 35-foot maximum equivalent length for 4-inch rigid metal duct. Each 90-degree elbow deducts 5 feet and each 45-degree elbow 2.5 feet, so two 90s leave 25 feet of straight pipe. A second-floor laundry near an exterior wall often needs only a 6-10-foot run. Always check the dryer manufacturer’s spec, which is frequently stricter.
Do I need a permit to add laundry plumbing upstairs?
Yes, in virtually all U.S. jurisdictions. New drain connections to the stack, new supply branches, and new electrical circuits all require a permit. Some states let homeowners pull the permit and do the rough-in themselves, but it must still pass inspection before walls close. Check with your local building department first; permits typically cost $50-$300.
