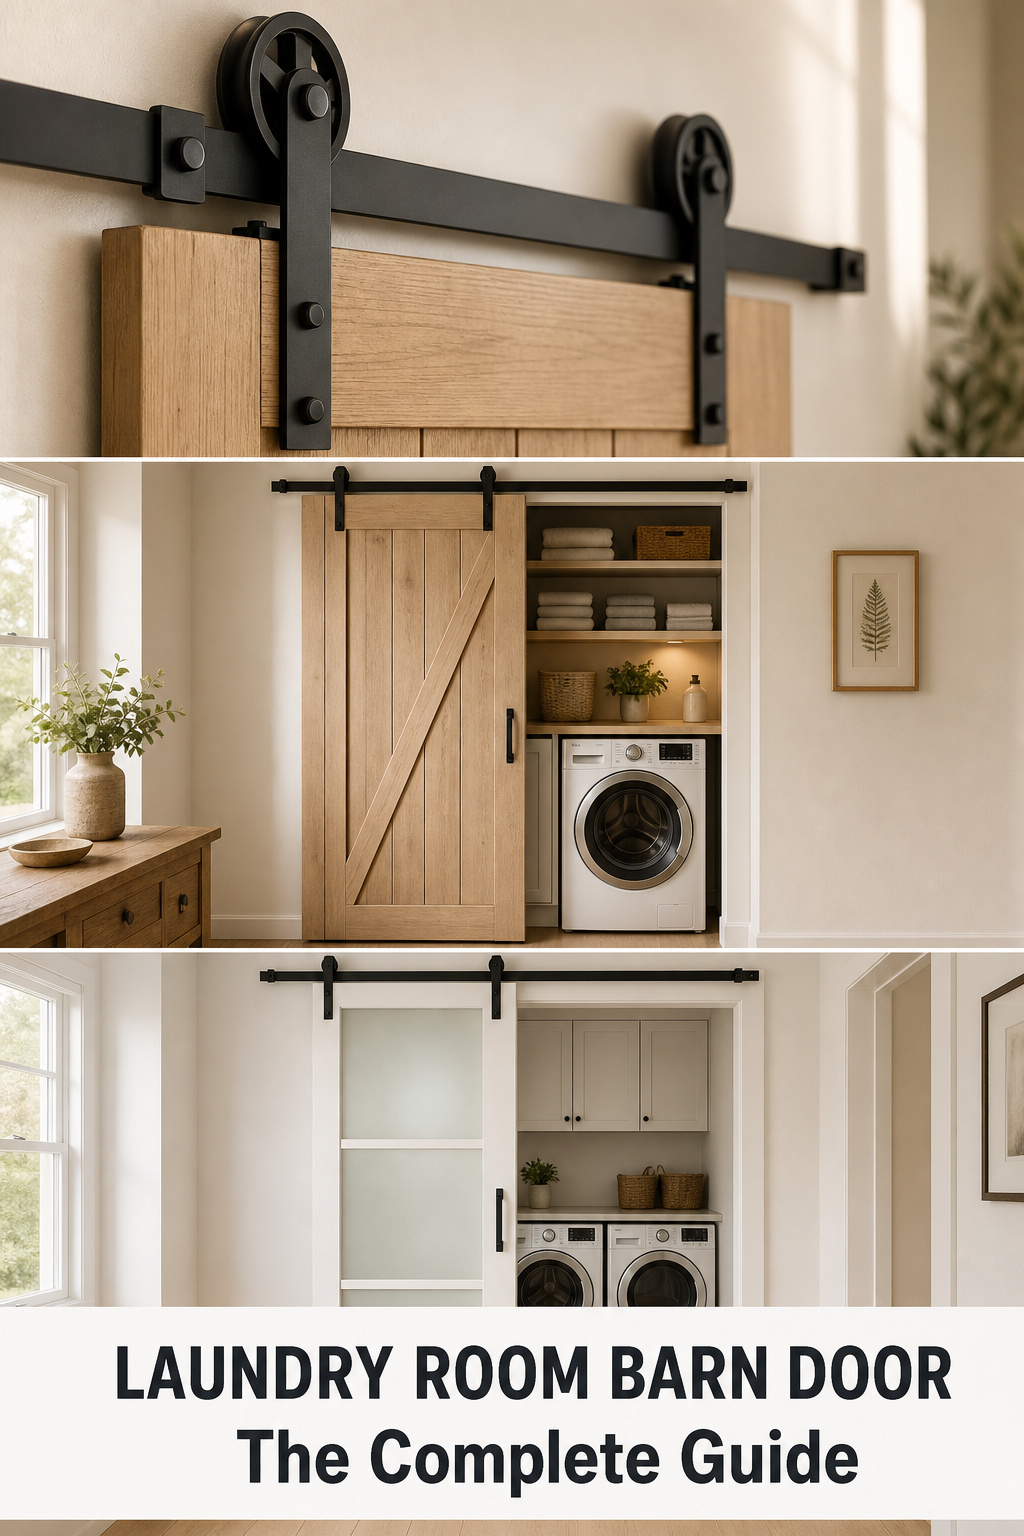
Type “laundry room barn door” into any search bar and you’ll surface a few thousand photos and almost no straight answers. Farmhouse plank, frosted glass, navy flat-panel, louvered, bifold, bypass — every one of them looks great in someone’s finished closet, and none of the pretty pictures tell you which one fits your opening, your wall, or your budget. I’ve hung enough of these to know the order the decisions actually come in, and it isn’t the order Pinterest serves them. So this is the sorted version: what a laundry room barn door is good for, the style and hardware choices that matter, how to size it without ordering the wrong slab, and what the whole thing really costs across three honest budget tiers. Where a decision deserves a full walkthrough, I’ll point you to the chapter and keep moving.
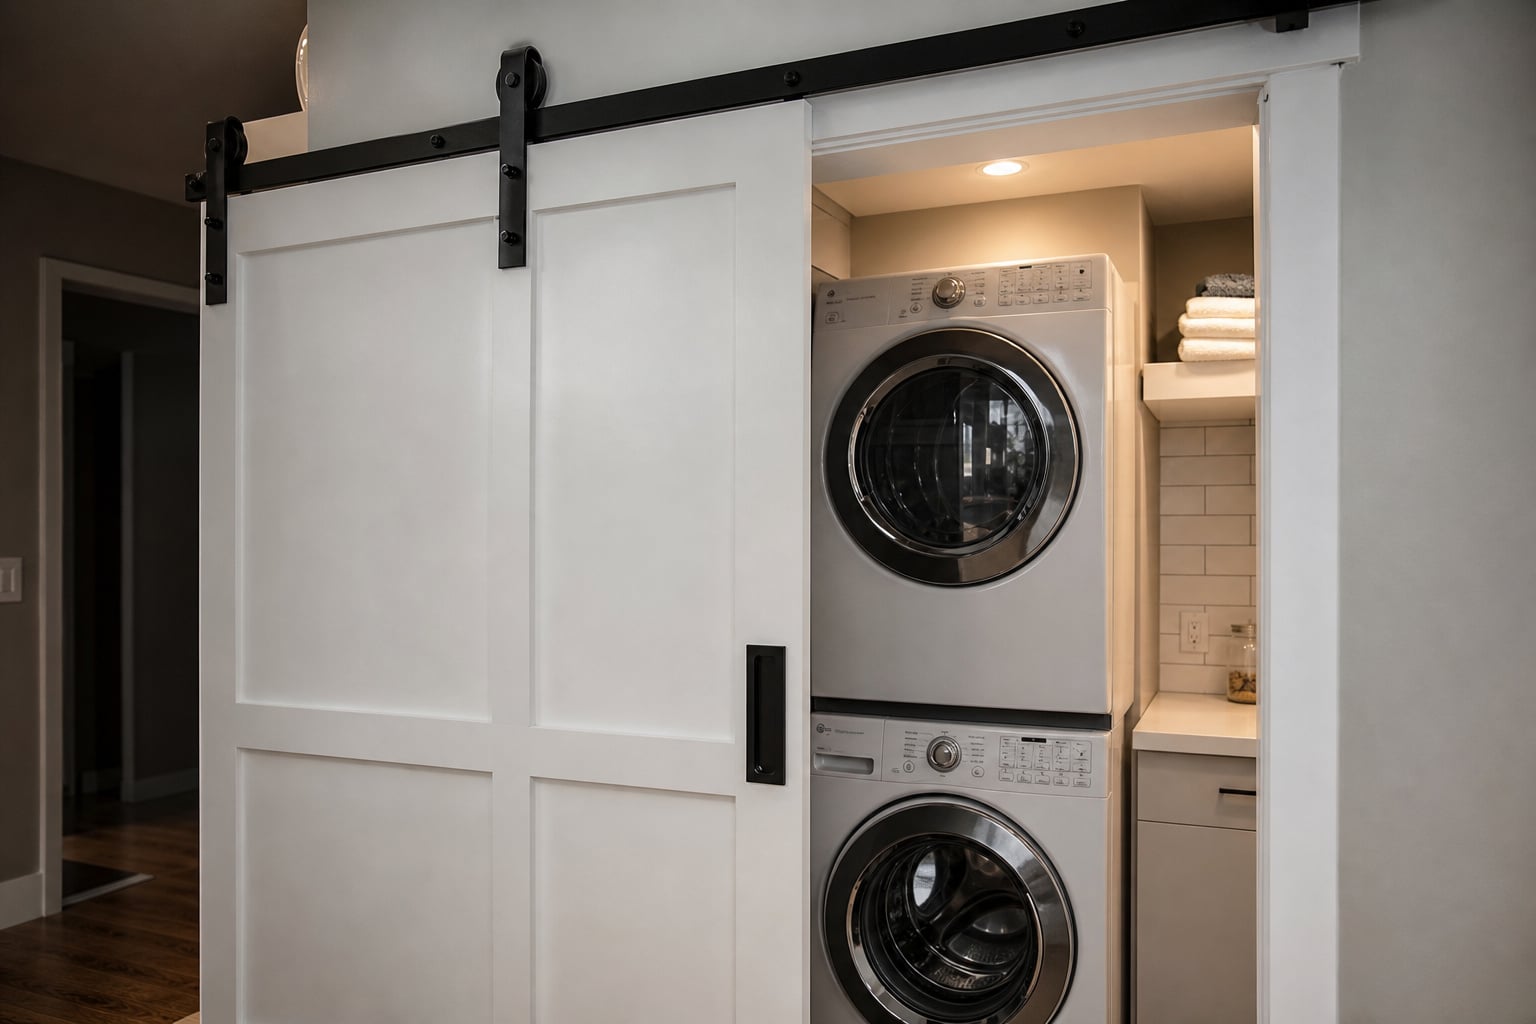
Why a Sliding Barn Door Beats a Swing Door in a Laundry Room
The whole case for a barn door in a laundry room comes down to floor space you’re currently giving to a door that’s open maybe two minutes a day. A hinged door has to swing through an arc of clear floor to function, and in a tight laundry closet that arc is expensive real estate.
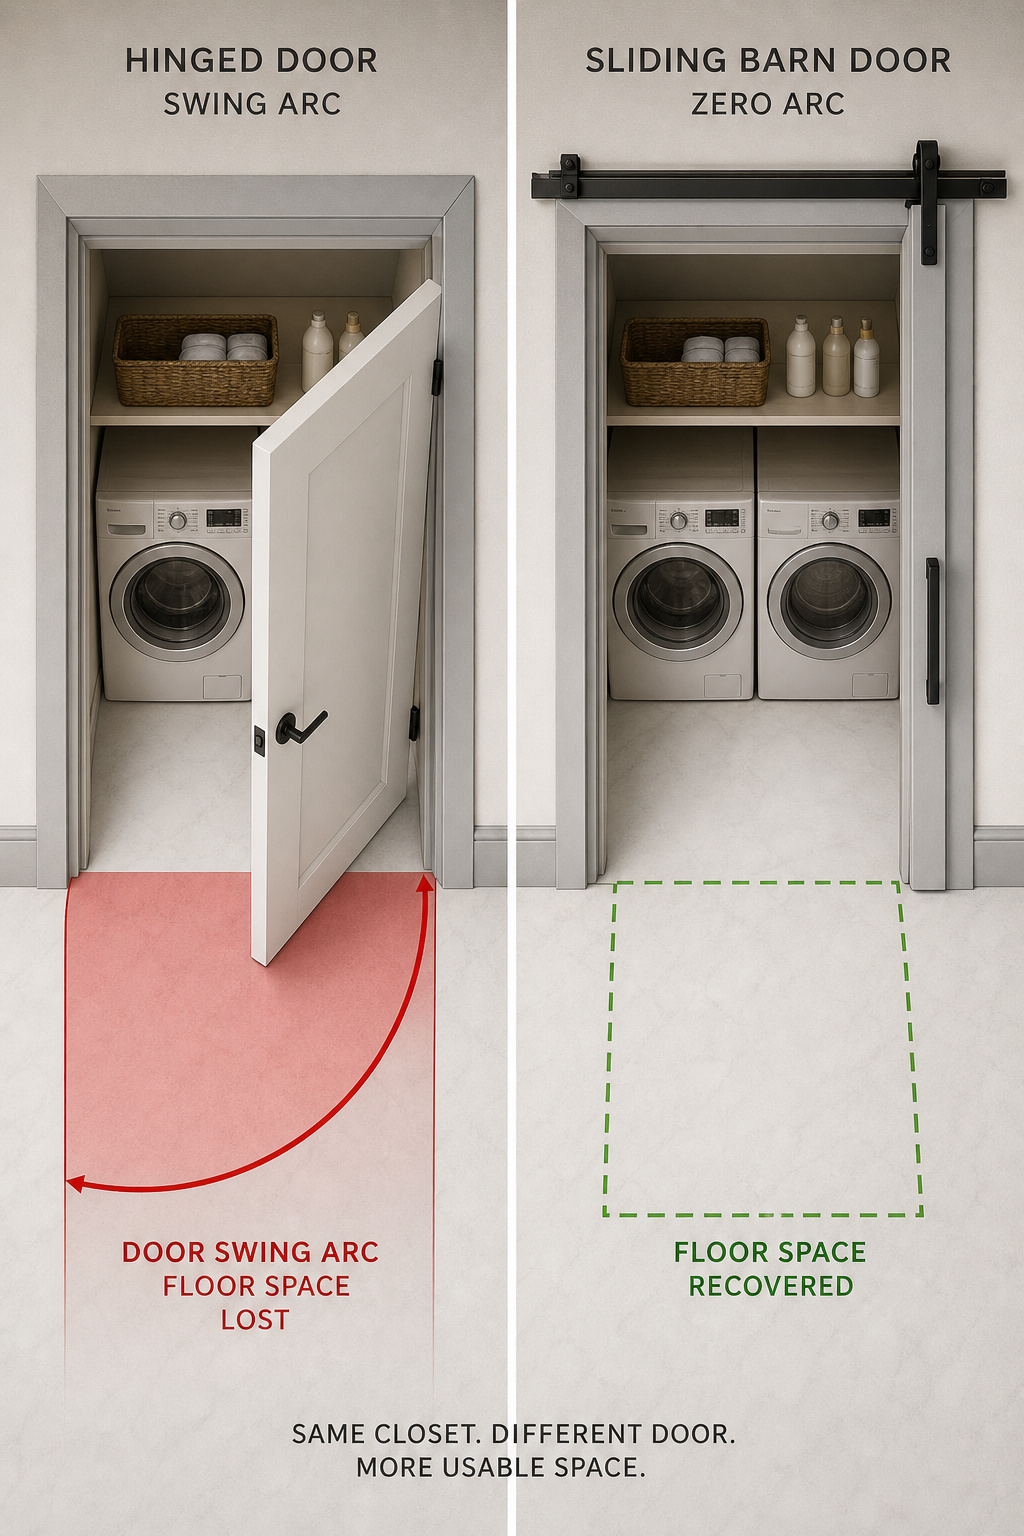
The floor-swing problem in tight laundry closets
A standard 32-inch hinged door swings through an arc that eats 8 to 10 square feet of floor; a 36-inch door takes up to 10 to 14. The average laundry room runs only 50 to 100 square feet, so you’re handing a tenth or more of the room to empty swing space. A sliding barn door sits outside the frame and travels parallel to the wall, so it needs zero swing clearance — the entire opening is usable the moment the door slides clear.
There’s a practical access point too. Laundry doors should give at least 32 inches of clearance so you can actually get the appliances in and out, and a swing door blocks several inches of the frame even when it’s fully open. The National Association of Realtors puts the floor recovered at up to 14 square feet when you swap a swing for a slider — a number that matters a lot more in a closet than in a hallway.
How much usable floor space a slider actually frees
In real terms, a barn door gives back 24 to 36 inches of swing-radius depth — exactly enough footprint for a laundry pedestal, a hamper, or a folding cart that had nowhere to live before. That recovered strip is usually the most useful floor in the room — it’s where you actually stand.
Here’s the honest trade-off, and it’s the one most people skip until the door arrives: a barn door needs clear wall beside the opening equal to the full door width. A 40-inch door on a 36-inch opening needs 40 inches of unobstructed wall to slide fully clear. Measuring the opening but not the wall run is the step that derails more barn door projects than any other — it’s why how to measure your opening comes before falling in love with a particular door.
One quiet bonus: a quality barn door runs nearly silent, and a soft-close add-on kills the hard stop entirely — genuinely nice when you’re starting a load at 11pm.
| Swing door | Barn door | |
|---|---|---|
| Floor clearance needed | 8–14 sq ft swing arc | None |
| Wall space needed | None | Full door width beside opening |
| Usable opening when open | Frame width minus door edge | 100% of opening |
| Install complexity | Hinges, jamb, latch | Track, rollers, floor guide |
When a swing door is still the right call
A barn door isn’t always the answer, and I’d rather say so than sell you one. The door hangs about 3/8 inch off the wall on its hardware, which leaves a perimeter air gap that lets sound and light through. Fine for a utility laundry room; relevant if that closet shares a wall with a bedroom. Barn doors also have no built-in latch, and without an added privacy latch the door can drift open under the vibration of a washer spin cycle.
And if the wall beside the opening carries an electrical panel, an outlet, a window, or a structural corner that blocks the door’s travel, a single slider simply won’t work there. Evan Christensen of The Barn Door Hardware Store puts it plainly: “A barn door is the right choice when you have swing clearance problems that a sliding door solves and adequate wall space beside the opening for the door to travel. If the wall space isn’t there, no amount of hardware selection will fix it.” When that’s your situation, you’re looking at a hinged door or one of the multi-panel options further down.
Barn Door Styles for a Laundry Room: From Farmhouse to Frosted Glass
Four style families cover nearly every laundry room. Each one buys you something and costs you something — privacy, light, ventilation, or money — and choosing well means picking the trade-off you can live with, not the prettiest thumbnail.
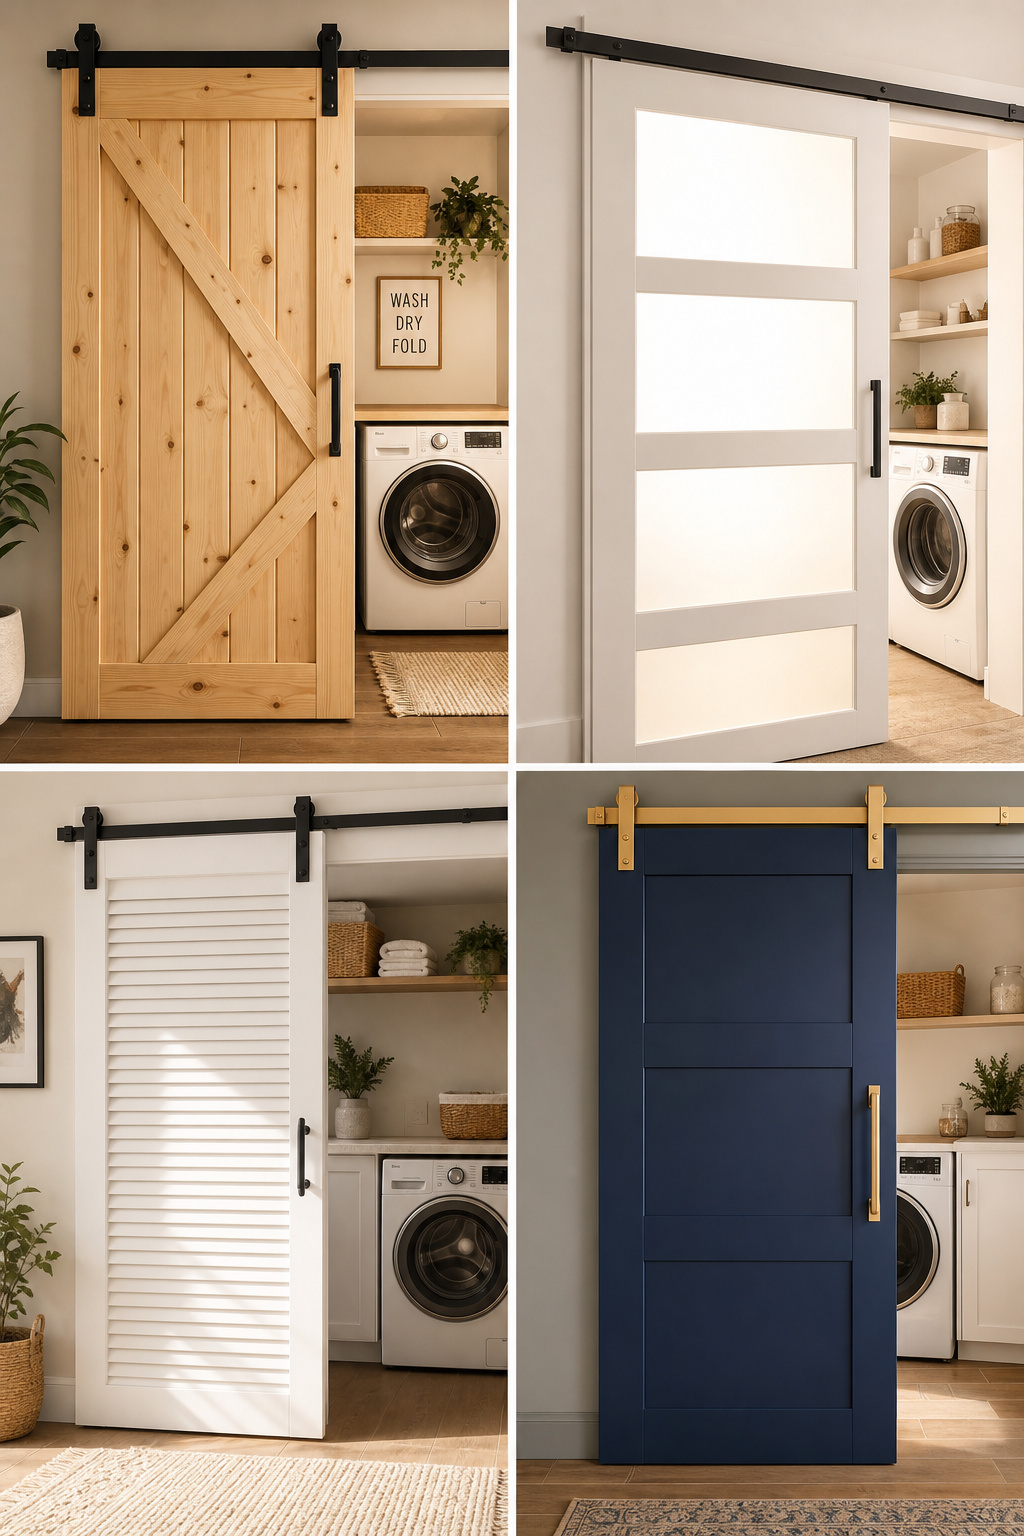
Classic plank-and-batten and shaker panel looks
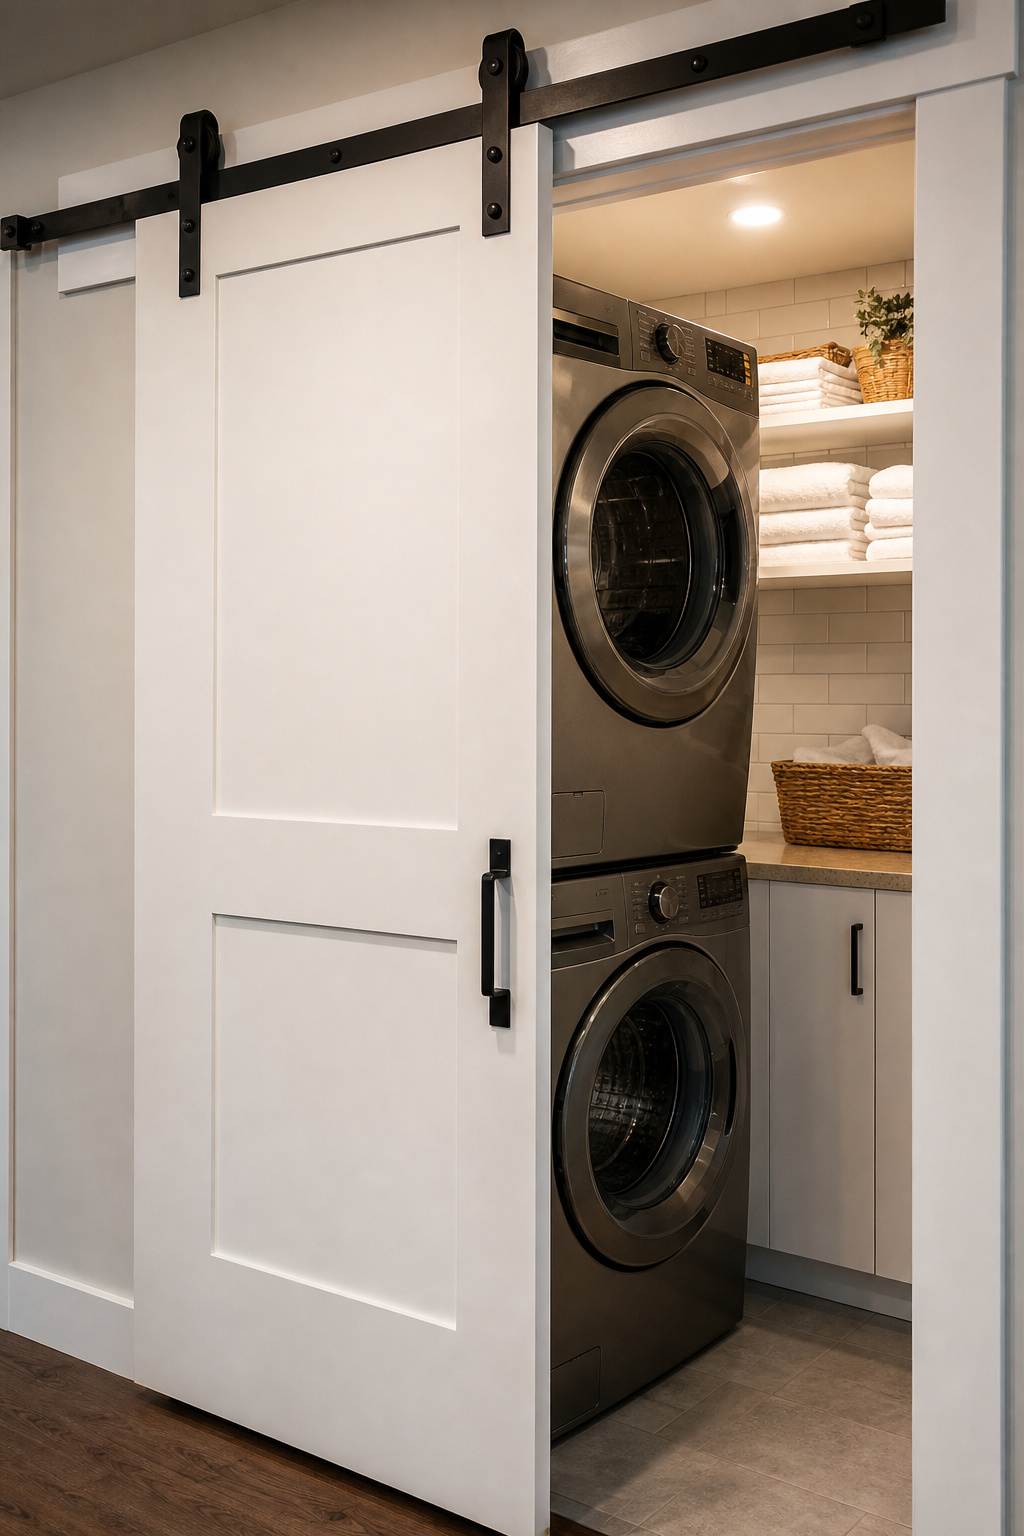
Plank-and-batten is the original barn door: vertical boards held flat by horizontal and diagonal battens on the back, and the Z-brace version is the most recognizable rustic style there is. It’s also the most beginner-friendly thing to build. Shaker panel — a flat recessed-panel slab — is the most popular base for painted finishes and reads cleanly across farmhouse, transitional, and modern-rustic rooms.
If you want genuine reclaimed or salvaged timber, with the knots and mixed grain that make a door one-of-one, that’s the most-requested farmhouse option but also the longest lead time and highest material cost. The sourcing and the grain-reading that separate real salvage from costume are a topic of their own — the farmhouse and reclaimed-wood looks chapter handles it properly.
Frosted and reeded glass doors for brighter closets
Most laundry rooms are under-lit; the standard target is 50 to 75 lumens per square foot, and plenty of closets don’t come close. A glass barn door, even a frosted one, lets borrowed daylight reach the space without you adding a single electrical circuit. Frosted glass obscures clutter and movement while transmitting diffused light; reeded (fluted) glass passes slightly less light but adds texture. Rustica’s team calls frosted panels “a perfect solution” for laundry rooms short on natural light.
The catch is weight: a pine-framed frosted door starts at 60 to 80 pounds and frameless glass panels run 80 to 120 pounds, both heavier than the 50 to 70 pounds of a pine slab, which drives your hardware choice. If brightening a dim room is the goal, the frosted glass doors that let light in chapter weighs clear versus frosted versus reeded in detail.
Louvered panels for ventilation
Dryers throw off heat and humidity, and a sealed closet traps both. Louvered doors with horizontal slats let air keep moving, which cuts moisture build-up and discourages mold inside the closet — which is exactly why they’re recommended for closet-style laundry rooms where heat needs somewhere to go. The trade-off is real, though: louvered panels offer the least sound attenuation of any solidish door, and light bleeds through the slats. Great over a dryer, wrong next to a living room.
Modern flat-panel and painted finishes
A flat MDF slab in a bold color — navy, sage, charcoal — gives the hardware visual prominence and suits minimalist and transitional rooms. Navy and muted blues are the leading painted-door trend right now; warm whites and greige stay the resale-safe perennials. Here’s the budget trick worth knowing: gluing applied trim strips onto a flat slab fakes a paneled look for under $20 in materials, and it photographs identically to a custom shaker door. One mistake to dodge across all of these — never hang unsealed solid wood in a steam-rich laundry closet, because it warps. Seal it first.
How to Size a Barn Door for a Laundry Closet
Sizing trips up more first-timers than the install does, because the intuitive answer is wrong: the door has to be bigger than the opening, not the same size. Three measurements decide the fit — door width, door height, and track length — and they’re not derived from the same number.
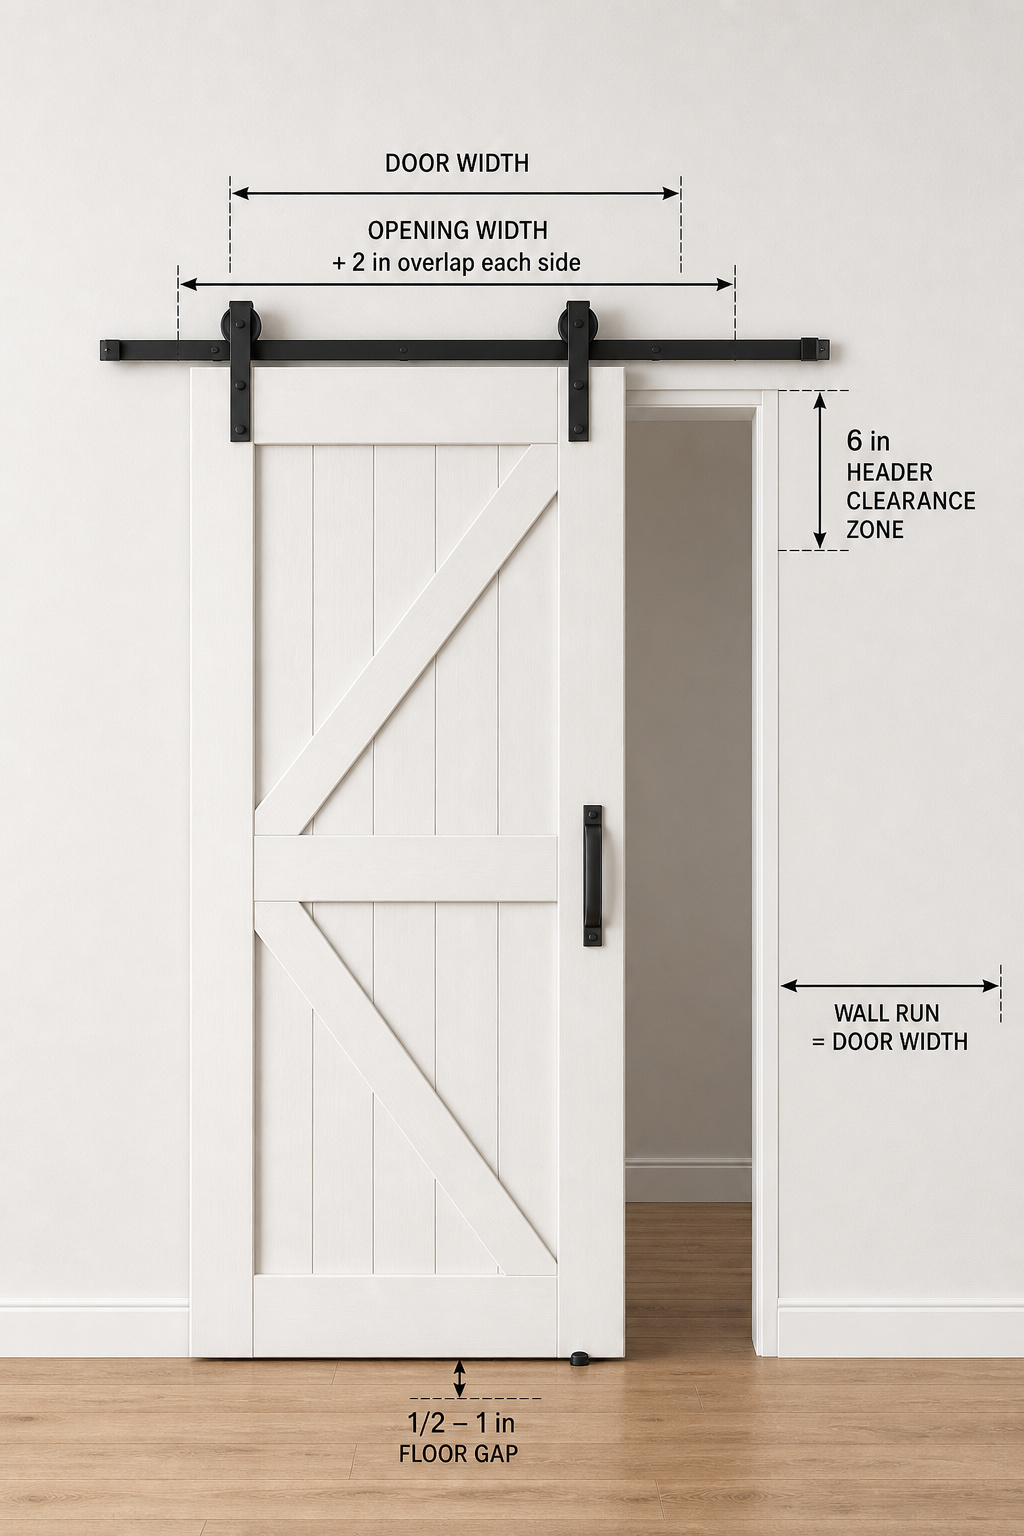
The 1–2 inch overlap rule explained
Add 1 to 2 inches of overlap on each side of the opening. So a 30-inch opening wants a 32- to 34-inch door, and a 36-inch opening wants a 38- to 40-inch door. Two inches per side (4 inches total beyond the opening) is the recommended standard; bump it to 3 inches per side only if privacy matters, like a bathroom. Utility laundry openings usually run 24 to 32 inches to suit standard washer/dryer widths, while full laundry rooms tend toward 30 to 36.
Standard door heights and the header clearance you need
Standard residential barn door heights are 80 inches (6’8″) and 84 inches (7′), matching standard interior rough openings. Hang the door with 1/2 to 1 inch of floor clearance so it doesn’t drag over a tile transition or carpet edge. The measurement people forget: standard flat-track hardware needs at least 6 inches of clearance above the opening for the track. If you’ve got less, low-profile or ceiling-mount hardware can bring that down to 4 inches — but check before you order, because 6 inches is non-negotiable for a standard kit.
Quick reference: common opening widths to door sizes
The track length catches people out. It must be at least twice the door width — not twice the opening width. As Rustica’s sizing guide warns, “A common mistake is calculating 2× the opening, which leaves the door partially covering the frame when fully open.” A 38-inch door needs a 76-inch track minimum; a 40-inch door needs 80.
| Opening width | Door width (with 2″ overlap/side) | Minimum track length |
|---|---|---|
| 24 in | 28 in | 56 in |
| 30 in | 34 in | 68 in |
| 32 in | 36 in | 72 in |
| 36 in | 40 in | 80 in |
That’s the principle. For the full walkthrough — bypass formulas, ceiling-mount headers, and how to record the wall run so you don’t order blind — work through how to measure your opening.
Barn Door Hardware Basics: Track, Rollers, and What a Kit Includes
The hardware is a separate decision from the door, with its own price tiers and its own ways to go wrong. You don’t need to become an expert — you need to know what a complete kit contains, what one number to check, and which of the three systems your opening calls for.
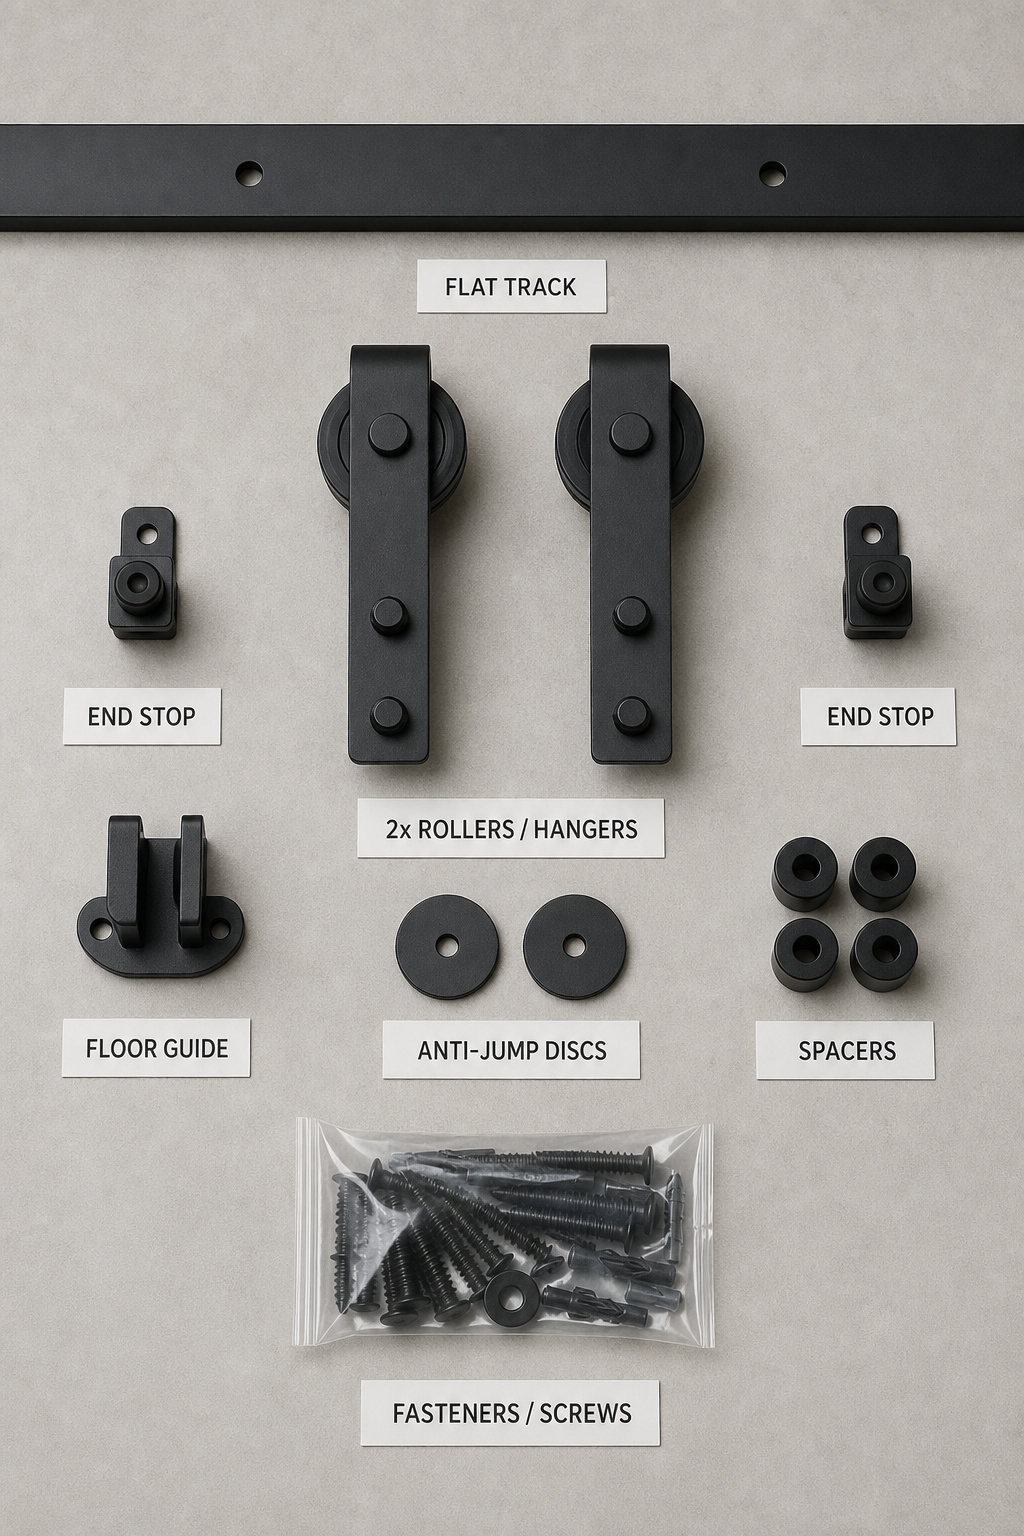
What comes in a standard hardware kit
A standard single-door kit contains: one flat track, two hanging rollers, two end stops, a floor guide, anti-jump discs, spacers, and the mounting fasteners. Two of those are the ones budget kits quietly omit. Anti-jump discs are small clips that keep the rollers from leaving the track — critical on any door over 80 pounds — and they’re often sold separately. The floor guide ($10 to $30, frequently not in the kit) keeps the door from swinging away from the wall, which in a laundry room matters specifically because washer vibration will rock an unguided door. Read the listing before you buy; “complete kit” is a flexible phrase.
Weight ratings and why they matter
This is the one number that decides whether the door stays on the wall. Standard residential single-track kits are rated for 150 to 200 pounds, and most solid pine or MDF doors weigh 40 to 70 — comfortably inside the range. Glass is where you check carefully: pine-framed frosted doors start at 60 to 80 pounds, frameless glass panels run 80 to 120 pounds, and steel-framed glass can approach 150 — confirm the kit’s rating covers the actual panel you’re buying. A soft-close mechanism (a $40 to $80 add-on, rated to 220 pounds) absorbs the door’s momentum over the last 10 to 12 inches so it can’t slam — the upgrade installers recommend most.
Single slider vs bi-parting vs bypass: price-tier overview
The cost scales with how much hardware the system needs. As The Barn Door Hardware Store’s guide puts it, “a bypass kit costs $319 vs $128 for a single-slider because it uses two tracks and twice the rollers.” A single slider suits openings up to about 48 inches. Bi-parting splits a wide opening symmetrically and needs clear wall on both sides. Bypass runs two doors on two tracks for 48-to-72-inch openings where one side hasn’t got the wall space.
| Hardware type | Typical starting cost | Best for |
|---|---|---|
| Single slider | ~$128 | Openings up to ~48 in with wall run one side |
| Bi-parting | ~$204 | Wide openings, clear wall both sides |
| Bypass | ~$319 | 48–72 in openings, no wall space one side |
Finish is a wash on price within a tier — matte black for farmhouse and modern, brushed nickel for transitional, oil-rubbed bronze for rustic all cost about the same. For the full breakdown of choosing barn door hardware — what to skip, what to upgrade, and how the kits really compare — that’s its own chapter.
Build It or Buy It? Door Slab Options at Every Budget
Here’s where my cost-per-use math earns its keep, because the build-versus-buy numbers genuinely surprise people. A pre-made door costs three to five times what the same door costs in lumber. That doesn’t automatically mean build it — it means know what you’re trading.
Pre-hung and pre-finished doors from big-box stores
Pre-finished single barn door slabs from Home Depot and Lowe’s run $300 to $800 for standard 36×80 or 36×84 sizes in pine, MDF, and engineered wood. MDF slabs are among the most affordable pre-made options at $100 to $500 depending on the panel design — they paint beautifully and shrug off seasonal wood movement, though they’re heavier than pine. Vinyl doors are the lightest route ($700 to $1,500 installed), and they mimic wood grain, but they don’t carry the same visual weight as real timber.
Unfinished slab doors and where to find them
The middle path most people miss: an unfinished solid or knotty pine slab, stocked at most Home Depot and Lowe’s locations for $150 to $350 in laundry-closet sizes (24×80, 30×80, 36×84). You add your own paint or stain for $20 to $50, and you get a custom finish that matches your room exactly. If you’re going bold with color, an unfinished MDF slab is the better substrate — it takes latex paint without grain raising, where solid wood needs more coats and sanding for a uniform finish.
Building your own from stock lumber: what it costs
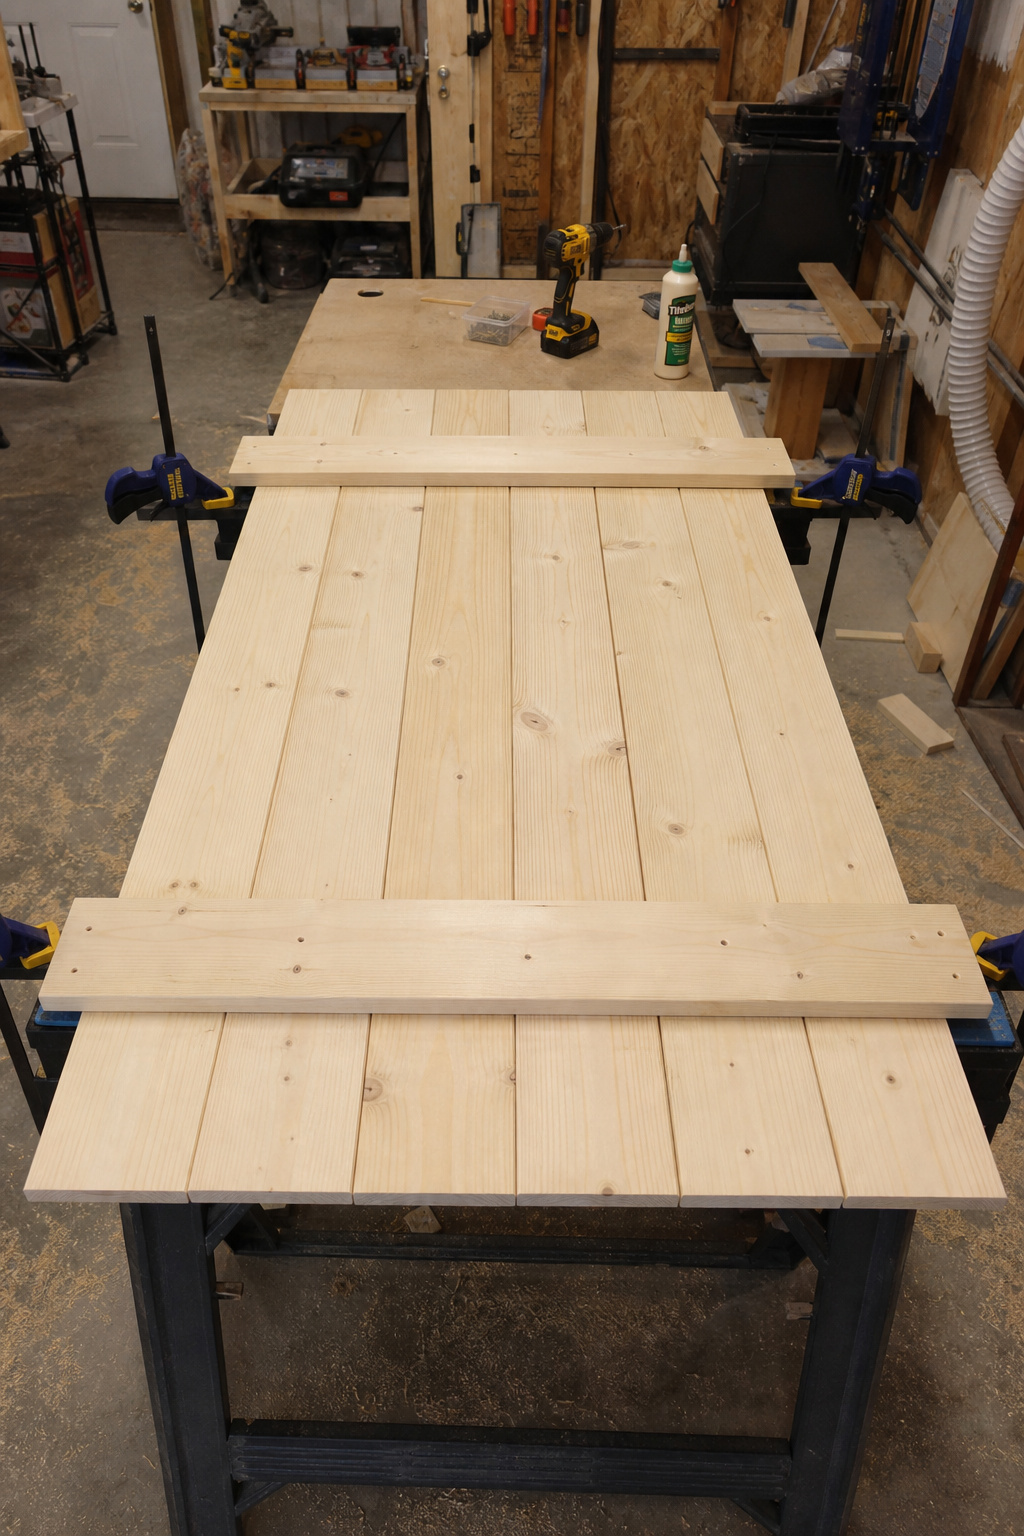
A DIY plank-and-batten door from 1×6 No. 2 pine (eight boards for a 36×80) costs $75 to $150 in lumber, plus $20 to $40 for stain or paint — call it $95 to $190 all in. With a $128 single-slider kit, the complete project lands around $278, against $600 to $1,000-plus for a pre-made door with mid-grade hardware. You don’t need a shop: a miter or circular saw, a drill, clamps, a sander, and a square cover a plank-and-batten build, and there’s no joinery to learn. I’ll flag the lumber figures as an approximate floor — prices swing — but the gap over buying is wide enough to survive the swing. If that’s the route you want, build the door slab yourself is the full weekend walkthrough.
When DIY saves money and when it doesn’t
The honest version: DIY saves money when you finish in one or two hardware-store trips. A third trip — a warped board to replace, the wrong fasteners — erodes the savings until you might as well have bought. And whatever you build or buy in solid wood, seal it with at least two coats of poly or paint sealer before it goes into a humid laundry room, or it warps within 6 to 12 months. Professional installation adds $300 to $2,000 to any door; most people with basic tool skills can hang one in under 8 hours from the kit’s own instructions. Leveling and securing the track is the step that trips up first-timers most — learnable in an afternoon, not a trade.
| Option | Cost range | Skill level | Lead time |
|---|---|---|---|
| Pre-finished slab | $300–$800 | First build | Off the shelf |
| Vinyl door (installed) | $700–$1,500 | None (installed) | Days |
| Unfinished slab + finish | $180–$350 | First build | A day to finish |
| DIY stock-lumber build | $95–$190 | Some builds | One weekend |
Narrow Closets and No-Wall-Space Problems: Bifold and Bypass Alternatives
Sooner or later someone measures the wall beside the opening, finds there isn’t enough of it, and assumes the project’s dead. It isn’t — it’s a solved problem, just a different one.
When a single slider won’t work: recognising the constraint
The test is simple. Measure the clear wall on the side the door slides onto. If it’s less than the door width (opening plus your 2-to-4-inch overlap), a single slider can’t fully open, end of story. The usual culprits are light switches, electrical panels, windows, and corners — and laundry closets, which so often sit at the end of a narrow hallway, frequently have a corner right at one edge, leaving no slide path at all on that side.
Bifold for tight niches, bypass for wide openings
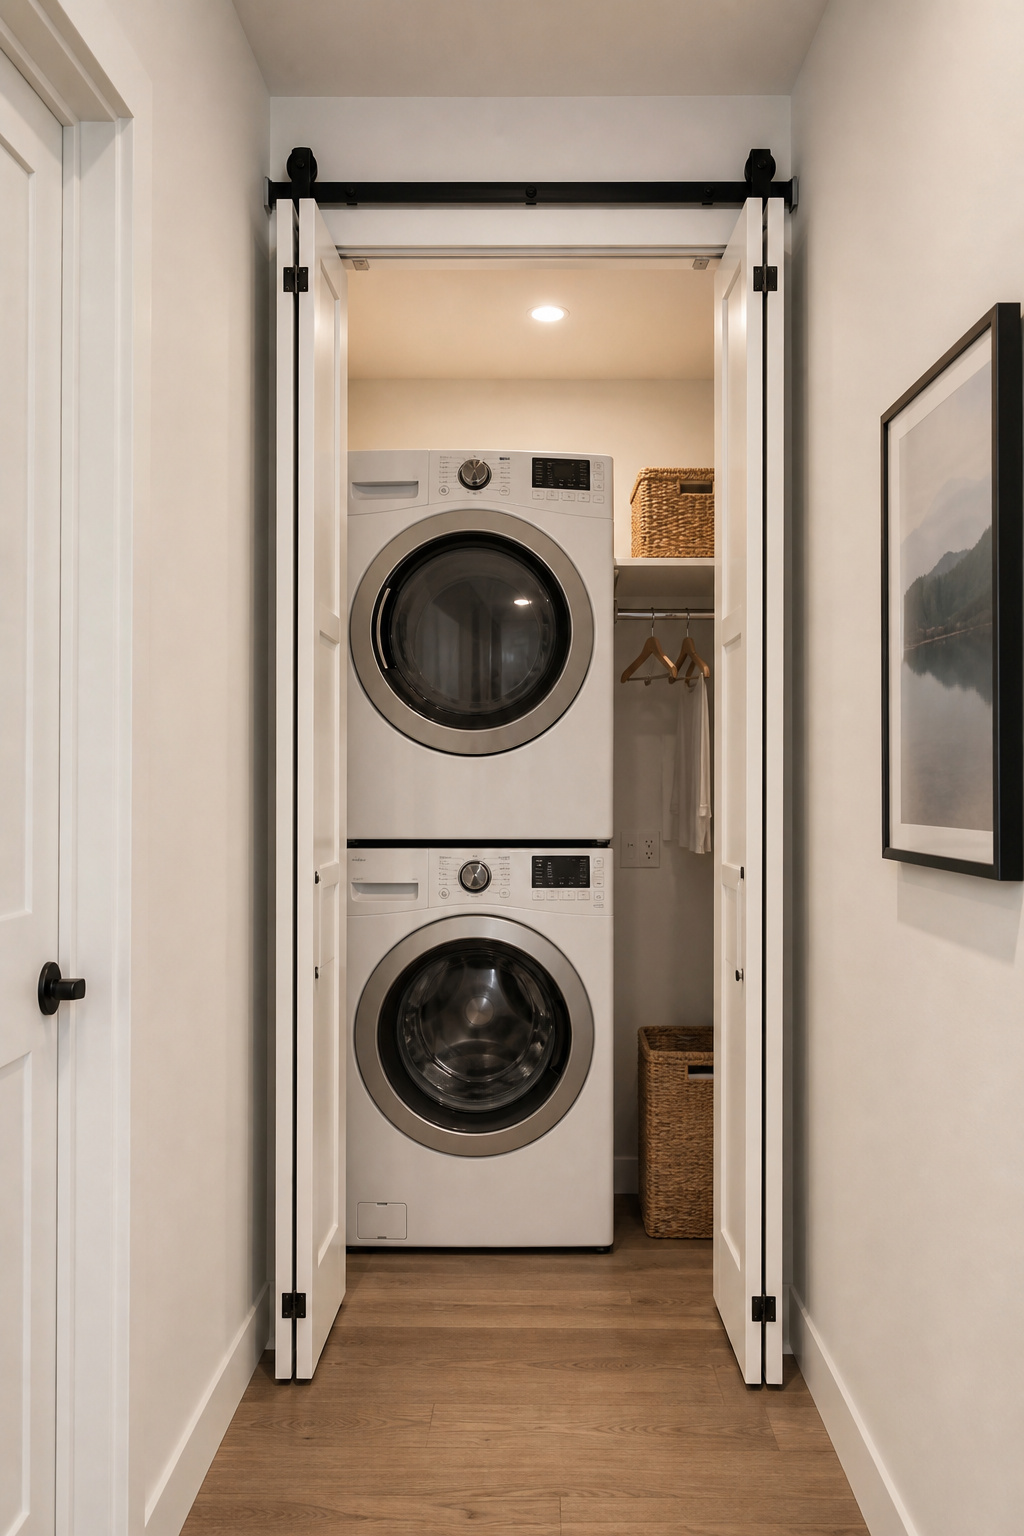
Two mechanisms, two situations. Bifold panels fold in half as they open and stack within or just outside the opening, so they need only 5 to 8 inches of side clearance instead of a full door-width wall run — the fix for tight openings. Bypass doors ride two parallel tracks, one passing in front of the other, which suits wide 48-to-72-inch openings where stacking a full panel to one side isn’t practical. Homacer notes bifolds are “ideal for laundry closets because they fold into a compact profile, require very little clearance, and offer full access to the washer and dryer.”
The trade-offs are honest ones. Bifold panels give you 60 to 70% of the opening width when fully open (the panels stack inside the frame), where a single slider gives 100%. And barn-style bifold and bypass panels come in all the same looks — plank-and-batten, shaker, louvered, glass — so you’re not sacrificing the aesthetic for the mechanism. For the full picture of bifold and bypass options for narrow closets — clearance math, costs, and which to pick — that chapter goes deep.
Renter-Friendly Barn Door Options: Getting the Look Without Drilling Into Framing
If you rent, you probably assume a barn door means screw holes you’ll pay for at move-out. It’s a more forgiving project than that — the trick is routing the damage somewhere you can fully reverse.
Tension-mounted and backer-board methods overview
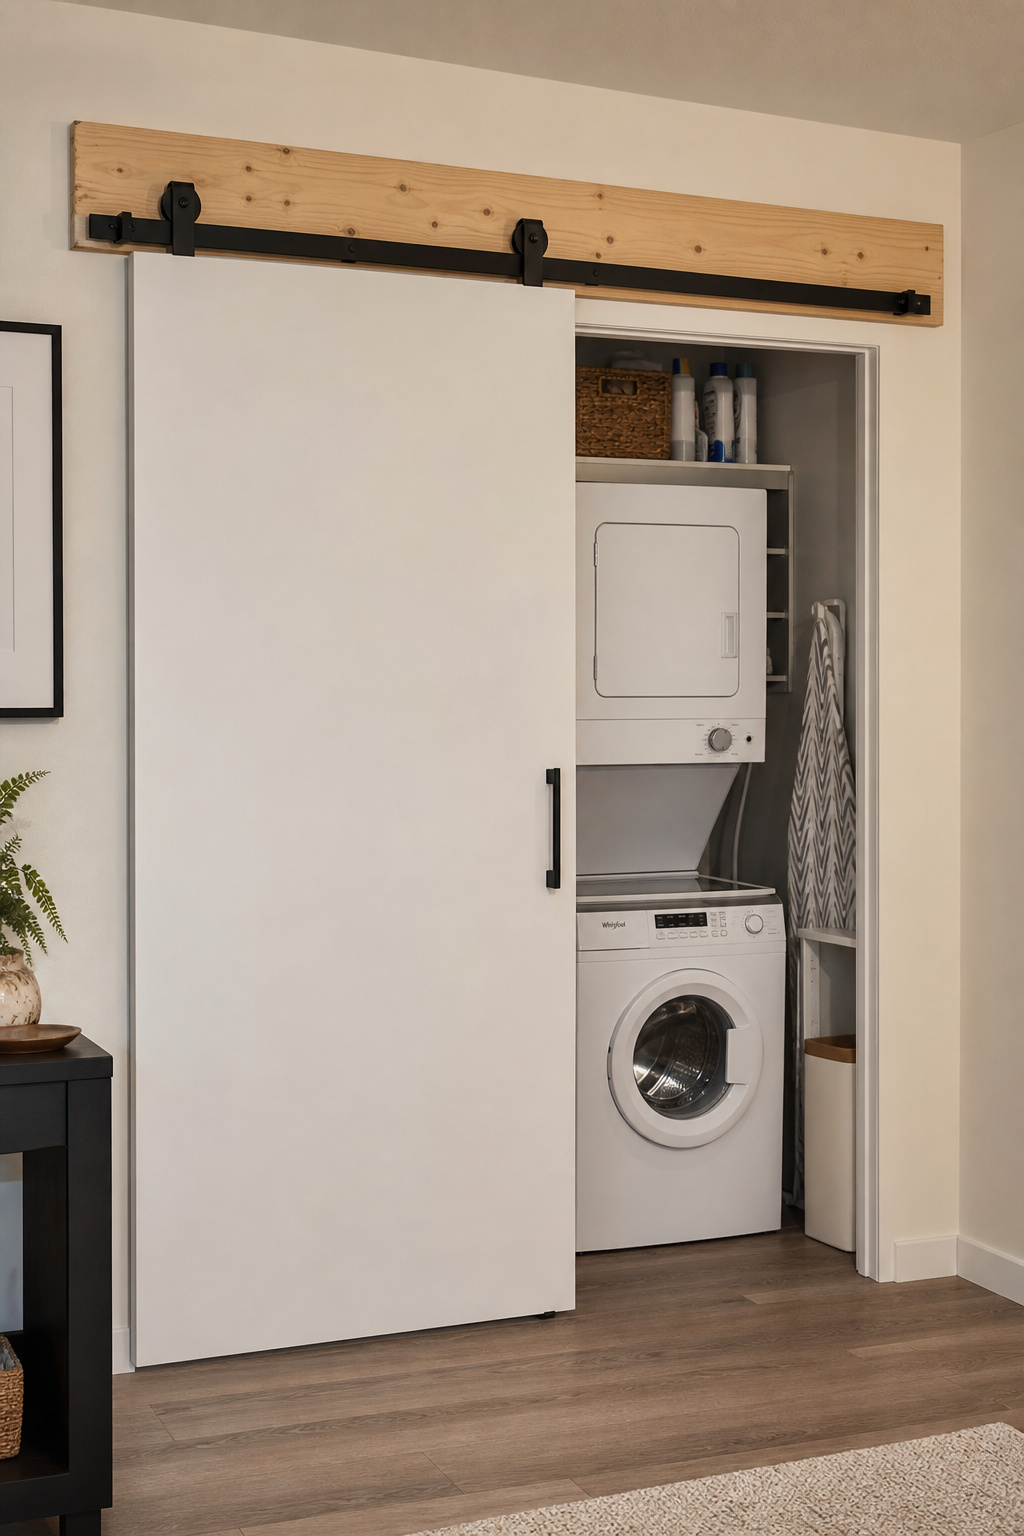
The workhorse method is a backer board: a sturdy 1×6 or 2×6 plank mounted horizontally above the opening into the studs, with the track screwed into the board instead of straight into drywall. At move-out you pull the track, pull the board, and patch one known set of stud screws — a contained, predictable repair rather than a dozen scattered track holes. As ToksoMike House’s renter guide describes it, “when it is time to move, you take down the track and door, remove the board, and patch a known set of screw holes with wood filler and paint.” For very light doors a tension-mounted rod system drills nothing at all, though it won’t hold a solid wood slab.
Lightweight door choices that suit no-drill hardware
Door weight is the constraint that decides your method. For tension systems, a lightweight MDF or hollow-core door blank is about the most you’d risk — solid pine slabs are simply too heavy. With a backer board screwed into studs, weight matters far less — standard 150-pound-rated hardware on a 2×6 has the same pull-out strength as mounting straight into framing. Flush pull handles, rather than projecting bar handles, also keep the door from catching in a narrow hallway.
What to check in your lease before starting
This part’s general on purpose — leases vary, so confirm yours rather than trusting a rule of thumb. Most US residential leases treat small nail holes as normal wear but not screw penetrations into framing, so check with your landlord before any backer-board install. Photograph the wall condition first and keep your material receipts; that’s the standard protection against a deposit dispute. Some landlords will even pre-approve a backer-board install in writing for a laundry closet, since freeing the swing clearance makes the unit more appealing to the next tenant. For the step-by-step on renter-friendly no-drill installs and the clean patch job at the end, that chapter walks the whole thing.
What Your Laundry Room Barn Door Project Actually Costs
Time for the number nobody quotes you up front: the whole-project cost, not the door sticker. I’ll give it to you in three tiers so you can self-select before you start, and then the hidden costs that surprise almost everyone.
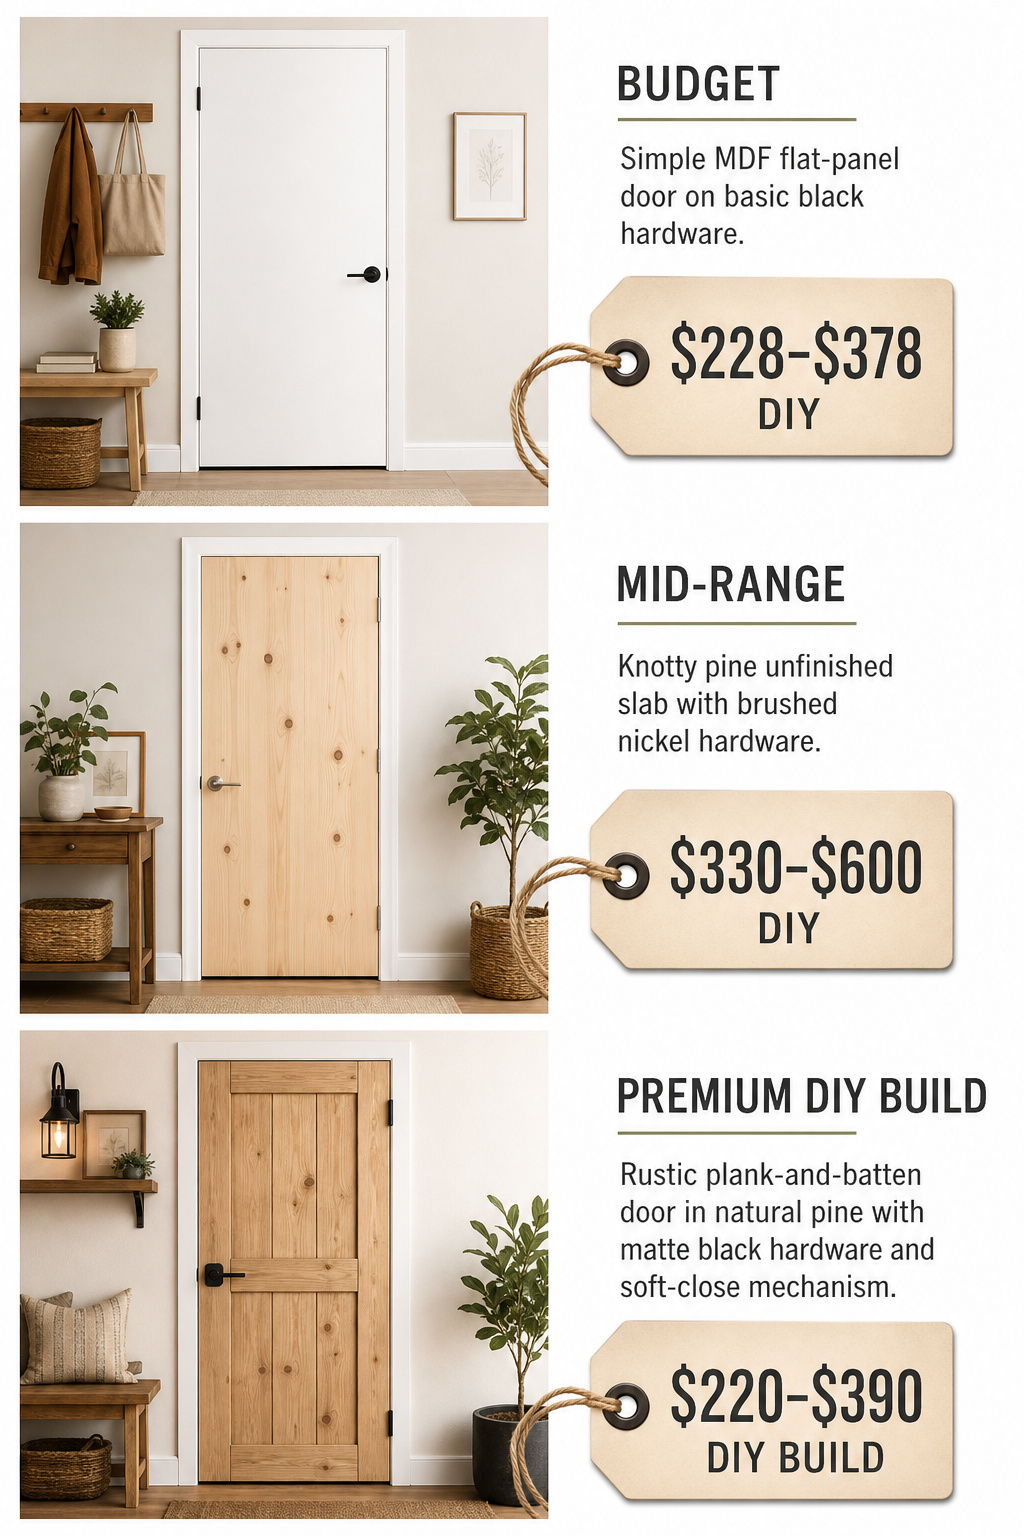
The budget tier is an MDF pre-made slab ($100 to $250) plus a basic single-slider kit ($128), landing at $228 to $378 DIY-installed. Bargain doors are often poorly finished, made from wood that warps, and may not hold hardware screws through repeated use. The mid-range tier pairs an unfinished knotty pine slab ($150 to $300) with $30 to $50 in finish and a mid-grade kit ($150 to $250) for $330 to $600 — and this is the tier where I’d spend the $30 to $80 on soft-close. The DIY build tier is the cheapest route to a real-wood door: $75 to $150 in pine, $20 to $40 in finish, and a $128 to $200 kit with soft-close, for roughly $220 to $390. Budget the time too — 4 to 6 hours to build the slab, 2 to 4 to hang it, one full weekend.
| Budget tier | Door cost | Hardware cost | Total range | Skill required |
|---|---|---|---|---|
| Budget (pre-made MDF) | $100–$250 | ~$128 | $228–$378 | First build |
| Mid-range (unfinished slab) | $180–$350 | $150–$250 | $330–$600 | First build |
| DIY build (stock lumber) | $95–$190 | $128–$200 | $220–$390 | Some builds |
Then the hidden costs, which add $55 to $120 that catches most first-timers: a floor guide ($10 to $30, often not in the kit), anti-jump discs ($10 to $20 if not included), and a header board ($15 to $50 in lumber) if you’re mounting over drywall. If the wall framing doesn’t land where you need it, wall reinforcement runs $100 to $300, and disposing of the old door adds $70 to $200 — both only if a pro’s doing it.
Which brings me to the one budget lever worth more than all the others: doing the install yourself. Angi’s 2026 data puts professional installation at $1,350 to $5,000 — a range that’s really the gap between a vinyl slab on a budget kit and a custom reclaimed-wood door with designer hardware — and homeowners who hang their own save $300 to $2,000 in labor. Hanging a barn door is within reach of anyone who can level and drill. So the short version: decide your tier first, measure the wall run before the opening, seal anything wood, and put the soft-close on if you’ll use the room at night. Get those four right and the rest is just picking the door you like.